2-15
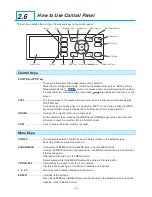
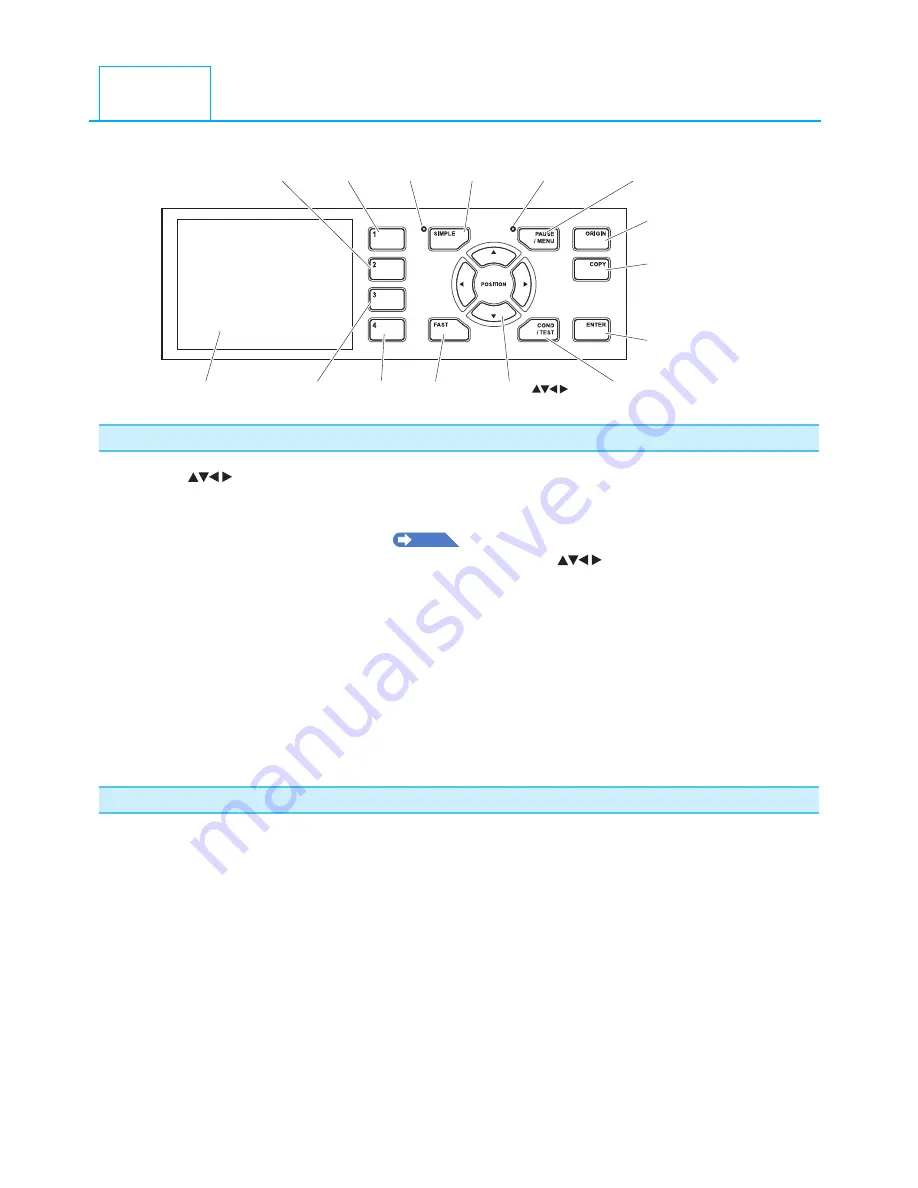
This section explains the function of lamps and keys on the control panel.
[1] key
[SIMPLE] lamp
[SIMPLE] key
[MENU] lamp
[ORIGIN] key
[2] key
[PAUSE/MENU] key
[4] key
[3] key
Screen (LCD)
[FAST] key POSITION (
) key
[COND/TEST] key
[COPY] key
[ENTER] key
Control Keys
POSITION (
) key
............................ There are following functions depending on the operation.
Move the tool carriage and media. It will move specified distance (see "Setting of Step
Movement Distance"
P.3-4
) when it is pressed once, and continuously move when
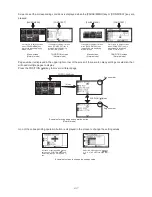
it is pressed down. It will select the menu when
are displayed in the menu on the
screen.
FAST
.......................... The tool carriage or the media will move faster when it is pressed simultaneously with
POSITION key.
It will work as a menu key when it is displaying "FAST" on the screen. Press the [FAST]
key during READY status to display the current area and tool carriage position.
ORIGIN
...................... It will set the current position as an origin point.
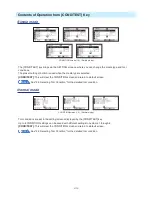
On the default screen, pressing the [ENTER] and [ORIGIN] keys at the same time will
allow you to reset the machine. (Only in Normal mode)
COPY
......................... Copy of data in the buffer memory is output.
Menu Keys
SIMPLE
...................... You can switch between Simple mode and Normal mode on the default screen.
Switching modes will reset the machine.
PAUSE/MENU
........... It will switch to the MENU mode. MENU lamp is lit in the MENU mode.
It will go into MENU mode if it is pressed once, and MENU mode will be turned off when
it is pressed again.
Different function are set in the MENU mode.
Data received while in the MENU mode will be stored in the data buffer.
COND/TEST
.............. It will display the screen to set the tool conditions.
Use this when checking tool conditions to activate a cutting test.
1, 2, 3, 4
...................... Select the menu number displayed in the screen.
ENTER
.......................
It will define the settings.
Press the [ENTER] and [ORIGIN] keys simultaneously on the default screen to reset the
machine. (Only in Normal mode)
2.6
How to Use Control Panel
Summary of Contents for Vinyl Express Qe6000
Page 1: ...CUTTING PLOTTER USER S MANUAL MANUAL NO VEXQe60 UM 151...
Page 2: ......
Page 24: ......
Page 86: ......
Page 146: ......
Page 152: ......
Page 168: ......
Page 194: ......
Page 208: ......
Page 232: ...A 4 Qe6000 900 1046 593 Unit mm Dimensional accuracy 5mm A 3 External Dimensions...
Page 244: ......
Page 246: ......


