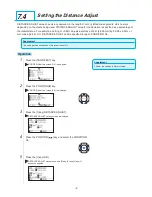
6-5
Supplement
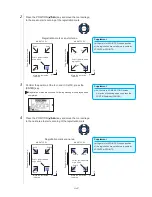
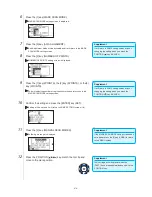
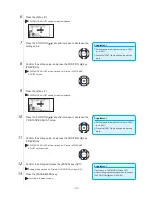
Repeat steps 12 and 13 if following message
prompting to move to the adjustment mark is
displayed.
Number to repeat steps 12 and 13 differs
depending on the specified number of the
adjustment marks. Follow the message that
is displayed.
It will return to ARMS SETTING screen
without scanning when the [4] key (CANCEL)
is pressed.
13
Confirm the position of the tool, and if it is OK, press the
[ENTER] key (SET).
Once all the adjustment marks are specified, DISTANCE entry screen is
displayed.
Supplement
Measured distance is displayed in the top
line in the DISTANCE input screen. Input
value (initially same as measured value) is
displayed under that.
If the input value is not changed, it will
assume that there is no difference between
measured distance and the distance in the
data.
Digits of settings can be changed by pressing
the [FAST] key.
14
Press the POSITION (
) key to set the original distance on
the data.
Supplement
It will return to default screen without
changing the settings when you press the
POSITION ( ) key (PREVIOUS).
DISTANCE input screen for point 3 is
displayed if it is set to 3POINTS or more, so
repeat steps 13 to 15 to set.
15
Confirm the setting and press the [ENTER] key (SET).
The adjustments based on the registration mark reading will be
completed, and it will return to the default screen.
Reference
Please refer to the following for adjustments when matching the manual position.
2 point matching, ["Point 1" settings] ["Point 2" settings] ["Origin point of the axis adjustment" settings] [Finish]
3 point matching, ["Point 1" settings] ["Point 2" settings] ["Point 3" settings] ["Distance between Point 1-2" settings]
["Distance between Point 1-3" settings] ["Origin point of the axis adjustment" settings] [Finish]
4 point matching, ["Point 1" settings] ["Point 2" settings] ["Point 3" settings] ["Point 4" settings] ["Distance between point
1-2" settings] ["Distance between point 1-3" settings] [Finish]
Summary of Contents for Vinyl Express Qe6000
Page 1: ...CUTTING PLOTTER USER S MANUAL MANUAL NO VEXQe60 UM 151...
Page 2: ......
Page 24: ......
Page 86: ......
Page 146: ......
Page 152: ......
Page 168: ......
Page 194: ......
Page 208: ......
Page 232: ...A 4 Qe6000 900 1046 593 Unit mm Dimensional accuracy 5mm A 3 External Dimensions...
Page 244: ......
Page 246: ......

