


Section 03 ENGINE SYSTEM
Subsection 04 (EXHAUST SYSTEM)
529 035 989
2
F18D0JA
1
3
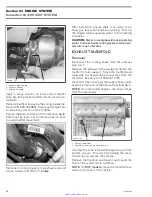
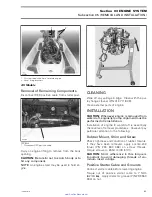
1. Muffler
2. Strap
3. Spring installer/remover
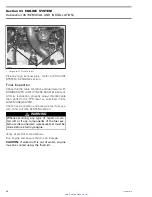
Slowly unscrew exhaust clamp
no. 6
and remove
it.
NOTE:
Unscrewing the nut too fast generates
heat that will make it harder to unscrew.
1
F18D0SA
2
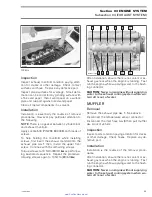
1. Exhaust clamp
2. Exhaust pipe
Move muffler
no. 4
backward enough to allow the
exhaust pipe to be pulled out.
Inspection
Inspect exhaust pipe condition paying attention for
cracks or other damage. Check joints, coupling ar-
eas, heat shield and hoses. Replace any defective
part.
Installation
Installation is essentially the reverse of the re-
moval procedures. However, pay particular atten-
tion to the following.
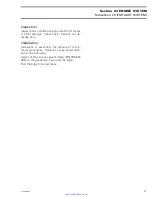
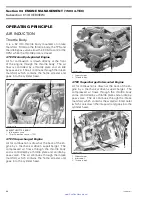
Apply high temperature RTV sealant (P/N 293 800
090) on the welds of the exhaust pipe straight end,
while the exhaust pipe is removed from the muf-
fler.
1
F18D0TA
2
1. High temperature RTV sealant
2. Exhaust pipe straight end
Loosely install clamps
no. 2
on muffler hose
no. 3
.
Insert the exhaust pipe straight end in the muffler
hose. Align the exhaust pipe flange to the engine
manifold
no. 7
.
NOTE:
To achieve a good fit, it could be necessary
to push the exhaust pipe straight end further down
into the muffler hose over its step. Note distance
if pushed over step, then cut hose by obtained
measure.
Prealign the exhaust pipe
no. 1
by rotating (axially)
and moving (longitudinally) the muffler so that the
exhaust pipe flange makes perfect contact with
the engine manifold.
52
smr2005-009
www.SeaDooManuals.net


