PAGE 58
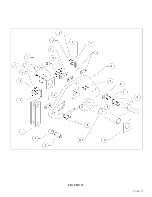
7.6 PICKET FENCE TOOL
The picket fence tool is designed to put picket fence points on square tubing from 1/2 to 1 inch (12 to 25
mm). This tool is mounted in the punch station and operated with the selector switch in the PUNCH
position.
7.6A PICKET FENCE TOOL INSTALLATION
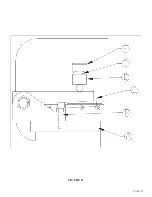
SEE FIGURE 26 ON THE FOLLOWING PAGE.
1.
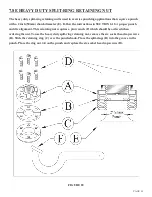
Remove the die holder, stripper and the punch retaining nut.
2.
Install the punch pusher (E) with the #45 punch retaining nut (D).
3.
Install the tool on the bolster so that the punch pusher aligns with the ram on the tool.
4.
Anchor the tool to the punch bed with the finger clamps provided.
7.6B PICKET FENCE TOOL OPERATION
CAUTION: THE DOWNSTROKE OF THE MACHINE MUST BE SET BEFORE OPERATING
THIS TOOL. FAILURE TO SET THE DOWNSTROKE OF THE MACHINE WILL RESULT
IN DAMAGE TO THE TOOL AND POSSIBLE INJURY TO PERSONNEL.
1.
Set the down stroke of the machine so that the upper die clears the lower die by twice the wall
thickness of the tube, plus 1/32 of an inch (.8mm).
2.
Rotate the tube guide on the front of the tool to the proper size. If you are cutting 1 inch tube,
remove the tube guide.
3.
Adjust the tube stop (A) just low enough to contact the upper edge of the tube.
4.
Adjust the rest stop (B) so that it is approximately half of the tube size below the lower die.
5.
Feed the tube into the tool until it contacts the stop (A). Depress the foot pedal.
6.
Make sure that the slugs eject from the tool as the next piece is fed into the tool.
7.
Lubricate the dies every 10 to 15 cuts and grease the ram daily.
CAUTION: TO PREVENT POSSIBLE INJURY TO PERSONNEL AND DAMAGE TO THE
TOOL, THIS TOOL MUST BE REMOVED WHEN IT IS NOT IN USE.
Summary of Contents for FI-8510-20M
Page 10: ...PAGE 9 FIGURE 1...
Page 12: ...PAGE 11 FIGURE 2...
Page 24: ...PAGE 21 FIGURE 6...
Page 26: ...PAGE 23 FIGURE 7...
Page 38: ...PAGE 35 FIGURE 15...
Page 40: ...PAGE 37 FIGURE 16...
Page 42: ...PAGE 39 FIGURE 17...
Page 48: ...PAGE 45 FIGURE 20...
Page 50: ...PAGE 47 FIGURE 21...
Page 52: ...PAGE 49 FIGURE 22...
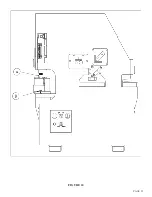
Page 56: ...PAGE 53 FIGURE 24...
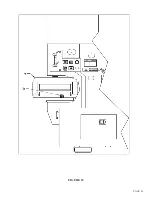
Page 58: ...PAGE 55 FIGURE 25...
Page 62: ...PAGE 59 FIGURE 26...
Page 64: ...PAGE 61 FIGURE 27...
Page 68: ...PAGE 65 FIGURE 29...
Page 74: ...PAGE 71 FIGURE 30...
Page 76: ...PAGE 73 FIGURE 31...
Page 80: ...PAGE 77 FIGURE 33...
Page 82: ...PAGE 79 FIGURE 34...
Page 84: ...PAGE 81 FIGURE 35...
Page 88: ...PAGE 85 FIGURE 37...
Page 90: ...PAGE 87 FIGURE 38...
Page 92: ...PAGE 89 FIGURE 39...
Page 94: ...PAGE 91 FIGURE 40...
Page 96: ...PAGE 93 FIGURE 41...
Page 100: ...PAGE 97 FIGURE 43 SERIAL S 4481 UP...

