PAGE 44
7.1B PIPE NOTCHER OPERATION
The following is Scotchman Industries’ recommendation for maintenance and alignment of this tool.
PLEASE READ CAREFULLY BEFORE USE.
TO ACHIEVE THE BEST RESULTS FROM YOUR UNIT,
PLEASE OBSERVE THESE SIMPLE RULES:
1.
Keep the unit clean. Whenever dirt or metal chips accumulate, remove the 8mm limit screw
located in the center, at the rear of the punch. Lift out the punch holder and the two springs
(1/2 x 3 inch). Clean the unit with solvent.
2.
CAUTION: Do not remove the M-10 dowel pin from the upper punch.
3.
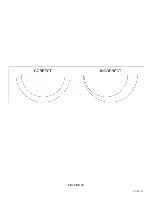
Check the alignment of the unit. After cleaning the unit, always check the alignment of the punch
And die section. To check the alignment, insert the punch and holder, without the springs, into the
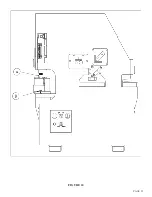
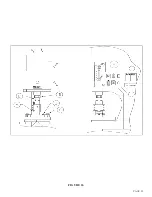
housing and check the gap. SEE FIGURE 20 ON THE FOLLOWING PAGE.
4.
If proven correct, tighten the two 10mm socket head cap screws holding the die section in place.
Apply some high pressure lube all around the inside of the housing. Then, reassemble the unit,
reversing the above procedures.
CAUTION: ALWAYS WEAR SAFETY GLASSES WHEN USING THIS TOOL.
5.
With the tool properly located and secured, place the selector switch in the START position and
the run/jog switch in the JOG position.
6.
Power the machine and place the selector switch in the PUNCH position.
7.
Jog the ram down to 1/8 of an inch (3mm) above the riser on the tool and set the upper stroke
control. Jog the machine on down until the upper die just passes the lower die (DO NOT EXCEED
1/32 of an inch (0.8mm) and set the lower stroke control.
8.
Place the run/jog switch in the RUN position.
9.
Before operating, lubricate the sides and back of the upper die with way oil. Repeat this
lubrication daily. Cutting blades should be lubricated with a cutting oil or motor oil before
making the first cut and after every 10 to 15 cuts.
CAUTION: TO PREVENT POSSIBLE INJURY TO PERSONNEL AND DAMAGE TO THE
TOOL, THIS TOOL MUST BE REMOVED WHEN IT IS NOT IN USE.
Summary of Contents for FI-8510-20M
Page 10: ...PAGE 9 FIGURE 1...
Page 12: ...PAGE 11 FIGURE 2...
Page 24: ...PAGE 21 FIGURE 6...
Page 26: ...PAGE 23 FIGURE 7...
Page 38: ...PAGE 35 FIGURE 15...
Page 40: ...PAGE 37 FIGURE 16...
Page 42: ...PAGE 39 FIGURE 17...
Page 48: ...PAGE 45 FIGURE 20...
Page 50: ...PAGE 47 FIGURE 21...
Page 52: ...PAGE 49 FIGURE 22...
Page 56: ...PAGE 53 FIGURE 24...
Page 58: ...PAGE 55 FIGURE 25...
Page 62: ...PAGE 59 FIGURE 26...
Page 64: ...PAGE 61 FIGURE 27...
Page 68: ...PAGE 65 FIGURE 29...
Page 74: ...PAGE 71 FIGURE 30...
Page 76: ...PAGE 73 FIGURE 31...
Page 80: ...PAGE 77 FIGURE 33...
Page 82: ...PAGE 79 FIGURE 34...
Page 84: ...PAGE 81 FIGURE 35...
Page 88: ...PAGE 85 FIGURE 37...
Page 90: ...PAGE 87 FIGURE 38...
Page 92: ...PAGE 89 FIGURE 39...
Page 94: ...PAGE 91 FIGURE 40...
Page 96: ...PAGE 93 FIGURE 41...
Page 100: ...PAGE 97 FIGURE 43 SERIAL S 4481 UP...

