User Manual SMO1000A-S
165/176
To Output Arbitrary Waveform
1.
Press the
Wave Gen
button on the front panel to enable the AWG function and enter
the WAVEFORM function menu.
2.
Connect the oscilloscope with PC which has installed the EasyWave software using a
USB cable.
3.
Double click the EasyWave icon to run it.
4.
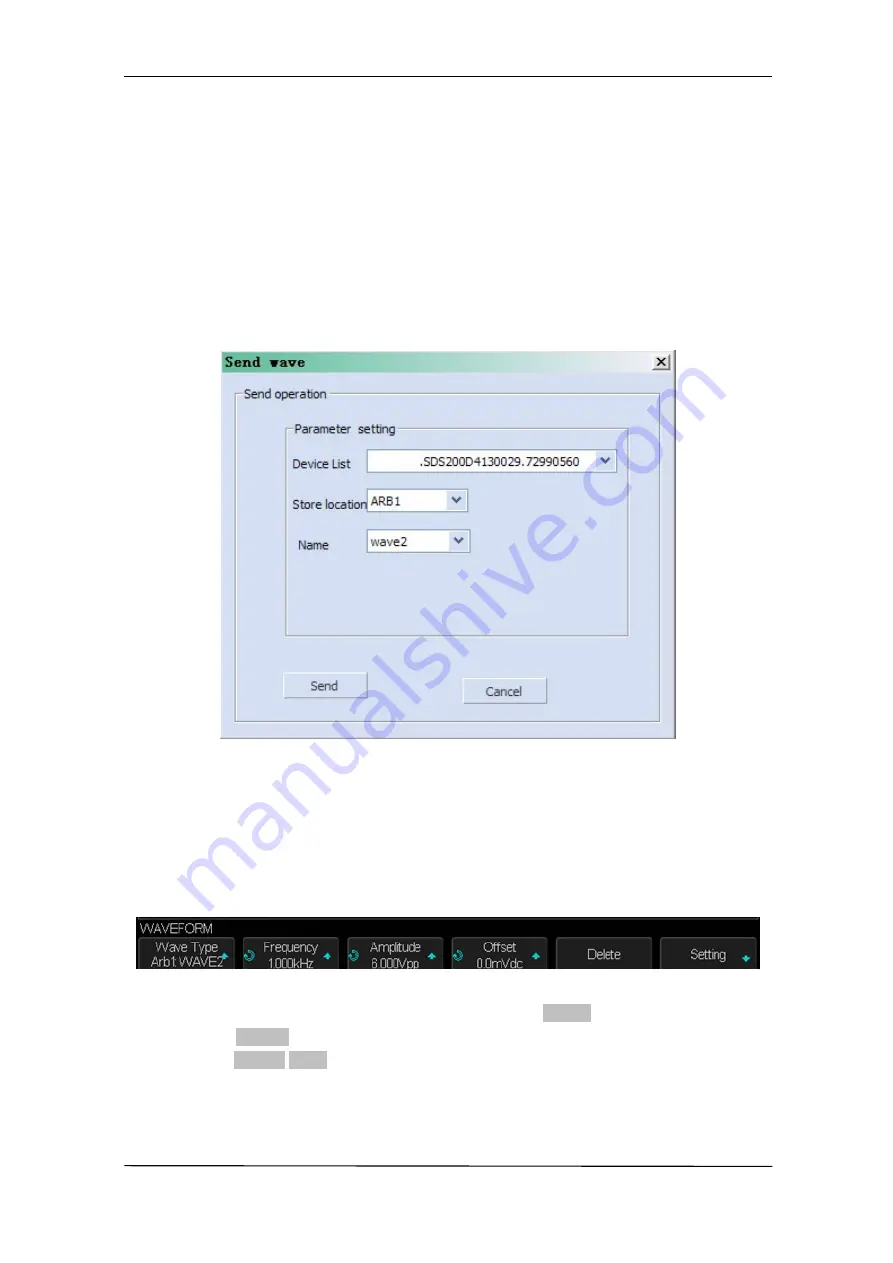
Select a waveform file or draw an arbitrary waveform; then click the
Send wave
option
which at the bottom of the interface and it will pop-up the dialogue which shows as the
picture below:
Figure 89 Send Wave Dialogue
5.
Click the Store location area and select the location to keep the arbitrary waveform.
6.
Click the Send option, then the oscilloscope will pop-out the message
―
Dealing with
waveform data, please wait…
ǁ
7.
A few seconds later the oscilloscope will prompt
―
Succeed to save waveform
ǁ
, and it
will enter the WAVEFORM function menu, the Wave Type sets to ArbX (the location
chose above)
Figure 90 Save Waveform Successfully
8.
If you want to delete the arbitrary waveform, press the
Delete
softkey.
9.
Press the
Setting
softkey to enter the SETTING function menu.
10. Press the
Output Load
softkey to select
High-Z
or
50
Ω
.
Summary of Contents for SMO1000A-S
Page 1: ...Digital Oscilloscope SMO1000A S User Manual ...
Page 50: ...User Manual SMO1000A S 50 176 Figure 12 x Interpolation Figure 13 Sinx Interpolation ...
Page 76: ...User Manual SMO1000A S 76 176 Figure 28 Relative Window Trigger ...
Page 78: ...User Manual SMO1000A S 78 176 Figure 29 Interval Trigger ...
Page 82: ...User Manual SMO1000A S 82 176 Figure 32 Runt Trigger ...
Page 96: ...User Manual SMO1000A S 96 176 Figure 44 SPI Trigger ...


