24
Sanako Lab 90 User Guide
VIDEO AUDIO (REQUIRES VIDEO DISTRIBUTION
UNIT)
Once the configuration of the external video source is
completed, you can use video material as audio source for
the session. To use the video as program source, do as
follows:
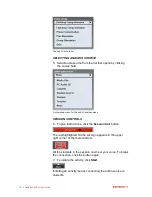
In the graphical user interface of Lab 90, in the Source menu
list, select the video option.
In the Source menu list are displayed all the sources that
were defined in the
Video Sources
dialog. When the menu
item is selected, you can view the video on your screen and
hear the audio in your headset.
To display the video source to the students in the session,
click Start. The session students are now able to view and
hear the video.
If you have started a different video for different sessions, the
video that is played on your screen and headphones is the
one that the students in the currently active session are
viewing and hearing.
By switching from one session to another (by clicking the
session tab accordingly) you can see and hear the video that
the students of the corresponding session are seeing and
hearing. That is, when you move from one session to
another, if the sessions have different video sources, the
video source on your workstation changes accordingly.
To stop the video transfer on the student screens, click
Pause or End.
MONITOR AND INTERCOM
Monitoring a student means listening to a selected student‟s
work. Left-click on a student icon, and you will instantly hear
what the student is saying and hearing. In the intercom
connection, you can monitor and speak with a student.
In Pair / Group Discussion and Phone Conversation, the
monitor and intercom connection cover both of the pair
members / the whole group.
MONITOR
You can monitor the student at any point by clicking on the
student icon (left mouse button). Clicking on the student icon
opens the following panel.
Summary of Contents for Lab 90
Page 1: ...Sanako Lab 90 USER GUIDE ...
Page 5: ...Contents iii ...
Page 6: ......
Page 8: ......
Page 72: ......
Page 79: ...Index 73 ...

