âESKY
ENGLISH
System Menu Setting
27
27
✤
Clock setup works in Camera/Player/M.Cam/M.Player modes.
✤
The Date/Time is automatically recorded onto a tape.
Before recording, please set the Date/Time.
1. Set the
Power
switch to
CAMERA
or
PLAYER
.
2. Set the
Mode
switch to
TAPE
or
MEMORY CARD
.
(VP-D353(i)/D354(i)/D355(i) only)
3. Press the
MENU
button.
■
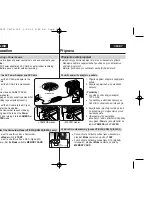
The menu list will appear.
4. Move the
Menu selector
to the left or right to select
System
, then press the
Menu selector
.
5. Move the
Menu selector
to the left or right to select
Clock Set
, then press the
Menu selector
.
■
The year will highlight first.
6. Move the
Menu selector
to the left or right to set
current Year, then press the
Menu selector
.
■
The month will be highlighted.
7. You can set the month, day, hour and minute following
the same procedure for setting the year.
8. Press the
Menu selector
after setting the minutes.
■
The message
Complete!
will be displayed.
■
To adjust the clock, select the Year, Month, Day,
Hour or Min by pressing the
Menu selector
, then
move the
Menu selector
to the left or right to set
respective values.
9. To exit, press the
MENU
button.
[ Notes ]
■
After the Lithium battery loses its charge (after about 6 months),
the date/time appears on the screen as 00:00 1.JAN.2005.
■
You can set the year up to 2037.
■
If the Lithium battery is not installed, any input data will not be backed up.
Setting the Clock
Nastavení systémové nabídky
✤
Nastavení hodin funguje v reÏimech Camera/Player/M.Cam/M.Player.
✤
Date/Time (Datum a ãas) se automaticky nahrává na kazetu.
Pfied nahráváním nastavte datum a ãas.
1. Vypínaã
Power
pfiepnûte do polohy
CAMERA
nebo
PLAYER
.
2. Pfiepínaã
Mode
nastavte do polohy
TAPE
nebo
MEMORY
CARD
. (pouze VP-D353(i)/D354(i)/D355(i))
3. Stisknûte tlaãítko
MENU
.
■
Zobrazí se seznam nabídek.
4. Pohybem ovladaãe
Menu
doleva ãi doprava vyberte
poloÏku
System (Systém)
, poté ovladaã stisknûte.
5. Pohybem ovladaãe
Menu
doleva ãi doprava vyberte
poloÏku
Clock Set (Nastavení hodin)
, poté ovladaã
stisknûte.
■
Nejdfiíve bude blikat rok.
6. Pohybem ovladaãe
Menu
doleva ãi doprava nastavte
aktuální rok, poté ovladaã stisknûte.
■
Oznaãí se mûsíc.
7. Mûsíc, den, hodinu a minutu lze nastavit stejn˘m
postupem jako rok.
8. Po nastavení minut ovladaã stisknûte.
■
Zobrazí se zpráva
Complete! (Dokonãeno!)
.
■
Chcete-li nastavit hodiny, stisknûte ovladaã
Menu
,
vyberte poloÏku Year (Rok), Month (Mûsíc), Day (Den),
Hour (Hodinu) nebo Min (Minutu) a pohybem ovladaãe
doleva nebo doprava nastavte pfiíslu‰né hodnoty.
9. Pro ukonãení stisknûte tlaãítko
MENU
.
[ Poznámky ]
■
Po vyãerpání lithiové baterie (pfiibliÏnû po 6 mûsících) se
na obrazovce datumu a ãasu zobrazí
00:00 1.JAN.2005.
■
Rok lze nastavit maximálnû na 2037.
■
Pokud není lithiová baterie vloÏena, nebudou uloÏeny
Ïádné vloÏené údaje.
Nastavení hodin
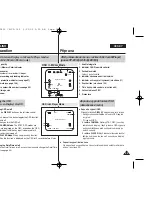
Adjust
Select
Exit
MENU
Camera Mode
Back
Clock Set
Beep Sound
Language
Demonstration
1 JAN 2005
00 : 00
…
†
Move
Select
Exit
MENU
Camera Mode
Back
Clock Set
Beep Sound
Language
Demonstration
1 JAN 2005
00 : 00
Complete!
4
5
8
Camera Mode
√
System
Clock Set
Beep Sound
Language
Demonstration
√
On
√
English
√
On
Move
Select
Exit
MENU
00839L VP-D353 UK+CZ~086 3/23/05 9:51 AM Page 27
Summary of Contents for VP-D351
Page 27: ......
Page 28: ......
Page 29: ......
Page 30: ......
Page 31: ......
Page 32: ......
Page 33: ......
Page 34: ......
Page 35: ......
Page 36: ......
Page 37: ......
Page 38: ......
Page 39: ......
Page 40: ......
Page 41: ......
Page 42: ......
Page 43: ......
Page 44: ......
Page 45: ......
Page 46: ......
Page 47: ......
Page 48: ......
Page 49: ......
Page 50: ......
Page 51: ......
Page 52: ......
Page 53: ......
Page 54: ......
Page 55: ......
Page 56: ......
Page 57: ......
Page 58: ......
Page 59: ......
Page 60: ......
Page 61: ......
Page 62: ......
Page 63: ......
Page 64: ......
Page 65: ......
Page 66: ......
Page 67: ......
Page 68: ......
Page 69: ......
Page 70: ......
Page 71: ......
Page 72: ......
Page 73: ......
Page 74: ......
Page 75: ......
Page 76: ......
Page 77: ......
Page 78: ......
Page 79: ......
Page 80: ......
Page 81: ......
Page 82: ......
Page 83: ......
Page 84: ......
Page 85: ......
Page 86: ......
Page 87: ......
Page 88: ......
Page 89: ......
Page 90: ......
Page 91: ......
Page 92: ......
Page 93: ......
Page 94: ......
Page 95: ......
Page 96: ......
Page 97: ......
Page 98: ......
Page 99: ......
Page 100: ......
Page 101: ......
Page 102: ......
Page 103: ......
Page 104: ......
Page 105: ......
Page 106: ......
Page 107: ......
Page 108: ......
Page 109: ......
Page 110: ......
Page 111: ......
Page 112: ......
Page 113: ......
Page 114: ......
Page 115: ......
Page 116: ......
Page 117: ......
Page 118: ......
Page 119: ......
Page 120: ......


