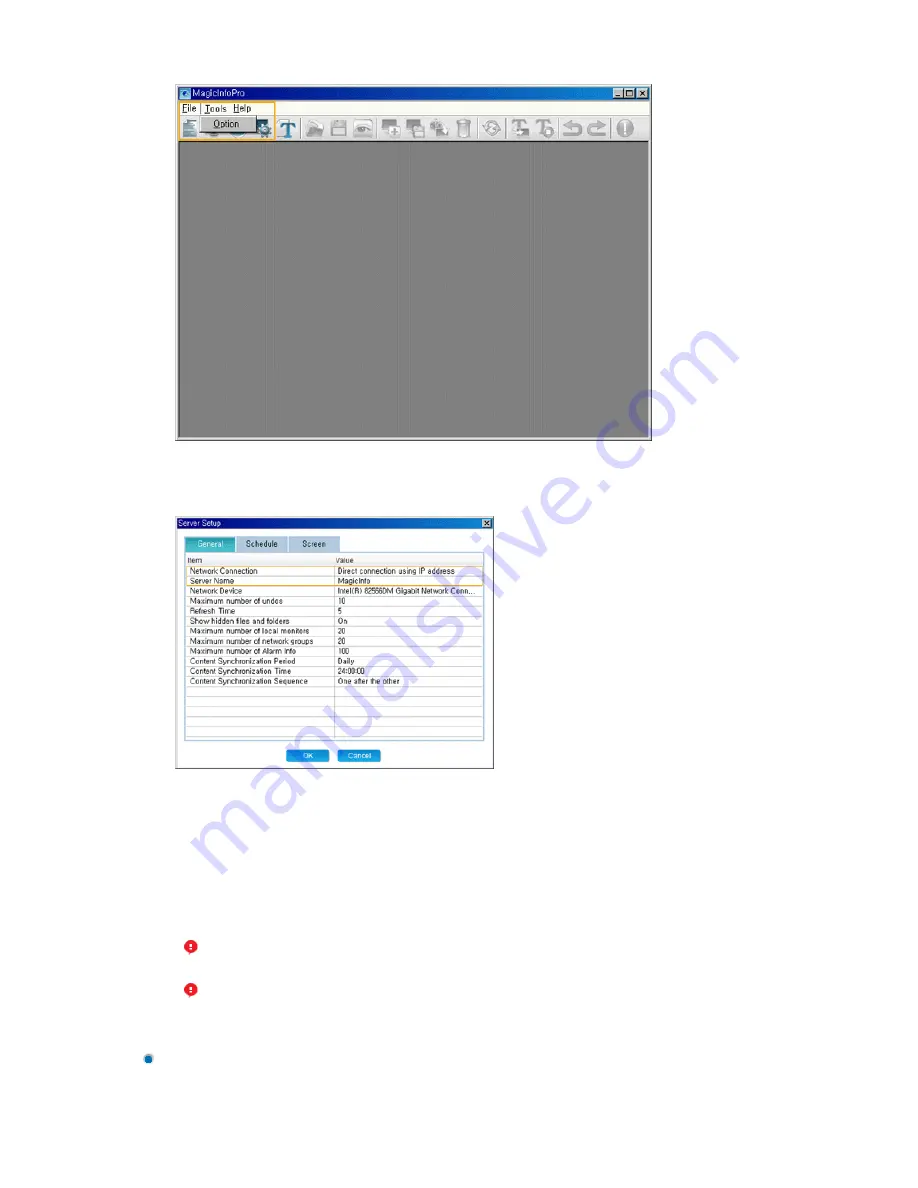
2. Configure the Network Connection settings In the General tab. Enter the server name on the monitor
identical to the name of the server. To change the server name, double-click the Value field of the
Server Name item.
3. If there is more than one network card in the server, select a network card in the Network Device
item.
4. If both the server and monitor are on the same network, make sure to select
‘
Automatic connection
using a server name
’
in the Value field of the Network Connection item as the connection method.
When setting up the monitor, make sure to use the same settings.
5. If the server and monitor are on different networks, make sure to select
‘
Direct connection using an
IP address
’
in the Value field of the Network Connection item as the connection method. When setting
up the monitor, make sure to use the same settings.
Setting up the Monitor
1. Set the source of the monitor to MagicInfo Pro and then enter the IP address and server name using
the Setup menu or the Network Connection item. They must be the same as the IP address and the
name of the server to connect to. (For more information, refer to the description of setting up
At this time, the IP address of the server which the monitor will connect to must be a
public IP address. Make sure to enter this IP address in the Server IP Address item when
setting up the monitor.
If the server is using a firewall, make sure to include the IP address of the monitor in the
exceptions list for the firewall.
Summary of Contents for SyncMaster 400CXN
Page 1: ...SyncMaster 400CXN 460CXN LCD Display User Manual ...
Page 18: ...LCD Display Head Introduction ...
Page 46: ...6 Choose a folder to install the MagicInfo Pro program 7 Click Install Using the Software ...
Page 76: ......
Page 181: ...Play Plays a movie file Full Size Plays a movie file in full screen Adjusting the LCD Display ...
Page 225: ...Appendix ...


