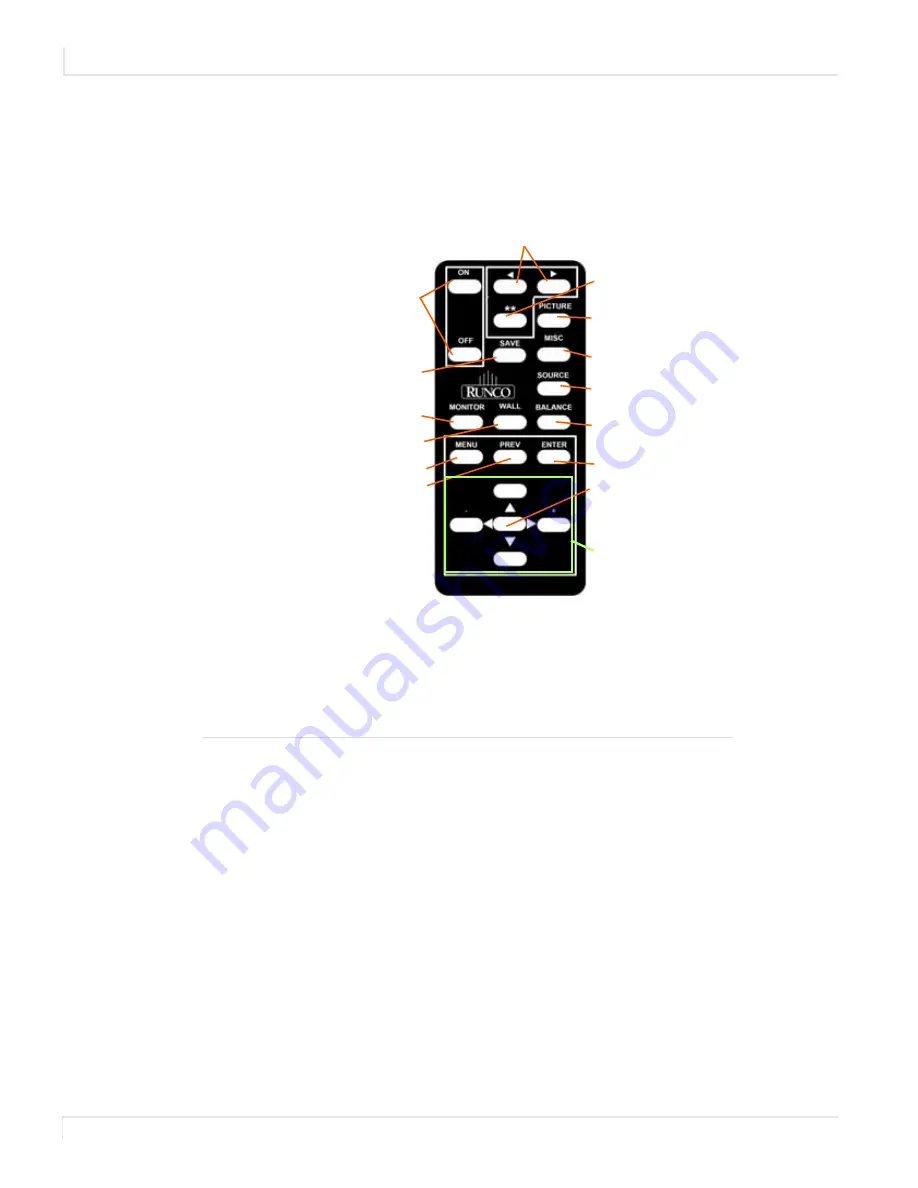
Menus and the Remote
50
Runco WindowWall Installation Guide
Menus and the Remote
All on-screen menus are controlled using a specific remote control created for the
Runco WindowWall display wall. This remote allows you to access the four menu
types: navigational, global, local and status. These menus are described below.
Note:
Keep in mind that you need to point the remote towards where the IR sensor is
mounted.
Number
Definition
1
Turn the display ON/OFF.
2
Move the target left or right.
3
Set the target to all at once.
4
With each press, go to Picture, Input Levels, Aspect Ratio,
Picture Position, Zoom Top & Left, Zoom Bottom and
Right.
5
Press once for Miscellaneous Options, twice for Backlight
Settings, three times for Serial Port Settings.
6
Press once for Recall, twice for Save.
7
Takes you to the next Quick Configure setting (Big
Picture, A1, A2, etc.)
8
Press once for the Color Balance menu.
1
2
4
3
5
6
7
8
9
10
11
12
13
14
15
Summary of Contents for WindowWall
Page 1: ...Runco WindowWall Installation Guide...
Page 2: ......
Page 8: ...viii Runco WindowWall Installation Guide...
Page 14: ...vi Runco WindowWall Installation Guide...
Page 18: ...Safety Information 4 Runco WindowWall Installation Guide European Union Disposal Information...
Page 28: ...Off Board Equipment and Components 14 Runco WindowWall Installation Guide...
Page 56: ...Installing LCD Tiles 42 Runco WindowWall Installation Guide...
Page 62: ...Loop Through 48 Runco WindowWall Installation Guide...
Page 70: ...Menus and the Remote 56 Runco WindowWall Installation Guide...
Page 74: ...Matrix Layout Menu 60 Runco WindowWall Installation Guide...
Page 94: ...Adjusting Position 80 Runco WindowWall Installation Guide...
Page 102: ...Zoom and Viewport 88 Runco WindowWall Installation Guide...
Page 146: ...Main Menu and Submenus 132 Runco WindowWall Installation Guide...
Page 186: ...Downloading Additional Documentation and Firmware 172 Runco WindowWall Installation Guide...


