13
Basic Operations
Turning the Power On and Off
Turning the power on
* If still images are saved in internal memory (p. 24), startup takes
longer time according to image size and the number of still images
saved.
1.
Make sure all devices are turned off.
2.
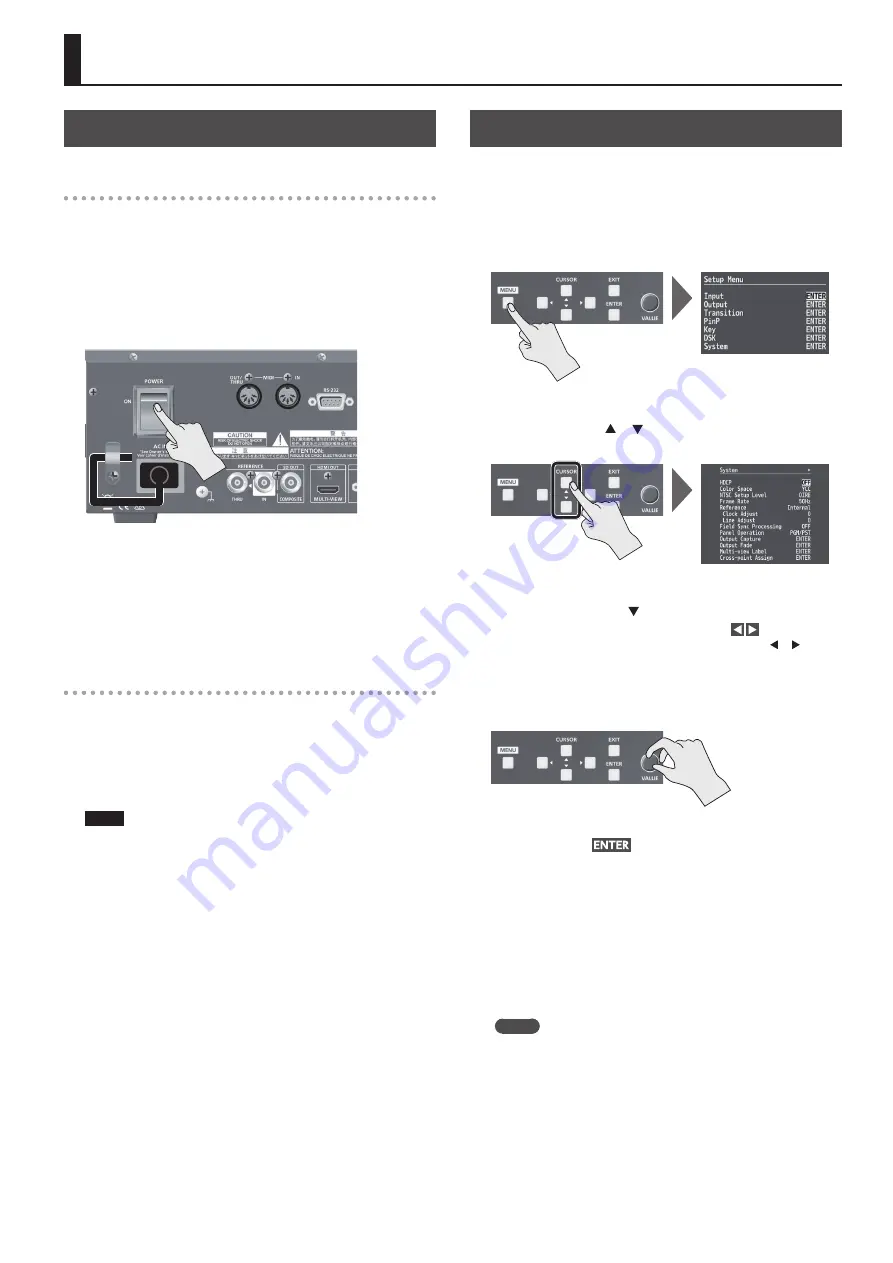
Turn on the [POWER] switch on the V-800HD MK II to turn on
the power.
3.
Turn on the power to the source devices.
Turn on the power to video cameras or other source equipment
connected to input connectors on the DV-800HD MK II.
4.
Turn on the power to the output devices.
Turn on the power to projectors or other devices connected to output
connectors on the V-800HD MK II.
Turning the power off
1.
Turn off the power in the sequence of first the output
equipment, and then the sources.
2.
Turn off the [POWER] switch on the V-800HD MK II to turn
off the power.
NOTE
5
Do not turn off the power while a message of “Processing...“ is
shown on menu display area of the multi-view monitor. Your
settings may not be saved properly.
5
If you need to turn off the power completely, first turn off the
V-800HD MK II, then unplug the power cord from the power
outlet. Refer to “To completely turn off power to the unit, pull out
the plug from the outlet” (p. 4).
Using the Menus
This explains how to display menus and make settings for video and
for the V-800HD MK II itself.
* Menus are shown only on the multi-view monitor connected to the
HDMI OUT connector (p. 12).
1.
Press the [MENU] button to display the menu.
The [MENU] button lights up, the menu categories are displayed.
2.
Press the CURSOR [ ] [ ] buttons to select a category,
then press the [ENTER] button to confirm the selection.
The menu items for the selected category are displayed.
3.
Press the CURSOR [
=
] [ ] buttons to select a menu item.
5
When menu items span two or more pages, a icon is
displayed at the top of the screen. Press the CURSOR [ ] [ ]
buttons to switch between the pages.
5
When the value area indicates “ENTER,” you can press the [ENTER]
button to proceed to a lower level.
4.
Turn the [VALUE] knob to change the setting value.
5
When a setting value has menu items that let you make more-
detailed settings,
is displayed at the top of the screen. Press
the [ENTER] button to go down a level.
5
To execute an operation, press the [ENTER] button.
5
You can change a setting value rapidly by holding down the
[ENTER] button and turning the [VALUE] knob.
5
Holding down the [ENTER] button and pressing the [EXIT] button
returns the currently selected setting to its default value.
5.
Press the [MENU] button to quit the menu.
Pressing the [EXIT] button once returns you to the previous screen.
MEMO
For detailed information on menu items, refer to the “Reference
Manual” (PDF) available for download at the Roland website.
https://proav.roland.com/


