background image

Combining Samples to Create a Pattern (PATTERN SEQUENCER)

Playing a Pattern

This shows you how to recall a pattern, which contains the sample playback order, and play it back.

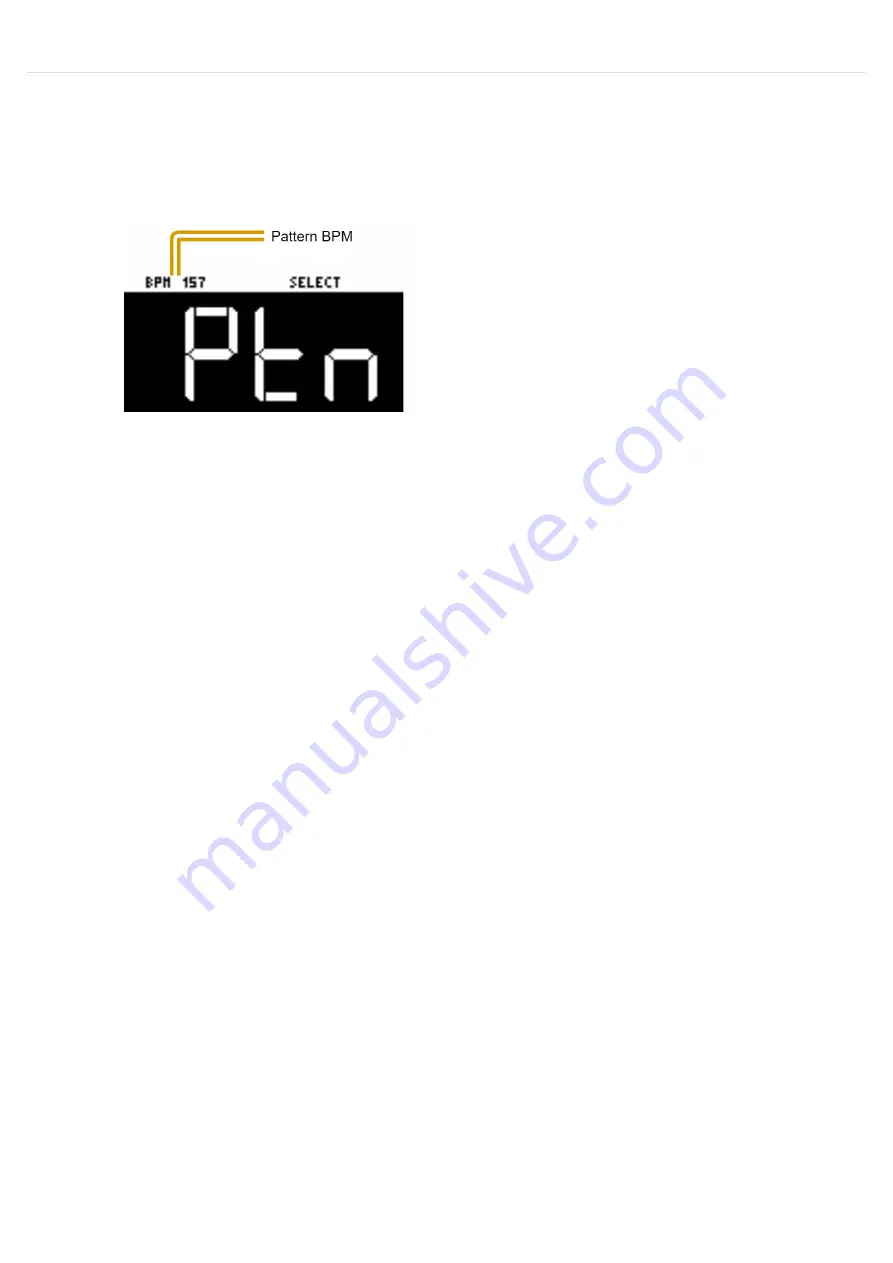
Press the [PATTERN SELECT] button. 
The SELECT screen appears. 

Pads to which patterns are assigned light up purple.

1

Press pads [1]‒[16]. 
The pattern plays back. 
When you press the other pads [1]‒[16] while the pattern is playing back, this places the next pattern to
play back in standby. When the currently playing pattern has finished playing, the next pattern starts
playing. 
To stop the pattern playback, press the pad thatʼs playing back (pads [1]‒[16]; lit white) or press the
[EXIT] button.

2

Summary of Contents for SP-404MK

Page 1: ...on The SP 404MK lets you do everything from audio sampling to editing creating your own songs and performing all in one unit This Reference Manual assumes that your unit is using software version 1 10...

Page 2: ...Introduction Panel Descriptions...

Page 3: ...Introduction Panel Descriptions...

Page 4: ...Introduction Panel Descriptions Edit Section VOLUME knob Adjusts the overall volume 1 CTRL 1 CTRL 3 knobs Use these to edit parameters 2...

Page 5: ...Introduction Panel Descriptions Control Section 1 Display Shows various information depending on the operation 1 E ect buttons Use these buttons to select the e ect you want to use 2...

Page 6: ...ss this to make the settings for sampling and for pattern recording The setting screen appears 3 DEL button Press this to erase the sample or pattern data 4 REC button Press this to sample or to recor...

Page 7: ...sync with the tempo The sample s playback speed is synchronized with the tempo set on this unit or with the MIDI clocks received via the USB port or the MIDI IN connector 5 GATE button Turns the gate...

Page 8: ...ck samples or to use the MUTE BUS function 2 HOLD button You can make the samples keep playing back even after you take your ngers o the pads by holding down pads 1 16 to play back their samples and p...

Page 9: ...Introduction Panel Descriptions Side Panel SD card slot Insert an SD card here 1...

Page 10: ...e INPUT jack 2 MIC GUITAR switch Switches the input impedance to match the device that s connected to the INPUT jack When connecting a high impedance instrument such as a guitar or bass guitar ip the...

Page 11: ...ower via the USB port 3 MIDI IN OUT jacks Connect an external MIDI device here To make these connections use TRS MIDI connecting cables sold separately BMIDI 5 35 4 LINE IN L MONO R jacks These are ja...

Page 12: ...his Unit How Data is Organized The SP 404MK handles a large amount of data including audio materials and data used to create songs In this section we explain the role of each type of data and the stru...

Page 13: ...f audio that has been sampled recorded audio data and settings such as loop settings and routings to BUS FX e ects Samples can be assigned to pads 1 16 and played back or you can use them as parts of...

Page 14: ...that contains the order in which the samples should be played back You can create a song by pressing the pads to play back several samples and then recording your performance as a pattern Use the patt...

Page 15: ...n What You Should Know About This Unit How Data is Organized Banks and Projects The 10 banks of samples and 10 banks of patterns are collectively managed as a project The SP 404MK can store 16 di eren...

Page 16: ...ction Getting Things Ready Now let s get ready to use the SP 404MK This section explains how to prepare and connect to external equipment for outputting sound as well as the di erent ways to power thi...

Page 17: ...ear panel 1 Use the PHONES jack when connecting headphones or earphones Connect an electronic musical instrument such as a synthesizer to the LINE IN jack s on the rear panel 2 Connect your mic or gui...

Page 18: ...s Android devices are not guaranteed to work with this unit Connecting to your computer You can also use a USB Type C to USB A cable to connect your computer to the SP 404MK However the computer canno...

Page 19: ...e settings when inputting audio from a computer or mobile device For details refer to Inputting Audio from a Computer or Mobile Device USB AUDIO Connect your iOS device and the SP 404MK using a USB ca...

Page 20: ...r to the USB port or by using batteries Powering the Unit via USB Port Using Batteries If the unit is using multiple power sources the sources are prioritized in this order DC IN jack the included AC...

Page 21: ...unit and insert the batteries in the correct polarity direction as marked inside the battery compartment Close the cover securely This unit uses six AA batteries rechargeable Ni MH or alkaline The un...

Page 22: ...ds No other USB cables can be used as they cannot provide enough power to operate the SP 404MK Also note that even when using cables that have a USB Type C connector on both ends you cannot power this...

Page 23: ...Turning the power on Turning the Power O To turn on the power slide the POWER switch of this unit to ON 1 Next turn on any connected devices and then the amp speakers in that order 2 Adjusts the volum...

Page 24: ...sponding samples play back When you turn on the SP 404MK the pads light up orange and the unit enters sample mode If the unit is not in sample mode press the EXIT button a number of times When the pad...

Page 25: ......

Page 26: ...se from the 10 available banks A J Press the bank A F E J buttons The bank switches Each time you press the bank A F button the bank switches between A and F When bank A E is selected the bank A F E J...

Page 27: ...varies between banks You may notice a di erence in playback volume when copying or exchanging samples between di erent banks due to the di erences in the BANK VOLUME parameters set for each bank Hold...

Page 28: ...layback in the system parameters For details refer to Parameter Guide To use BPM SYNC you must rst set the accurate tempo data for each sample For details refer to Setting the Tempo Data in a Sample Y...

Page 29: ...pad is pressed Momentary gate control Use the operations shown below to change how samples are played back Sample playback method Operation Stop the playback of samples whose GATE is o Hold down the E...

Page 30: ...ach time a pad is pressed Setting the loop to play back forwards Setting the loop to play back in reverse Setting the loop to play back forwards and then backwards Press the LOOP button to turn the lo...

Page 31: ...ou can use the reverse function to play back samples in reverse from end to start Press pads 1 16 to select the sample you want to play back in reverse 1 Press the REVERSE button to turn reverse playb...

Page 32: ...The roll starts once you take your nger o the ROLL button after pressing it To play rolls with the correct timing press the ROLL button just before the roll should begin and take your nger o the butto...

Page 33: ...et the roll interval Each time you press the ROLL button while holding down the SHIFT button the roll interval changes as follows quarter note eighth note sixteenth note thirty second note sixty fourt...

Page 34: ...ys back at 127 the maximum Hold down the SHIFT button and press the pad 1 FIXED VELOCITY ON is shown The sample velocity is xed at 127 1 To cancel this setting hold down the SHIFT button again and pre...

Page 35: ...when it plays back Press pads 1 16 to select the sample you want to use with the 16 VELOCITY function 1 Hold down the SHIFT button and press the pad 2 The 16 VELOCITY screen appears 2 Press pads 1 16...

Page 36: ...in chromatic mode Multiple samples can t produce sound at the same time meaning that chords cannot be played Press pads 1 16 to select the sample to use in chromatic mode 1 Hold down the SHIFT button...

Page 37: ...ay back just by operating a single pad within that group You can also register up to 10 groups A J Hold down the SHIFT button and press the pad 7 The PAD LINK GROUPS screen appears 1 Turn the VALUE kn...

Page 38: ...at the same time only the sample that started playing back last is heard A group can consist of up to 16 samples You can also register up to 10 groups groups A J Hold down the SHIFT button and press...

Page 39: ...es SAMPLE MODE Stopping All Sample Playback STOP You can make all samples and patterns that are currently playing back stop Press the EXIT button quickly four times All samples and patterns that are p...

Page 40: ...nd of a Sample PAUSE You can make samples that are currently playing back pause Hold down the SHIFT button and press the HOLD button All samples that are playing back pause 1 Hold down the SHIFT butto...

Page 41: ...outing inside the SP 404MK With BUS 1 and BUS 2 you can apply the e ects that are appropriate for your performance per sample BUS 3 and BUS 4 are mainly used to apply e ects to the overall sound outpu...

Page 42: ...buttons Press the buttons of the e ects you want to apply including the FILTER DRIVE button the RESONATOR button the DELAY button the ISOLATOR button the DJFX LOOPER button and the MFX button This tur...

Page 43: ...ects of this unit to BUS 3 or BUS 4 Up to four e ects are available To assign an e ect to BUS 3 or BUS 4 change the settings in the e ect setting screen Con guring the E ect Settings EFX SET Press th...

Page 44: ...an prevent the playback audio of samples from being sent to BUS 1 or BUS 2 DRY In this case no e ects are applied to the samples Sending the audio input from the INPUT jack to a bus As with the sample...

Page 45: ...d of the VALUE knob or the CTRL 3 knob to select an e ect To use pads 1 16 to select e ects from 17 and up hold down the MFX button and the DJFX LOOPER button at the same time 1 After selecting the e...

Page 46: ...the power in other words any changes are not saved Parameters that are retained even after you turn o the power of this unit are shown below Bus to which e ects are assigned Main parameters Sub parame...

Page 47: ...hile you hold down the e ect buttons EFFECT GRAB This lets you quickly turn an e ect on o in time with what you play Play back a sample 1 While holding down the VALUE knob press an e ect button such a...

Page 48: ...complex way to control the audio sent to the buses and the e ects at the same time This shows the audio signal ow when using MUTE BUS Also the diagram below shows how the audio outputted from this un...

Page 49: ...vidually selecting the bus to mute with MUTE BUS When MUTE BUS is turned on you can individually select the buses on which audio is muted For details refer to the Mute Bus parameter listing in the EFX...

Page 50: ...Sampling SAMPLING You can sample record the sound that s inputted into this unit to create your own samples audio data materials...

Page 51: ...REC BPM 40 0 200 0 Speci es the tempo Use the CTRL 1 knob while holding down the SHIFT button to set the value more precisely You can also set the tempo using the tap tempo function Setting the Tempo...

Page 52: ...EFX Type Bypass Auto Pitch Vocoder Gt Amp Sim Chorus JUNO Chorus Reverb TimeCtrlDly Chromatic PS Downer WrmSaturator 303 VinylSim 404 VinylSim Cassette Sim Lo Equalizer Compressor E ects marked with a...

Page 53: ...K Press pad 9 while holding down the SHIFT button to turn the metronome sound on o 1 Use the CTRL 1 knob to adjust the tempo during sampling the sample tempo and use the CTRL 3 knob to adjust the volu...

Page 54: ...h time you press pad 10 while holding down the SHIFT button Edit the count in setting Value Explanation COUNTIN 1MEAS Adds a one measure count in before sampling COUNTIN 2MEAS Adds a two measure count...

Page 55: ...own the SHIFT button to turn the metronome sound on o 1 Press the RECORD SETTING button The input setting screen appears 2 Use the CTRL 2 knob to set ROUTING to Mix When ROUTING is set to ExtIn only t...

Page 56: ...cide to cancel sampling press the EXIT button You can also press the REC button to begin sampling You can begin sampling when you want while playing back samples as backing sounds 7 To quit sampling p...

Page 57: ...back memory recording is paused Skip back memory is not recording if the MARK button is not blinking and thus can t be previewed or sampled If you press the MARK button at this time the message No SK...

Page 58: ......

Page 59: ...Editing a Sample SAMPLE EDIT You can edit the playback speed waveform and other parameters for the samples...

Page 60: ...area in out around each point you just manipulated SHIFT button VALUE knob turn You can use a numerical value to set the position of each point Use the VALUE knob to select the point to set and press...

Page 61: ...it cannot be restored Set the start and end points by following the steps in Setting the Playback and Loop Regions START END 1 Press the VALUE knob A menu appears 2 Use the VALUE knob to select the it...

Page 62: ...button and press the START END button The marker setting screen appears 2 Decide on where to add the marker by using the CTRL 1 knob and then press the MARK button This adds the marker to the sample Y...

Page 63: ...Press pads 1 16 to select the sample to which you want to add markers 1 Hold down the SHIFT button and press the START END button The marker setting screen appears 2 Press the VALUE knob A menu appea...

Page 64: ...and press the VALUE knob A con rmation message appears 6 Use the VALUE knob to select OK and press the VALUE knob The sample is split according to the speci ed conditions You can press pads 1 16 to pr...

Page 65: ...p green Pads to which samples have already been assigned light up dark orange If you press a pad for which a sample is already assigned the pad lights up red The assigned sample is then overwritten CT...

Page 66: ...radually get louder and fade out settings making the volume gradually get softer Hold down the SHIFT button and press the PITCH SPEED button The envelope setting screen appears 1 Press pads 1 16 to se...

Page 67: ...ance when this is set to 100 fade in and fade out are applied to the entire sample When this is set to 50 fade in and fade out are applied from the beginning of the sample to the middle CTRL 3 knob RE...

Page 68: ......

Page 69: ...NT Lets you set a more precise value for the playback pitch CTRL 3 knob VOLUME 0 127 Sets the sample volume SHIFT button CTRL 3 knob PAN MONO Left L 50 R 50 MONO Right Sets the stereo position pan of...

Page 70: ...Editing a Sample SAMPLE EDIT Displaying Parameters Set in a Sample Hold down the REMAIN button to show the sample parameters assigned to the currently selected pad...

Page 71: ...t in a sample such as the start point end point tempo and so on to their default values Hold down the SHIFT button and press the pad 6 A con rmation message appears If you decide to cancel press the E...

Page 72: ...Editing a Sample SAMPLE EDIT Organizing the Samples This section explains the functions for making e ective use of the samples...

Page 73: ...ads for which you want to exchange the samples To cancel exchanging press the EXIT button You can use the bank A F E J buttons to select a bank before pressing the pads It s also possible to exchange...

Page 74: ...samples between di erent banks You may notice a di erence in volume when copying samples between di erent banks due to the di erences in the BANK VOLUME parameters set for each bank 2 Press the VALUE...

Page 75: ...nk basis Protection is set for both samples and patterns To cancel protection do the same operation again Press the bank A F E J buttons to select the banks to protect To select banks F J press the ba...

Page 76: ...een deleted If you want to keep your data or make sure it doesn t get accidentally modi ed we recommend that you follow the steps in Backing up Your Data BACKUP to create regular backups 3 Hold down t...

Page 77: ...ecord the order in which the samples play back so that multiple samples play back at the timing you choose The data in which the playback order is recorded is called a pattern In this section we expla...

Page 78: ...appears Pads to which patterns are assigned light up purple 1 Press pads 1 16 The pattern plays back When you press the other pads 1 16 while the pattern is playing back this places the next pattern...

Page 79: ...ing screen appears 3 Con gure the parameters for the pattern Controller Parameter Value Explanation CTRL 1 knob BPM 40 200 Sets the pattern s tempo CTRL 2 knob LENGTH 1 2 4 8 16 32 64 measures Sets th...

Page 80: ...ractice what to play before recording a pattern You can press the REC button while a pattern is playing back to switch to pattern recording Note that recording starts at the beginning of the pattern I...

Page 81: ...egins recording Hold down the SHIFT button and press the pad 10 Edit the count in setting Value Explanation COUNTIN 1MEAS Adds a one measure count in before recording COUNTIN 2MEAS Adds a two measure...

Page 82: ...n The input setting screen appears 3 Use the CTRL 2 knob to set ROUTING to Mix When ROUTING is set to ExtIn only the audio input from an external device is sampled the sample s audio is not included i...

Page 83: ...If you decide to cancel sampling press the EXIT button To exit sampling press the REC button again 8...

Page 84: ...he bank to use from the 10 available banks A J Press the bank A F E J buttons The bank switches Each time you press the bank A F button the bank switches between A and F When bank A E is selected the...

Page 85: ...dited the pattern chain an asterisk appears at the top right hand part of the screen If you want to revert undo your edits press the DEL button while holding down the SHIFT button Press the REMAIN but...

Page 86: ...n as it plays back Press the PATTERN SELECT button The unit enters pattern sequencer mode 1 While holding down the HOLD button press pads 1 16 to select the pattern chain number to play back The PATTE...

Page 87: ...s to blinking purple and a message Press Pad to START is shown 6 Press pads 1 16 while holding down the HOLD button to select the pattern chain to play back The PATTERN CHAIN screen appears 7 Press th...

Page 88: ...pattern you want to edit The pattern edit screen appears 3 Use the CTRL 1 CTRL 3 knobs to edit the parameters Controller Parameter Value Explanation CTRL 1 knob BPM 40 200 Sets the pattern s tempo CT...

Page 89: ...erall pattern becomes twice as long Press the PATTERN SELECT button 1 Press the PATTERN EDIT button 2 Press pads 1 16 to select the pattern you want to edit The pattern edit screen appears 3 Press the...

Page 90: ...s 1 16 to select the pattern you want to edit The pattern edit screen appears 3 Set the range you want to keep within the pattern in the LOOP START and LENGTH parameters Editing a Pattern PATTERN EDIT...

Page 91: ...Editing a Pattern PATTERN EDIT Organizing the Pattern Data This section explains the functions for making e ective use of the patterns...

Page 92: ...the pattern before performing the operation Hold down the SHIFT button and press the pad 5 The EXCHANGE screen appears 1 Press the two pads in order for which you want to exchange the patterns To canc...

Page 93: ...o another bank Press the COPY button The COPY screen appears 1 Press the pads in order beginning with the pattern pad you want to copy and then the copy destination pattern pad If you decide to cancel...

Page 94: ...VALUE knob clockwise to move the cursor 3 Press the bank A F E J buttons to select where to copy the bank destination 4 Press the VALUE knob or COPY button All the patterns in the bank are copied to...

Page 95: ...y bank basis Protection is set for both samples and patterns To cancel protection do the same operation again Press the bank A F E J buttons to select the banks to protect To select banks F J press th...

Page 96: ...attern for that pad is deleted You can t restore a pad s pattern after it has been deleted If you want to keep your data or make sure it doesn t get accidentally modi ed we recommend that you follow t...

Page 97: ...or all samples and patterns saved within the same bank This tempo is enabled when the TEMPO SEL parameter is BANK BANK A BANK J The patterns play back at the tempo set for the bank tempo If BPM SYNC i...

Page 98: ...ct the BPM range and press the VALUE knob Parameter Value BPM RANGE 100 199 80 159 70 139 50 99 A con rmation message appears 4 Use the VALUE knob to select OK and press the VALUE knob The sample is a...

Page 99: ...p tempo function Setting the Tempo in Time with the Rhythm Tap Tempo Hold down the SHIFT button and press the pad 11 The TEMPO SEL screen appears 1 Use the CTRL 1 knob to select the base tempo used fo...

Page 100: ...on is blinking orange On the input setting screen and other screens tap tempo is automatically enabled Hold down the SHIFT button and press the pad 11 This enables the tap tempo function When this hap...

Page 101: ...LECT or CH2 SELECT and press the VALUE knob 2 Press pads 1 16 to select the sample to assign to either CH1 or CH2 Press a pad to preview its sample You may not be able to hear the samples at this time...

Page 102: ...ay pause CH1 Pad 9 CH2 Pad 11 Returns to the playback start position CH1 Pad 14 CH2 Pad 16 CUE Sends the sample audio to CUE Monitoring with Headphones CUE Pad 10 or pad 12 SYNC Synchronizes the tempo...

Page 103: ...ntroller Operation CTRL 1 knob Moves the start point CTRL 2 knob when the loop is on Moves the loop point CTRL 3 knob Moves the end point SHIFT button CTRL knob turn Zooms the area around each point i...

Page 104: ...UE knob to select OK and press the VALUE knob REMAIN button On Prevents the start point from being moved beyond the loop point or the end point O When the start point moves beyond the loop point or th...

Page 105: ...can preview check the sample s sound in headphones You can t send two or more samples to CUE at the same time playback is not possible Hold down the SHIFT button and press the pad 3 The unit switches...

Page 106: ...nel to the right hand side 1 Press the EXT SOURCE button The EXT SOURCE button lights up This inputs the audio of the connected device The EXT SOURCE button blinks red if the level of the input signal...

Page 107: ...Click the Hardware and Sound icon and then click the Sound icon If the panel is displaying as icons or in classic view double click the Sound icon 2 Click the Playback tab 3 Click Speakers SP 404MKII...

Page 108: ...the unit is ready to play back samples and create patterns Hold down the SHIFT button and press the SUB PAD button The SELECT PROJECT screen appears 1 Press pads 1 16 to select a project you want to r...

Page 109: ...Organizing Projects On this unit you can copy projects and delete projects you no longer need...

Page 110: ...ss the COPY button The COPY PROJECT screen appears 2 Press the pads in order beginning with the pad you want to copy project and then the copy destination pad If you decide to cancel copying press the...

Page 111: ...ed we recommend that you follow the steps in Backing up Your Data BACKUP to create regular backups Hold down the SHIFT button and press the SUB PAD button The SELECT PROJECT screen appears 1 Press the...

Page 112: ...Customizing This Unit You can customize the design of this unit to match your tastes...

Page 113: ...it Removing the faceplate Attaching the faceplate To attach the faceplate follow the steps for removing the top panel in reverse order Use a commercially available hex wrench 2 mm to remove the two sc...

Page 114: ...the opening image You must perform the following operations summarized to use your custom image data as the opening image Create your custom image Preparing a Screen Saver Image 1 Export the project t...

Page 115: ...ormat BMP Size 128 x 64 y pixels Color depth 1 bit 4 bit 8 bit 24 bit Note that only monochromatic images can be displayed Intermediate colors cannot be displayed Filename and extension startup bmp Su...

Page 116: ...is unit and open the contents on your computer 2 Copy the opening image that s saved in the SD card to the EXPORT PROJECT PROJECT 01 PICTURE folder Change the lename to startup bmp replacing the aster...

Page 117: ...the following operations summarized to use your custom images as the screen saver Create your custom image Preparing a Screen Saver Image 1 Switch the settings to use a custom screen saver Enabling a...

Page 118: ...rmat BMP Size 128 x 64 y pixels Color depth 1 bit 4 bit 8 bit 24 bit Note that only monochromatic images can be displayed Intermediate colors cannot be displayed Filename and extension screen saver bm...

Page 119: ...pad 13 The UTILITY MENU screen appears 1 Use the VALUE knob to select SYSTEM and press the VALUE knob The system screen appears 2 Turn the CTRL 3 knob to select the GENERAL tab 3 Use the VALUE knob to...

Page 120: ...to an SD card Exporting a Project EXPORT PROJECT 2 Remove the SD card from this unit and open the contents on your computer 3 Copy the screen saver image that s saved in the SD card to the EXPORT PRO...

Page 121: ...Con guring the Various Settings UTILITY This menu lets you edit the parameters and view information related to the overall unit...

Page 122: ...parameter is shown as divided into ve tabs groups 2 Turn the CTRL 3 knob to select a tab Select the tab of the parameter you want to edit 3 Turn the VALUE knob to move the cursor to the parameter tha...

Page 123: ...ar by pressing pad 15 while holding down the SHIFT button 2 Turn the CTRL 3 knob to select a tab The PAD SETTING screen is divided into four tabs groups Select the tab of the group that contains the p...

Page 124: ...3 knob to select a tab 3 Select the tab of the parameter you want to edit Tab Explanation FAVORITE Shows the current BUS FX settings Use the VALUE knob to change the FAVORITE number BUS 3 BUS 4 Edits...

Page 125: ...screen appears 1 2 Use the VALUE knob to select EFX SET and press the VALUE knob The e ect setting screen appears From the top screen you can also make this screen appear by pressing pad 16 while hold...

Page 126: ...ears 1 Use the VALUE knob to select EFX SET and press the VALUE knob The e ect setting screen appears From the top screen you can also make this screen appear by pressing pad 16 while holding down the...

Page 127: ...knob The e ect setting screen appears From the top screen you can also make this screen appear by pressing pad 16 while holding down the SHIFT button 2 Turn the CTRL 3 knob to select FAVORITE 3 Turn t...

Page 128: ...he VALUE knob to select EFX SET and press the VALUE knob The e ect setting screen appears From the top screen you can also make this screen appear by pressing pad 16 while holding down the SHIFT butto...

Page 129: ...e CTRL 3 knob to select DIRECT 3 Use the VALUE knob to select the e ect button to which the e ect is to be assigned E ect button to assign Parameter FILTER DRIVE button Direct FX1 RESONATOR button Dir...

Page 130: ...creen you can also make this screen appear by pressing pad 16 while holding down the SHIFT button 2 Turn the CTRL 3 knob to select OTHER 3 Use the VALUE knob to move the cursor to Input Bus and press...

Page 131: ...the samples you like into the SP 404MK or exchange patterns and other data between di erent SP 404MK units To work with data on the SD card the SD card folder structure must be set up as shown below S...

Page 132: ...e UTILITY MENU screen appears 3 Use the VALUE knob to select IMPORT and press the VALUE knob The IMPORT EXPORT MENU screen appears From the top screen you can also make this screen appear by pressing...

Page 133: ...ds You can preview the selected sample by pressing the SUB PAD button When selecting samples inside a folder use the VALUE knob to select the folder and then press the VALUE knob Hold down the SHIFT b...

Page 134: ...g down the SHIFT button 4 Use the VALUE knob to select EXPORT to SD CARD and press the VALUE knob The EXPORT SAMPLE PROJECT screen appears 5 Use the VALUE knob to select SAMPLE and press the VALUE kno...

Page 135: ...nob to select IMPORT The IMPORT EXPORT MENU screen appears From the top screen you can also make this screen appear by pressing pad 14 while holding down the SHIFT button 4 Use the VALUE knob to selec...

Page 136: ...s a project Blinking yellow Project number for which a project hasn t been created empty project Blinking red Project number to which the imported project is saved Lit red Project number to which the...

Page 137: ...VALUE knob to select EXPORT to SD CARD and press the VALUE knob The EXPORT SAMPLE PROJECT screen appears 4 Use the VALUE knob to select PROJECT and press the VALUE knob 5 Press the pads of the projec...

Page 138: ...import and overwrite turn the VALUE knob to select OK and press the VALUE knob When this operation is executed the backup data on the SD card that has the same number is overwritten erased Insert the...

Page 139: ...he SD card on which the backup data is saved into the SD card slot of this unit 1 Hold down the SHIFT button and press the pad 13 The UTILITY MENU screen appears 2 Use the VALUE knob to select BACKUP...

Page 140: ...n and press the pad 14 The IMPORT EXPORT MENU screen appears 2 Use the VALUE knob to select FORMAT SD CARD and press the VALUE knob A con rmation message appears If you decide to cancel press the EXIT...

Page 141: ...press the VALUE knob The UTILITY FACTORY RESET screen appears 2 Turn the VALUE knob to select the data to initialize and press the VALUE knob to con rm Value Explanation data to initialize ALL DATA T...

Page 142: ...Appendix Parameter Guide MFX List List of Shortcut Keys Error Messages Audio Diagram Main Speci cations MIDI Implementation Chart...

Page 143: ...Appendix Parameter Guide SYSTEM PAD SET EFX SET...

Page 144: ...rameter DIRECT When you move a knob the control data current position is always outputted Manual When you switch e ects control data corresponding to the position of the knob is outputted Load Project...

Page 145: ...s ON the metronome sound is output while you are sampling or resampling Metronome PTN OFF ON When this is ON the metronome sound is output when a pattern is being recorded Count In REC This selects ho...

Page 146: ...t are inputted to the MIDI IN connector are re transmitted without change from the MIDI OUT connector USB MIDI Thru OFF ON When this is ON MIDI signals that are inputted via the USB port are outputted...

Page 147: ...12 dB Sets the gain of the audio output from the LINE OUT jacks PHONES OUT 0 6 12 dB Sets the gain of the audio output from the PHONES OUT jacks USB OUT 24 12 0 dB Sets the gain of the audio output f...

Page 148: ...rom sounding due to vibrations from other pads Gain 0 100 The sensitivity is adjusted with the curve as is The larger the value the greater the sensitivity is when playing the pads Trig Span 1 10 Adju...

Page 149: ...lor for each bus through which sample audio is sent This can be set for BUS 1 BUS 2 and DRY respectively This is enabled when Pad LED Mode is BUS Hold down the SHIFT button and turn the VALUE knob to...

Page 150: ...arameter Value Explanation EFX TYPE Bypass 303 VinylSim 404 VinylSim Cassette Sim Lo Downer Compressor Equalizer Isolator Super Filter Filter Drive WrmSaturator Overdrive Distortion Crusher Ring Mod S...

Page 151: ...the bus to mute with MUTE BUS ALL Both BUS 1 and BUS 2 are muted BUS Only the bus selected with the BUS FX button is muted Input FX Bypass Auto Pitch Vocoder Gt Amp Sim Chorus JUNO Chorus Reverb Time...

Page 152: ......

Page 153: ...Ma Zan Zou To Gu Ro SBF Stopper Tape Echo TimeCtrlDly Super Filter WrmSaturator 303 VinylSim 404 VinylSim Cassette Sim Lo Reverb Chorus JUNO Chorus Flanger Phaser Wah Slicer Tremolo Pan Chromatic PS...

Page 154: ...ts the lter s resonance level The larger the value the more that the frequency range set in CUTOFF is emphasized DRIVE 0 100 Adds distortion FLT TYPE Sets the type of lter HPF Cuts o the low frequenci...

Page 155: ...rameter Value Explanation ROOT C1 G9 Sets the reference pitch root note BRIGHT 0 100 Adjusts the tonal brightness FEEDBACK 0 99 Adjusts the amount of feedback for the e ect CHORD Root Oct UpDn P5 m3 m...

Page 156: ...1 1T 1 2D 1 1 Sets the sound delay time FEEDBACK 0 99 Adjusts the amount of feedback for the e ect LEVEL 0 100 Adjusts the volume of the e ect sound L DAMP F FLAT 80 100 125 160 200 250 315 400 500 6...

Page 157: ...uency range Parameter Value Explanation LOW INF 41 87 12 dB Adjusts the amount of boost cut in the low frequency range MID INF 41 87 12 dB Adjusts the amount of boost cut in the mid frequency range HI...

Page 158: ...0 012 sec Sets the length of the loop SPEED 100 100 Sets the playback direction and playback speed The loop plays backward when this is set to a negative value stops when this is set to zero and play...

Page 159: ...back direction and gate length This gives you the loop playback a digital groove feeling Parameter Value Explanation TYPE 1 10 Sets the scatter type DEPTH 10 20 30 40 50 60 70 80 90 100 Adjusts the sc...

Page 160: ...1 16 1 8 1 4 1 2 1 2 Sets the period at which the playback speed is changed FILTER 0 100 Attenuates the high frequency range PITCH OFF ON When this is turned ON pitches that were lowered due to the ch...

Page 161: ...00 Sets the length of the e ect sound LEVEL 0 100 Adjusts the volume of the e ect sound LOW CUT FLAT 20 25 31 40 50 63 80 100 125 160 200 250 315 400 500 630 800 Hz Sets the frequency range at which t...

Page 162: ...ect sound is repeated SEND 0 100 Adjusts the volume of sound sent to the e ect L DAMP F FLAT 80 100 125 160 200 250 315 400 500 630 800 Hz Sets the frequency range that is attenuated each time the del...

Page 163: ...16D 1 8 1 4T 1 8D 1 4 1 2T 1 4D 1 2 1 1T 1 2D 1 1 when the SYNC parameter is ON Sets the sound delay time FEEDBACK 0 99 Adjusts the amount of feedback for the e ect HF DAMP 200 250 315 400 500 630 80...

Page 164: ...32 1 16 1 8 1 4 1 2 1 1 2 1 when the SYNC parameter is ON Sets the period at which the playback speed is lowered RESONANCE 0 100 Adjusts the lter s resonance level Increasing the value further emphasi...

Page 165: ...ency of each band increases WIDTH 0 100 Sets the bandwidth Larger values produce a narrower bandwidth which further isolates the speci c frequency components that pass through the lter BALANCE 100 0 0...

Page 166: ...should be slowed down RATE 1 128 1 64 1 32 1 16 1 8 1 4 1 2 1 2 Sets the period at which the playback speed is changed RESONANCE 0 100 Adjusts the lter s resonance level Increasing the value further...

Page 167: ...r values make the tape speed slower which creates a longer interval between delay sounds FEEDBACK 0 99 Adjusts the volume of the delay repeat sound LEVEL 0 100 Adjusts the volume of the e ect sound MO...

Page 168: ...ts the amount of feedback for the e ect LEVEL 0 100 Sets the volume of the e ect sound L DAMP F FLAT 80 100 125 160 200 250 315 400 500 630 800 Hz Sets the frequency range that is attenuated each time...

Page 169: ...that the frequency range set in CUTOFF is emphasized FLT TYPE Sets the lter type LPF A low pass lter This lter lets frequencies pass through that are higher than the frequency range set in CUTOFF BPF...

Page 170: ...parameters are set Use caution not to raise the values too much Parameter Value Explanation DRIVE 0 48 dB Adjusts the strength of the distortion Eq LOW 24 24 dB Adjusts the amount of boost cut for th...

Page 171: ...an analog record playing Parameter Value Explanation COMP 0 100 Sets the compression feel a unique part of the analog record s sound NOISE 0 100 Adjusts the volume of the noise WOW FLUT 0 100 Sets th...

Page 172: ...e ect simulates the sound of an analog record playing Parameter Value Explanation FREQUENCY 0 100 Sets the frequency characteristics of the playback system NOISE 0 100 Adjusts the volume of the noise...

Page 173: ...0 Sets the tone HISS 0 100 Adjusts the volume of the noise AGE 0 60 years Sets how many years the cassette tape has deteriorated DRIVE 0 100 Adjusts the amount of distortion WOW FLUT 0 100 Sets the in...

Page 174: ...ller settings emphasize the low frequency range CUTOFF 200 250 315 400 500 630 800 1000 1250 1600 2000 2500 3150 4000 5000 6300 8000 Hz Sets the frequency range in which the post lter the lter that th...

Page 175: ...HALL1 HALL2 Sets the type of reverb TIME 0 100 Sets the reverb time LEVEL 0 100 Adjusts the volume of the e ect sound LOW CUT FLAT 20 800 Hz Sets the frequency range at which the e ect sound is atten...

Page 176: ...33 2 30 sec Sets the cycle period of the e ect sound BALANCE 100 0 0 100 Adjusts the volume balance between dry the original sound and e ect sound EQ LOW 15 15 dB Adjusts the amount of boost cut of t...

Page 177: ...land JUNO 106 and JX series Parameter Value Explanation MODE JUNO 1 JUNO 2 JUNO12 JX 1 1 JX 1 2 Sets the type of e ect NOISE 0 100 Adjusts the volume of noise generated by the e ect BALANCE 100 0 0 10...

Page 178: ...ON Sets the cycle period of the e ect sound MANUAL 0 100 Sets the frequency range in which the e ect is applied Smaller values reduce the anging e ect in the low end RESONANCE 0 100 Adjusts the lter s...

Page 179: ...ts the cycle period of the e ect sound MANUAL 0 100 Sets the frequency range in which the e ect is applied Larger values reduce the phasing e ect in the low end RESONANCE 0 100 Adjusts the lter s reso...

Page 180: ...e SYNC parameter is OFF 1 000 0 010 bars when the SYNC parameter is ON Sets the cycle period of the e ect MANUAL 0 100 Sets the frequency range in which the e ect is applied DEPTH 0 100 Sets the depth...

Page 181: ...the sequence pattern SPEED 0 100 when the SYNC parameter is OFF 2 1 to 1 64T bars when the SYNC parameter is ON Sets the period over which the sequence pattern repeats DEPTH 0 100 Sets the slicing de...

Page 182: ...0 010 when the SYNC parameter is ON Sets the cycle period of the e ect TYPE Sets the type of e ect TRE Cyclically changes the volume tremolo PAN Cyclically changes the panning WAVE Sets how the e ect...

Page 183: ...in semitone steps Parameter Value Explanation PITCH1 PITCH2 24 12 semi Adjusts the amount that PITCH1 or PITCH2 is pitch shifted BALANCE 100 0 0 100 Adjusts the volume balance between dry the origina...

Page 184: ...resonate counting from the root of the SCALE value SPREAD UNISON TINY SMALL MEDIUM HUGE Sets the octave of the resonator CHARACTER 0 100 Adjusts the brightness and detuning of the sound SCALE C maj B...

Page 185: ...t is applied SENS 0 100 Adjusts the volume of the e ect sound BALANCE 100 0 0 100 Adjusts the volume balance between dry the original sound and e ect sound POLARITY OFF ON Sets the direction in which...

Page 186: ...quency range in which the pre lter the lter that the sound passes through before e ects are applied works RATE 0 100 Sets the sample rate of the e ect Larger values make the sample rate lower for a mo...

Page 187: ...s the amount of distortion TONE 100 100 Sets the tone Larger settings emphasize the high frequency range Smaller settings emphasize the low frequency range BALANCE 100 0 0 100 Adjusts the volume balan...

Page 188: ...sts the amount of distortion TONE 100 100 Sets the tone Larger settings emphasize the high frequency range Smaller settings emphasize the low frequency range BALANCE 100 0 0 100 Adjusts the volume bal...

Page 189: ...t of the mid frequency range HIGH GAIN 15 15 dB Adjusts the amount of boost cut of the high frequency range LOW FREQ 20 25 31 40 50 63 80 100 125 160 200 250 315 400 Hz Sets the low frequency range Mi...

Page 190: ...tion SUSTAIN 0 100 Sets how long the e ect is applied to the decaying sound ATTACK 0 100 Sets how long it takes to reduce the volume when a high input level is detected RATIO 0 100 Sets the compressio...

Page 191: ...ice Lower settings give a more masculine vocal character and higher settings give a more feminine vocal character BALANCE 100 0 0 100 Adjusts the volume balance between dry the original sound and e ec...

Page 192: ...an iOS device and so on At that time you can send pitch bend messages to continuously change the pitch For note messages Note Number 0 127 and pitch bend messages set the MIDI channel on your external...

Page 193: ...rb BG Models a lead guitar sound played using a MESA Boogie combo amp MATCH Models a Matchless D C 30 MS Models a Marshall 1959 SLDN Models a Soldano SLO 100 DRIVE 0 100 Adjusts the volume and distort...

Page 194: ...parameter for all samples in the bank on o ROLL button ROLL SET Sets the roll interval how quickly the roll repeats Setting the Roll Interval START END button CHOP Splits the sample at the marker pos...

Page 195: ...Resampling a Sample RESAMPLE Creating a New Pattern Resampling a Pattern RESAMPLE Pad 10 COUNT IN Adds a count in before sampling or pattern recording begins Adding a Count in Before Sampling Adding a...

Page 196: ...button While holding down the SHIFT button Function explanation Pads 1 16 Sets which sample playback audio is sent to which bus meaning which e ects are used for each sample Deciding on E ects to Use...

Page 197: ...s that use the COPY button While holding down the COPY button Function explanation EXIT button Copies all samples or patterns in a bank to a di erent bank Copying the Sample from a Pad Copying the Pat...

Page 198: ...Unlock the lock switch on the left side of the SD card SD CARD Full The SD card has run out of free space Delete any unneeded data on the card Internal Storage Full There is not enough storage capaci...

Page 199: ...Appendix Audio Diagram...

Page 200: ...upports WAV AIFF MP3 FLAC M4A Sample Rate 48 kHz Pattern sequencer Resolution 480 ticks per quarter note Pattern length 1 to 64 bars Recording method Realtime Loop Recording with shu e quantize functi...

Page 201: ...er Expected Battery Life under Continuous Use Alkaline battery Approx 2 5 hours Ni MH battery Approx 3 5 hours This can vary depending on the speci cations of the batteries capacity of the batteries a...

Page 202: ...e 3 Messages Altered Note Number 36 51 C2 E 3 CH 1 10 1 36 51 C2 E 3 CH 1 10 1 0 127 CH 11 2 True Voice 36 51 C2 E 3 1 Velocity Note On Note O After Touch Key s Channel s Pitch Bend 2 Control Change P...

Page 203: ...J 2 Enabled when INPUT FX is Vocoder MIDI CH 11 3 Output when MIDI Sync Out is ON and when there is no tempo input from an external device 4 Enabled when this unit is in remote mode when a tempo signa...

Page 204: ...imprint Model01 SP 404MK Version 1 10 Title01 Reference Manual FileNo01 1 00 Published Oct 13 2021 Title02 Roland Corporation Trademark 2021 Roland Corporation...

Reviews: