56
9 Software Guide
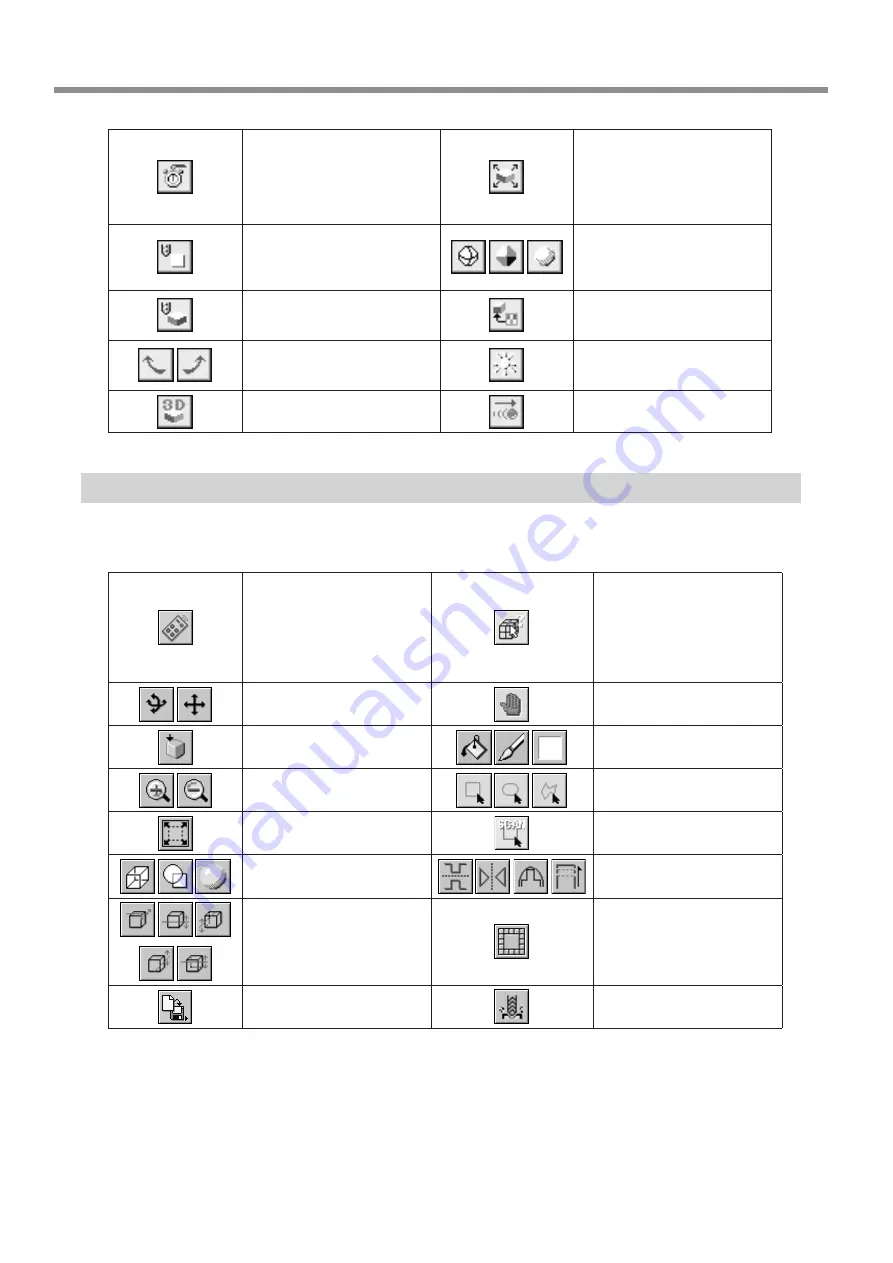
This displays a prediction of how
much time cutting will take. The
time is a general estimate.
In addition to the time, you can
also verify the tool movement
distance and movement range.
This enlarges or reduces what
is displayed to fill the drawing
size.
This displays the simulation
screen as a flat (two-dimension-
al) view.
This selects how the object
is displayed when on the 3D
screen when not performing
any operation.
This displays the simulation
screen as a solid (three-dimen-
sional) view.
This selects the image to paste
on the surface of the work-
piece.
These change the perspective
when displaying a simulation
three-dimensionally.
This changes the direction and
brightness of incident light,
thereby changing the shading.
This is for checking the shape
after cutting simulation.
This displays the movement of
the tool with animation.
Dr.PICZA
For information on how to use Dr. PICZA, see “7 Operation Guide [Scanning Section].”
This section describes the controls for Dr. PICZA.
This unhides and hides the
controller window. At the con-
troller window, you can make
the settings for the various
scanning parameters.
These display the coordinates
of the point chosen with the
mouse pointer.
Clicking a start point and
an end point shows you the
distance between the two
points.
These choose how an object
moves when dragged.
This undoes the very last op-
eration.
This displays the top surface
of an object.
These color a surface of the
object.
These zoom the view of an
object in or out.
These specify the edit area for
three-dimensional data.
This displays the object, filling
the view area.
This specifies the range to
rescan.
These choose how an object
is drawn.
These edit three-dimensional
data.
These adjust the slant of an
object.
This deletes data in the se-
lected range.
This saves data in various file
formats.
This starts MODELA Player.


