30
6 Operation Guide [Cutting Section]
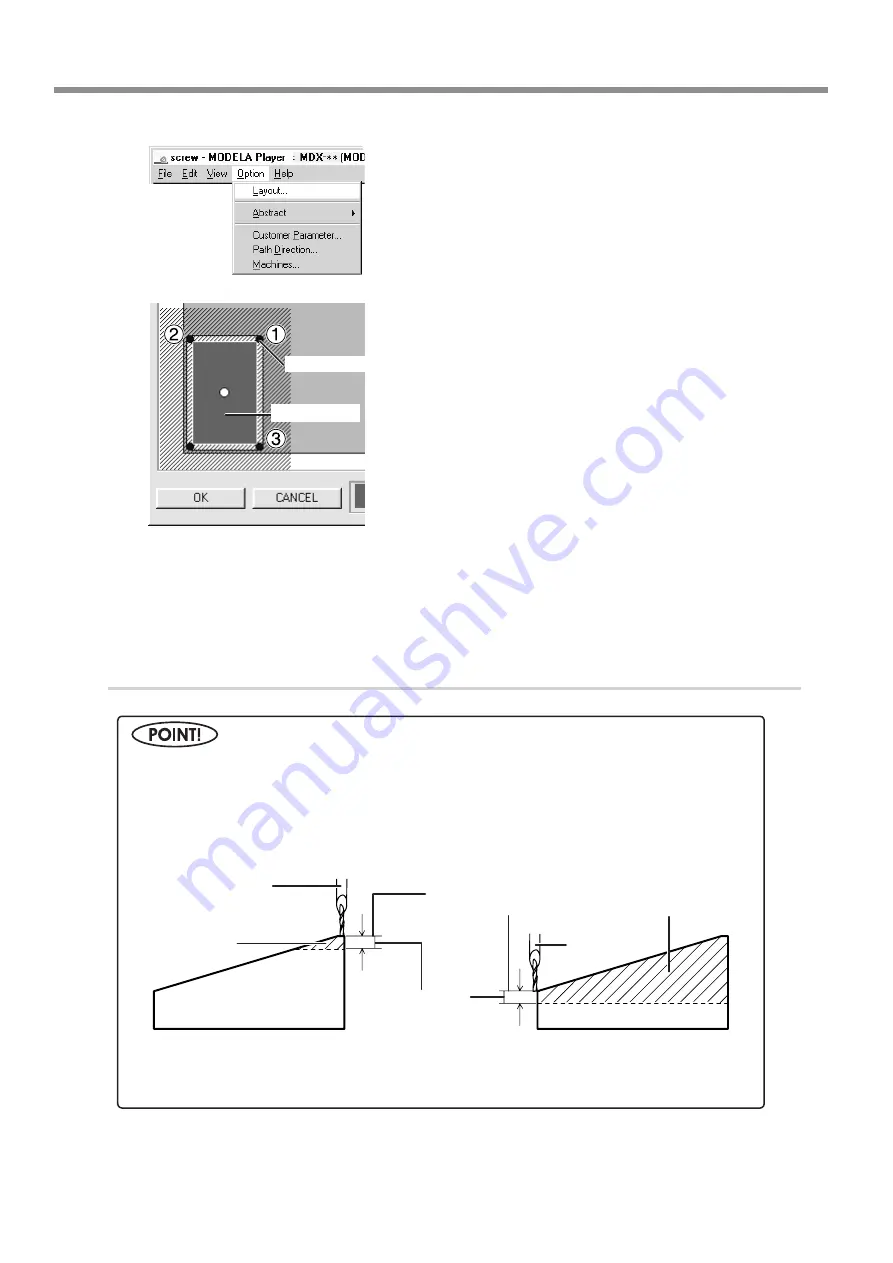
From the [Options] menu, click [Layout...].
The [Layout/Surfacing] dialog box appears.
The blue rectangle is the range of the object.
When you double-click one of the black circles displayed
at the corners of the object, the cutting tool descends to
the depth-direction reference point at that location.
Double-click black circles in the sequence shown by the
numbers in the figure and verify the cutting position.
To move the object's cutting position, drag the blue rect-
angle.
If the workpiece is cut when you lower the cutting tool at positions 1 through 3 in step 2,
then skip ahead to the next section, "3. Reset the Depth-direction Reference Point."
If it is not cut, then proceed to step 2 of "4. Perform Surfacing" and perform surfacing.
To make the setting for the cutting position only without performing surfacing, then click
[OK].
3.
Reset the Depth-direction Reference Point
In "2 verify the specified cutting position and the height when the tool is lowered," if the tool cut the surface of
the workpiece, then you need to redo the setting.
Reset the depth-direction reference point at the highest position on the workpiece.
If surfacing is started without redoing the setting first, then the amount of cutting in the first pass increases, which
may place excessive load on the tool and make it impossible to complete surfacing.
Blue rectangle
Black circles
Workpiece
Workpiece
Cutting tool
Amount cut in
first pass
Cutting tool
Amount cut in
first pass
Depth-direction
reference point
Amount of
surfacing
OK
Not OK


