50
www.rinnai.it
MAIN COMPONENTS DISASSEMBLY
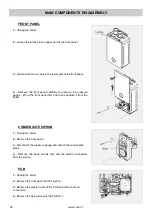
FRONT PANEL
1 -
Unplug the boiler.
2 -
Loosen the latches in the upper part of the front panel.
3 -
Unscrew the two screws in the lower part of the front panel.
4 -
Remove the front panel carefully to preserve the pressure
gauge - lift up the front panel first and then separate it from the
boiler.
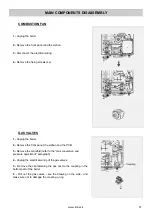
CONDENSATE SIPHON
1 -
Unplug the boiler.
2 -
Remove the front panel.
3 -
Disconnect the pressure gauge and detach the condensate
pipes.
4 -
Remove the fixing screws (3x) and the electric connectors
from the siphon.
PCB
1 -
Unplug the boiler.
2 -
Remove the front panel and the siphon.
3 -
Remove the plastic cover of the PCB and disconnect all
connectors.
4 -
Remove the fixing screw of the PCB (1x).
Summary of Contents for Mirai 24
Page 1: ......
Page 2: ...2 www rinnai it ...
Page 11: ...www rinnai it 11 MAIN COMPONENTS ...
Page 12: ...12 www rinnai it MAIN COMPONENTS ...
Page 30: ...30 www rinnai it MAIN COMPONENTS ...
Page 31: ...www rinnai it 31 GENERAL SCHEME AND OPERATION PRINCIPLES ...
Page 38: ...38 www rinnai it INSTALLATION Type C room sealed forced flue application ...
Page 55: ...www rinnai it 55 WIRING DIAGRAM ...
Page 56: ...56 www rinnai it DIAGNOSIS POINT ...
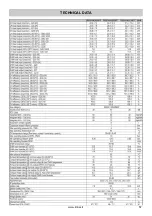
Page 57: ...www rinnai it 57 TECHNICAL DATA ...
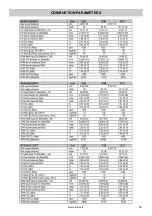
Page 59: ...www rinnai it 59 COMBUSTION PARAMETERS ...
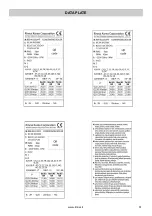
Page 61: ...www rinnai it 61 DATA PLATE ...
Page 62: ...62 www rinnai it CE CERTIFICATE ...
Page 63: ...www rinnai it 63 ...


