
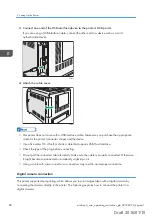


If you select [PIN Code Method], enter the displayed PIN code in the Registrar.
8.
Press [Start]
When Wireless LAN Easy Setup is complete, press [OK].
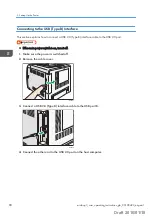
1.
Press the [User Tools] key, and then display the [Network] screen.
[System Settings] [Interface Settings] [Network]
2.
Select Wireless LAN as the network interface to be used.
[LAN Type] [Wireless LAN] [OK]
3.
Press [Exit].
4.
Display the [Wireless LAN Easy Setup] screen.
[Wireless LAN] [Wireless LAN Easy Setup]
5.
Set up a Wireless LAN using WPS.
• [Push Button]
Press the WPS button on the wireless LAN access point Press [Connect] on the screen
• [PIN Code]
Enter the displayed PIN code in the Registrar on the wireless access point’s webpage,
and then press [Connect] on the screen.
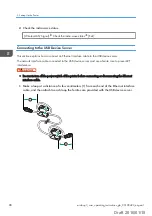
Configuring a wireless LAN manually
To set up a wireless LAN manually, specify the transmission mode and SSID (Service Set Identifier) of the
wireless access point that the printer will use for network access.
Ask your network administrator for the SSID.
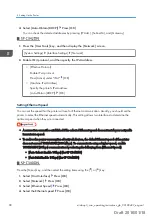
Setting the communication mode
Press the [Menu] key, and then select the setting items using the [ ] or [ ] key.
1.
Select [Host Interface] Press [OK]
2.
Select [Network] Press [OK]
3.
Select [LAN Type] Press [OK]
4.
Select [Wireless LAN] Press [OK] Press [Escape]
2. Setting Up the Printer
94
midas-p3_com_operating_instructions_gb_00198499_eng.xml
Draft 2016/01/18