Ricoh FT9105 Operating Instructions Manual Download Page 76

Stapling Copies (Staple) 

For stapling, the following limitations apply:

B4, 8

1/2

" x 14", or smaller

A3 or 11" x 17"

Staple capacity

2 ~ 50 sheets 

*1

2 ~ 30 sheets 

*1

Paper weight

64 ~ 80 g/m

2

, 17 ~ 20 lb 

*2

*1

If you use thicker paper or a special kind of paper, your service representative might

have to reduce the maximum staple capacity.

*2

In Cover/Paper Designate mode, the maximum paper weight is 163 g/m

2

, 43 lb or 90 lb

index for the cover or slip sheets.

Copies of different sizes cannot be stapled.

When you select Staple mode, Sort mode will be selected automatically. You can
also select Stapling in the Stacking with the user tools (

 See page 115). How-

ever, when you make 1 set of copies in Stack mode, you cannot use the Sta-
pling.

You can adjust the staple position using the user tools. 

 See page 124.

For how to add staples when staples have run out, 

 see page 53.

You cannot use Stapling in Tab Sheet mode.

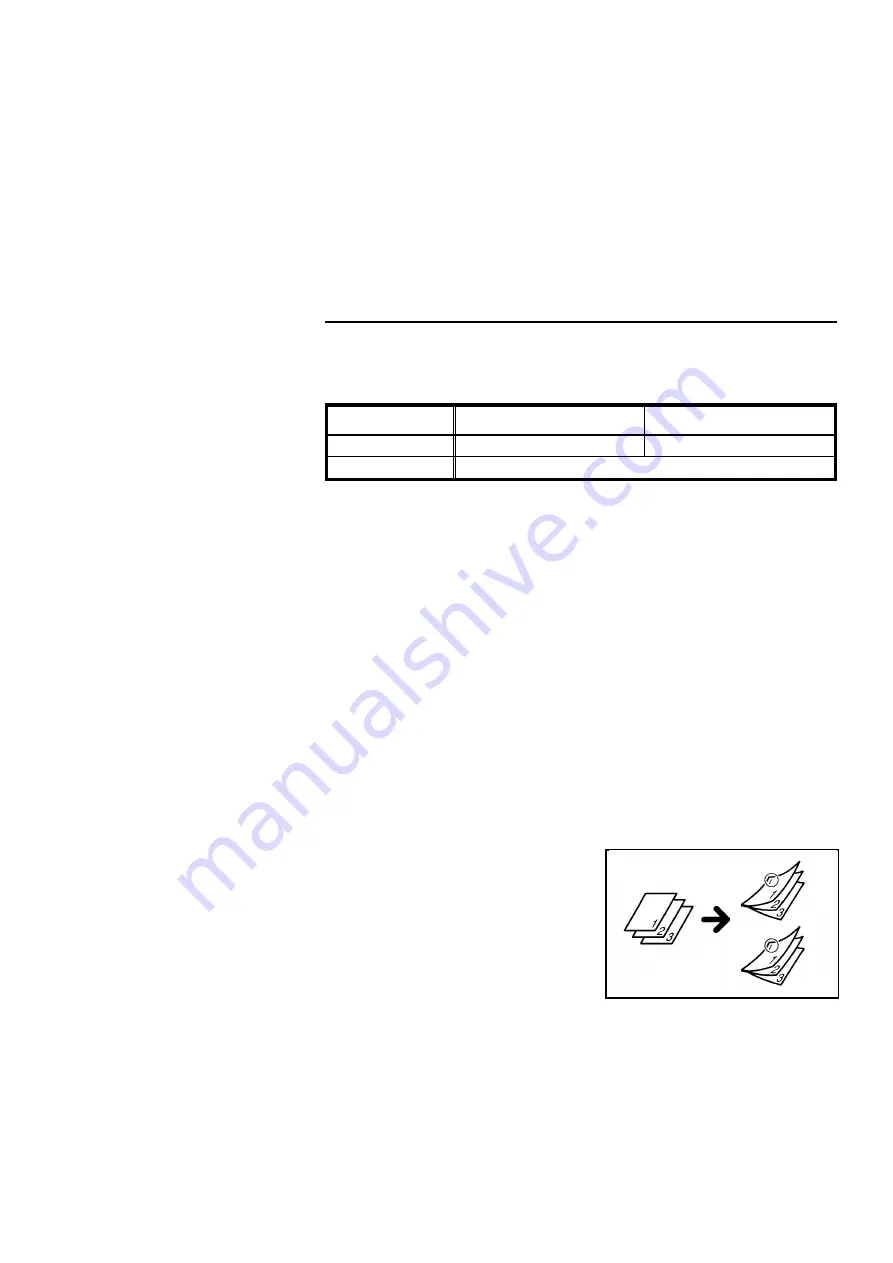
Stapling the top left corner of each set (1 Staple Top)  

Select the [Staple: Top] key. When
you set a stack of originals in the
recirculating document handler or
document feeder, groups of copies
are delivered to the finisher and auto-
matically stapled. Select this mode
when you copy originals oriented
sideways (

:

). 

GROUP COPIES (FINISHING)  

b-na-7

67

Summary of Contents for FT9105

Page 1: ...panel display 8 WHAT YOU CAN DO WITH THIS COPIER FUNCTIONS 10 SETTING ORIGINALS ORIGINALS 22 Notes When Setting Originals 22 Recommended Original Types 23 DF INDICATORS 26 SETTING ORIGINALS IN THE RE...

Page 2: ...or Tab Sheet Mode 45 CHANGING PAPER SIZE 47 1st 2nd And 3rd Paper Tray 47 ADDING TONER STAPLES AND OIL ADDING TONER 50 ADDING STAPLES 53 ADDING OIL 54 COPYING BASIC OPERATIONS 56 Using The Touch Panel...

Page 3: ...iginals 1 Sided Originals To 2 Sided Copy 88 Making 2 Sided Copies From 2 Sided Originals 2 Sided Original To 2 Sided Copy 89 Making 1 Sided Copies From 2 Sided Originals 2 Sided Original To 1 Sided C...

Page 4: ...HART 110 CHANGING THE COPIER SETTINGS USER TOOLS 114 How To Access The User Tools 114 User Tool Menu 115 SERVICE REPRESENTATIVE SETTINGS 141 MAINTAINING YOUR COPIER CLEARING PAPER AND ORIGINAL MISFEED...

Page 5: ...F YOU CANNOT MAKE COPIES AS YOU WANT 182 SPECIFICATIONS WHERE TO PUT YOUR COPIER COPIER 184 Recirculating Document Handler 187 Document Feeder 187 LARGE CAPACITY TRAY 188 FINISHER 188 WHERE TO PUT YOU...

Page 6: ...PROBLEMS SAFETY INFORMATION When using your copier the following safety precautions should always be followed Safety During Operation In this manual the following important symbols are used WARNING Ig...

Page 7: ...s direct or indi rect reflected eye contact with the laser beam may cause serious eyes damage When the copier needs to be checked adjusted or repaired contact your service representative Do not take a...

Page 8: ...electric shock might occur Do not place the copier on an unstable or tilted surface If it topples over it could cause injury Do not reuse stapled paper Do not use aluminum foil carbon containing pape...

Page 9: ...pier might move or come down to cause a personal injury If you use this copier in a confined space make sure there is a continuous air turnover F When clearing misfed originals in the document feeder...

Page 10: ...WHERE IS IT WHAT IS IT b na 2 1...

Page 11: ...COPIER EXTERIOR 3 15 2 1 12 13 11 14 8 16 4 10 7 9 5 6 COPIER EXTERIOR b na 2 2...

Page 12: ...ed here 9 Upper cover Open to access the inside of the copier 10 Right front cover Open to access the inside of the copier 11 Down key Press to load paper into the paper tray or change paper The key s...

Page 13: ...d here Pull out when a misfeed occurs in the fusing section When accessing the inside of the copier use caution This unit may be very hot 3 Toner cartridge Replace the toner cartridge when the copier...

Page 14: ...n be provided with the following options 1 Large capacity tray LCT You can store up to 4 500 sheets of plain paper here 2 Finisher Copies will be sorted stacked or stapled here Other option key counte...

Page 15: ...to enter the desired number of copies or data for the Size Magnification Number Key Zoom Paper Designate Chapters or the user tools Up to 9999 copies can be entered as the copy set number 4 Enter key...

Page 16: ...lay color See page 57 9 Preset key Touch to use the Preset Copying See page 102 10 Program key Touch to store recall or delete programs See page 105 11 Guidance key Touch for help on basic operations...

Page 17: ...e 56 Initial Display To save paper resources 1 Sided Originals To 2 Sided Copy mode is the default setting with this machine If you want to cancel this mode touch the Duplex key and 1 Sided 2 Sided ke...

Page 18: ...WHAT YOU CAN DO WITH THIS COPIER b na 3 9...

Page 19: ...e Duplex key and 1 Sided 2 Sided key You can change this default setting with the user tools See page 119 Originals of the same size Set a stack of originals in the recirculating document handler or d...

Page 20: ...equipped with the optional finisher Sorting into sets 123 123 123 Select Offset ON or Offset OFF mode See page 64 Stacking all copies of a page together 111 222 333 Touch the Stack key Then se lect O...

Page 21: ...r of copies Touch the Staple Top key See page 67 Stapling the bottom left corner of copies Touch the Staple Bottom key See page 68 Stapling the left side of copies Touch the Staple 2 staples key See p...

Page 22: ...Cover Paper Desig nate key Then touch the Front key See page 70 Copying the back cover of the originals Select the Cover Paper Desig nate key Then touch the Back key See page 71 Copying designated pag...

Page 23: ...1 sided originals into chapters of 2 sided cop ies Select 1 Sided Originals To 2 Sided Copy mode and Paper Designate mode Then touch the Paper Designate Chapters and Chapters key See page 82 FUNCTIONS...

Page 24: ...g Select one of Duplex modes Then touch the Margin Adjust key and adjust the margin See page 84 With the default setting 1 Sided Originals To 2 Sided Copy mode is selected If you want to make 2 sided...

Page 25: ...ing area of the original image Select the Erase Center Bor der key Then adjust the margin width See page 85 Erasing the center margin of the original image Select the Erase Center Bor der key Then adj...

Page 26: ...age 88 With the default setting this function is selected You can change this de fault setting with the user tools See page 119 2 sided original to 2 sided copy Select the Duplex key Then touch the 2...

Page 27: ...Select the Reduce Enlarge key Then select the desired preset ratio See page 91 Having the copier choose the reproduction ratios Set one original at a time in the document feeder and select the Paper s...

Page 28: ...e 94 or Select the Reduce Enlarge key Then touch the Zoom key and make sure that the Number Keys key is selected Enter your desired ratio using the Number keys See page 95 Fitting the original to a co...

Page 29: ...key See page 105 Temporarily stopping one job to copy something else Make urgently needed copies using the Interrupt key See page 100 Choosing the paper size The copier selects a suitable size of cop...

Page 30: ...SETTING ORIGINALS b na 4 21...

Page 31: ...Narrow margins on all four sides will not be copied as shown in the illus tration If you want to copy these margins adjust the margins or change the reproduction ratio You can also make copies without...

Page 32: ...riginals 60 originals 80 g m2 20 lb 40 originals 60 originals 80 originals 80 originals 64 g m2 17 lb 50 originals 100 originals 100 originals 100 originals If the number of originals that you set exc...

Page 33: ...A4 or 81 2 x 11 B5 128 g m2 34 lb 18 originals 29 originals 29 originals 105 g m2 28 lb 21 originals 36 originals 36 originals 80 g m2 20 lb 27 originals 45 originals 45 originals 64 g m2 17 lb 30 or...

Page 34: ...orated originals with more than 7 perforations greater than 8 mm 0 3 in diameter Bound originals Any kinds of coated paper carbon paper thermal paper etc Folded creased curled or damaged originals If...

Page 35: ...r If an original is set in the document feeder it will be automatically fed and copied while this indica tor is lit 2 Insert original indicator Shows that the recirculating document handler is ready f...

Page 36: ...originals on the recirculating document handler when you are not using it To prevent original misfeeds do not mix different sizes of originals in the recircu lating document handler To prevent origin...

Page 37: ...you set many originals at once follow the table provided on page 23 to find out the maximum set number If too many originals are set in the recir culating document handler original misfeeds might occu...

Page 38: ...tecting the original separa tor s position 7 Close the original feed in unit cover If you do not close the original feed in unit cover original misfeeds might occur 8 Select your desired modes and pre...

Page 39: ...200 sheets of paper are delivered to the copy tray the copier will stop copying Remove the copies and press the Start key You can change this number with the user tools See page 115 9 After a copy run...

Page 40: ...document han dler and you want to make 2 or more sets of copies in Sort mode make 1 set of copies setting originals in the document feeder Then set the copies in the recir culating document handler a...

Page 41: ...ne to one copy start key The Start key will change from green to red The copied originals will be deliv ered to the original stacker and the copies are delivered to the copy tray or shift tray The cop...

Page 42: ...use the original front and rear guides check the original size 2 Set the first original face down and select your desired modes Then press the Start key After the original is fed the auto feed indicat...

Page 43: ...e copy tray the copier stops copying Remove copies and press the Start key You can change this number with the user tools See page 115 Copies of the same original are delivered to the copy tray or shi...

Page 44: ...original on the ex posure glass Auto Paper Select mode cannot be used You should select the paper size 3 Lower the recirculating document handler When you set a book original on the exposure glass do...

Page 45: ...ginals and press the Sample Copy key The first original will be copied If you cannot get the proper copy try changing the copy settings Even if you have selected a Finisher mode the sample copy will d...

Page 46: ...LOADING PAPER b na 5 37...

Page 47: ...paper before loading Do not use copy paper that has been already copied on Paper Storage Paper should always be stored properly to avoid damage absorption of moisture and curling as poor conditions wi...

Page 48: ...l large capacity tray contact your service repre sentative Non recommended Paper Avoid using the following paper because these kinds of paper cause paper misfeeds or poor copy image Curled folded crea...

Page 49: ...al operation for this machine not a failure When the following display appears You can still make copies How ever it is better to load paper into the paper tray at this time You can disable this messa...

Page 50: ...Or 3rd Paper Tray 1 Press the Down key The Down key will start blinking This means that the tray is moving down into position 2 After the Down key has stopped blinking pull the tray all the way out W...

Page 51: ...y and make sure that the front and rear side guides and the end plate securely hold the paper If they are loose paper mis feeds might occur If paper misfeeds in the duplex tray or finisher occur due t...

Page 52: ...Large Capacity Tray 1 Press the Down key The Down key will start blinking This means that the tray is moving down into position 2 After the Down key has stopped blinking pull the tray all the way out...

Page 53: ...capacity tray and damage it when the paper tray is set Stack paper evenly If paper misfeeds in the duplex tray or finisher occur due to curled paper load paper upside down If there is still some pape...

Page 54: ...loading remove any bent or damaged tab sheets The original image and tab sheet set order should be as shown below 1 Press the Down key The Down key will start blinking This means that the tray is mov...

Page 55: ...y 4 Load tab sheets in the tray The edge opposite the tabs must be flush with the left fence Do not stack paper over the limit mark 5 Adjust the end plate to touch the tabs 6 Push the tray in until it...

Page 56: ...own key 2 After the Down key stops blink ing pull the tray all the way out 3 While pressing the release lever on the rear side guide slide the front and rear guides completely away from each other The...

Page 57: ...ey securely hold the paper 6 Slide the end plate until the paper is flush with the paper tray fence Make sure that the front and rear side guides and the end plate se curely hold the paper If they are...

Page 58: ...ADDING TONER STAPLES AND OIL b na 6 49...

Page 59: ...rtridge When the following display appears You can still make about 2 000 copies However it is better to change the toner cartridge WARNING Do not incinerate the used toner or toner containers Toner d...

Page 60: ...the shutter is pulled the used toner will be used again This will damage the copier Note Shake a new toner cartridge well at least 5 10 times Note Pull the green seal until you can see the red line I...

Page 61: ...ge when you change the toner cartridge stick the vinyl bag that is in the toner cartridge box on the edge of the toner replen ishing cover 2 Follow the instructions on the sticker inside the toner rep...

Page 62: ...ple Bottom or Staple 2 staples key The stapling function requires the optional finisher Before setting a refill for staples in the staple cartridge do not remove ribbon of staples The sticker inside t...

Page 63: ...is empty 1 Open the front door 2 Remove the oil tank cap 3 Pour oil into the oil tank Do not exceed the maximum oil level indicated in the illustration If any oil is spilled be sure to wipe it up 4 R...

Page 64: ...COPYING b na 7 55...

Page 65: ...disabled see the message area table on pages 178 to 180 and take actions according to the procedure described 2 Check Modes key When you set 2 or more copy settings touch to see all modes that you ha...

Page 66: ...l display with any hard or sharp object pen pencil etc Always use your fingers or something with a soft tip Display color adjustment To change the display color touch the Display Color key to switch t...

Page 67: ...e Start key turns green When the Energy Saver r indicator is lit and the display is off The copier is in Energy Saver mode Press the Energy Saver key to return to the Ready condi tion For details abou...

Page 68: ...Input your user code 8 digits using the Number keys then set any features you require and make copies To prevent others from making copies using your user code press the Clear Stop and Clear Modes key...

Page 69: ...change this time using the user tools The avail able settings are 1 minute or 3 minutes See page 118 While the guidance display is shown the Start key is red and you cannot make copies 1 Touch the Gui...

Page 70: ...mode with the user tools See page 123 When you make copies in Auto Paper Select and Preset R E modes the paper size will be selected as shown in the following tables If there is no paper size that is...

Page 71: ...tray selected with the user tools See page 116 When you want to select paper size manually If you cancel Auto Paper Select mode you can select your desired paper size using the Paper Tray Selector key...

Page 72: ...e user tools See page 117 The Manual Image Density keys appear even when Auto Image Density is selected However you can cancel this setting so that you cannot see the Man ual Image Density keys in Aut...

Page 73: ...orting Into Sets 123 123 123 When you set originals in the document feeder the copy set number will become 1 automatically When you use originals that are not suitable for the recirculating document h...

Page 74: ...set ON mode copying pauses for one of two cycles while the shift tray moves in 1 sided original to 1 sided copy mode Example 2 Not separating sets of copies Offset OFF 1 Set originals in the recircula...

Page 75: ...tacks You can set the copier to deliver cop ies face up image side up in Stack mode with the user tools See page 115 1 Set originals in the recirculating document handler or document feeder 2 Touch th...

Page 76: ...ort mode will be selected automatically You can also select Stapling in the Stacking with the user tools See page 115 How ever when you make 1 set of copies in Stack mode you cannot use the Sta pling...

Page 77: ...elivered to the finisher and auto matically stapled Select this mode when you copy originals oriented lengthwise Stapling the top and bottom left side of each set 2 Sta ples Select the Staple 2 Staple...

Page 78: ...see page 105 You can set special paper for cover and slip sheets into the 1st tray When you set tab sheets you should designate the 3rd tray as a tab sheet tray with the user tools See page 117 You c...

Page 79: ...cover sheets will be blank See page 72 You can change this setting with the user tools to facilitate copying onto both sides of the cover sheets See page 116 You can select both front and back cover...

Page 80: ...opier should be equipped with the optional finisher You can cancel this function with the user tools see page 116 and get the back covers delivered as other copies The copying speed will be slow only...

Page 81: ...he front and back cover sheets have only the images of the first and last originals and have no image on the other sides You can change this setting with the user tools to facilitate copying onto both...

Page 82: ...paper You will get blank sheets of special paper separating each chapter instead How to set Paper Designate mode using slip sheets Slip Sheet Note When you select Slip Sheet mode with 2 Sided Copy mod...

Page 83: ...mber When you want to designate continuous pages follow the steps below Designate the first page of original to be copied on the slip sheet Touch the key Designate the last page of the original to be...

Page 84: ...ets Before using this function you should set the number of tabs see step 3 with the user tools See page 120 The copying speed in Tab Sheet mode will be reduced You can use A4 81 2 x 11 tab sheets In...

Page 85: ...should be as shown below Example Number of tabs is 5 5 sets 4 Touch the Cover Paper Desig nate key Then select the Pa per Designate Chapters key 5 Select the Tabs key 8 mm 5 mm b a image area of the...

Page 86: ...ages follow the steps below Designate the first page of original to be copied on the slip sheet Touch the key Designate the last page of the original to be copied on the slip sheet and touch the key 7...

Page 87: ...u can change this setting with the user tools to facilitate copying onto both sides of the slip sheets See pages 116 and 132 Slip Sheet mode Tab Sheet mode How to set Paper Designate and 2 Sided Origi...

Page 88: ...page number of the originals you want to copy onto slip sheets according to the guidance displayed To change the number entered touch the Clear key and enter the new number When you want to designate...

Page 89: ...oth sides of the slip sheets See pages 116 and 132 Slip Sheet mode Tab Sheet mode With the default setting 1 Sided Originals To 2 Sided Copy mode is selected In this case you don t need to do step 1 Y...

Page 90: ...rding to the guidance displayed To change the number entered touch the Clear key and enter the new number When you want to designate continu ous pages follow the steps on page 74 However if you select...

Page 91: ...his case you don t need to do step 1 You can change this default setting with the user tools See page 119 1 Touch the Duplex key and make sure that the 1 Sided 2 Sided key is selected 2 Touch the Cove...

Page 92: ...e paper A right margin of 5 mm 1 4 is automatically made on the reverse of copies in 1 Sided Originals To 2 Sided Copy mode You can adjust this margin using the user tools See page 120 When you make a...

Page 93: ...want to make 2 sided copies from 1 sided originals you don t need to follow step 1 You can change this default setting with the user tools See page 119 1 Select one of Duplex modes 1 Sided 2 Sided 2 S...

Page 94: ...enter and margin widths selected by the Erase Cen ter Border key with the user tools See page 120 The width of the margin to be erased can be set as follows Erase Border Metric version 2 5 20 mm in 2...

Page 95: ...1 Touch the Erase Center Bor der key 2 Adjust the margin using the or keys ERASING PARTS OF THE COPY IMAGE ERASE b na 7 86...

Page 96: ...aries for each kind of copy paper as shown in the table below When you set a stack of originals in the recirculating document handler or docu ment feeder the numbers in the table below show the maximu...

Page 97: ...educe Enlarge mode You cannot set a stack of originals in the recircu lating document handler or document feeder In 1 Sided Originals To 2 Sided Copy mode if the last original is an odd page the last...

Page 98: ...ure that the 1 Sided 2 Sided key is selected Making 2 Sided Copies From 2 Sided Originals 2 Sided Original To 2 Sided Copy 1 Touch the Duplex key 2 Touch the 2 Sided 2 Sided key MAKING TWO SIDED OR ON...

Page 99: ...Making 1 Sided Copies From 2 Sided Originals 2 Sided Original To 1 Sided Copies 1 Touch the Duplex key 2 Touch the 2 Sided 1 Sided key MAKING TWO SIDED OR ONE SIDED COPIES DUPLEX b na 7 90...

Page 100: ...reproduction ratios You can change default reproduction ratio selected by the Reduce Enlarge key with the user tools See page 120 The following ratios are the factory setting Select the ratio that is...

Page 101: ...1 Touch the Reduce Enlarge key 2 Make sure that the Preset R E key is selected 3 Select the ratio you want REDUCING AND ENLARGING b na 7 92...

Page 102: ...original size You cannot set a stack of different sized originals in the recirculating document handler or document feeder and make sure that you set one original at a time in the docu ment feeder 1 T...

Page 103: ...And Zoom Down Keys Zoom You can change the reproduction ratio from 64 to 142 in 1 steps 1 Touch the Reduce Enlarge key 2 Touch the Zoom key 3 Touch the or key repeat edly until you reach the required...

Page 104: ...You can enter any reproduction ratio between 64 and 142 using the Number key 1 Touch the Reduce Enlarge key 2 Touch the Zoom key 3 Make sure that the Number Keys key is selected 4 Enter the desired r...

Page 105: ...al and copy im age you want The ratio will be selected between 64 and 142 1 Touch the Reduce Enlarge key 2 Touch the Size Mag key 3 Enter the original size using the Number keys Up to 999 mm 99 99 can...

Page 106: ...copies are as shown below In 3 Side Full Image mode margins b c and d are ignored and the copied image will show on these areas You cannot cancel the leading margin a To clear 3 Sided Full Image mode...

Page 107: ...When you use this function set originals in the document feeder See page 99 The following original limitations apply Original size A4 B5 81 2 x 11 Original weight 52 128 g m2 14 34 lb To clear ADF 2...

Page 108: ...ide of the document feeder and press the Start key ADF Thin Paper Mode In ADF Thin Paper mode originals lighter than 52 g m2 14 lb are not damaged when being fed into the document feeder To clear ADF...

Page 109: ...cle of original feeding has finished If you press the Interrupt key while setting originals in the document feeder or setting an original on the exposure glass the copy run will stop immediately and i...

Page 110: ...upt originals and set in terrupted originals Then press the Start key If the interrupted originals are set in the recirculating document handler you need only remove the interrupt originals C Sample S...

Page 111: ...wing occurs during the current copy run Opening the door or covers When a paper or original misfeed occurs When you stop copying When the Program indicator is lit When you remove originals from the re...

Page 112: ...Job key 4 Touch the Preset key To cancel preset copying touch the Preset key again Then select the Cancel Preset Job key After the current copy job is completed the current originals will be delivere...

Page 113: ...the Start key during the warm up period the Start key will blink then the copier will start copying after the warm up period To cancel Auto Start press the Clear Stop key C Sample Sto Start Copy Clea...

Page 114: ...u designate the cover or slip sheet tray with the user tools when you store the Cover or Slip Sheet function in the Program the cover or slip sheet tray set ting is also stored Before making copies co...

Page 115: ...he program number including the previous job settings you can select if you overwrite the program When you select the No key you should select another program number Recalling your settings 1 Touch th...

Page 116: ...1 Touch the Program key 2 Touch the Delete program key 3 Select the program number you want to delete 4 Touch the Yes key 5 Touch the Exit key Guidance Program Preset STORING YOUR COPY SETTINGS IN MEM...

Page 117: ...ically after the selected time since your job is finished Your service representative can change this time 1 Press the Energy Saver key All indicators except the r Energy Saver indicator turn off For...

Page 118: ...er that is curled flatten the paper Recommended Use Of Special Paper Tray Mode If you use a paper tray as a special paper tray you can make the copier indicate Special for the appropriate Paper Tray S...

Page 119: ...Magnification 5 1 Sided To 2 Sided 6 2 Sided To 2 Sided 7 2 Sided To 1 Sided 8 Erase Border 9 Erase Center 10 Front 11 Back 12 Front Cover 13 Back Cover 14 Slip Sheet 15 Tab Sheet 16 Chapters 17 Offse...

Page 120: ...7 18 19 20 21 22 23 24 25 26 1 2 3 4 5 6 7 8 9 10 11 12 13 14 15 16 17 18 2 19 2 20 2 21 2 2 2 22 23 24 25 26 2 These modes can be used together using the user tools b na 9 Erase Reduce Enlarge Cover...

Page 121: ...b na 9 COMBINATION CHART 112...

Page 122: ...CHANGING THE COPIER SETTINGS b na 10 113...

Page 123: ...th the Number keys To set the access number contact your service representative 1 Press the Clear Modes key 2 Hold down the Clear Stop key for more than 3 seconds 3 Touch the required user tool s numb...

Page 124: ...er When you make 1 set of copies setting originals in the document feeder Max Top Tray Capacity As a default setting the copier will stop copying when 200 sheets of paper are delivered to the copy tra...

Page 125: ...Switching default The special paper tray is not selected Duplex Copy onto Cover When you make 2 sided copies from 1 sided or 2 sided originals with the Cover function you can select if the reverse sid...

Page 126: ...the Auto Paper Select or Auto Tray Switching default The 3rd tray is not designated as a tab sheet tray 3 Copy Original Size A3 11 x 17 Selection Paper and original sizes are identified For details se...

Page 127: ...lowing conditions When the Start key is red When there are originals in the recirculating document handler or document feeder While the Paper Designate display appears While the display asks you to cl...

Page 128: ...efer to the above explanation Weekly Timer Use to set the weekly timer If you set the timer the copier turns on and off at the selected time each day Before setting the weekly timer set the copier s i...

Page 129: ...rgin As a default setting a 5 mm 1 4 margin is made on the right of the reverse side of copies when making two sided copies from one sided originals You can change this back side margin default Metric...

Page 130: ...e currently selected tray Auto Tray Switching mode You can cancel this setting and if paper runs out in the currently selected tray the copier stops copying and you must select another paper tray or l...

Page 131: ...n access user tools and use this function even during a system error If you remove the Finisher Duplex Tray 2 and LCT functions these keys disap pear from the operation display When you select the Tra...

Page 132: ...t mode the expected time to be finished copying can be shown default Yes The expected time is indicated 12 OPC Segment Skip When part of the OPC belt is damaged the blemish is copied onto the paper Wh...

Page 133: ...is equipped with the optional finisher you can adjust the staple position in Staple mode default Metric version 0 mm Inch version 0 20mm 0 79 0 mm 0 0 mm 0 20mm 0 79 0 mm 0 20mm 0 79 20mm 0 79 0 mm 0...

Page 134: ...previously set code the display will instruct you to enter another code Registered codes will be sorted in numerical order Correct You can change your present user code to a new one The number of copi...

Page 135: ...played The total is displayed for each of the different sizes used You can clear all the copy counters by touching the Reset key Display items A3 B4 A4 or 81 2 x 13 B5 11 x 17 81 2 x 14 and 81 2 x 11...

Page 136: ...2 17 32 lb 60 163 g m2 16 43 lb 90 lb index 2 sided cover and 2 sided slip sheets 64 120 g m2 17 32 lb When you select the 2 sided cover or slip sheets setting the cover or slip sheets will enter the...

Page 137: ...t side of the front covers Images on the reverse side of the first original are erased and the reverse side of the front covers will be blank The front side of the last original is copied onto the fro...

Page 138: ...side of the back covers The reverse side is copied onto the reverse side of the back covers The back covers are reversed and images on the front side of the last original are copied onto the back sid...

Page 139: ...copied onto the front side of plain paper that will be delivered after the front covers The reverse sides of the front covers are blank The last original is copied onto the front side of the back cov...

Page 140: ...1 sided front cover setting or insert a blank sheet after the first original so that the second original is equivalent to the third original The last original is copied onto the front side of the bac...

Page 141: ...side of the designated original are erased and the reverse sides of the slip sheets will remain blank 2 sided slip sheet setting in 2 Sided Original To 2 Sided Copy mode The front side of the designat...

Page 142: ...is copied onto the front sides of the slip sheets The following original is copied onto the reverse sides of the slip sheets Note You cannot designate continuous pages with this setting When you want...

Page 143: ...k slip sheet setting the 1 sided slip sheet setting is selected automatically even if you have selected 2 sided slip sheet In the blank slip sheet setting only the designated original image is always...

Page 144: ...when 81 2 x 13 paper is selected 81 2 x 13 paper cannot be set in the large capacity tray 1 Access user tool 3 2 Touch the A4 key 3 Access user tool 10 4 Touch the LCT key to deselect the large capac...

Page 145: ...ered by pressing the Number keys or turn the main switch off and on If you enter the wrong number press the Clear Stop key and input the number again Your service representative can change the user to...

Page 146: ...eeds occur frequently Tray 1 Error code SC60 is displayed When you use the 2nd tray paper misfeeds occur frequently Tray 2 Error code SC61 is displayed When you use the 3rd tray paper misfeeds occur f...

Page 147: ...sport belt will appear on copies 3 Confirm which copies have stains 4 If every 5th copy has the same stain the stains are due to the OPC belt Every 5th copy Check 1st and 6th copies 2nd and 7th copies...

Page 148: ...s in the dis play Press the Start key Blank copies will be delivered to the copy tray 5 Remove blank copies from the copy tray Then check which copy has a mark and touch the appropriate key Then touch...

Page 149: ...e Down keys of the paper trays 2 Access user tool 12 3 Touch the key 4 Touch the Clear key Then confirm if you can clear the OPC Segment Skip and touch the Yes key 5 Exit user tools 6 Pull out and pus...

Page 150: ...ce representative can set the copier to display a service tele phone number on the display when error message appears in the display A3 11 x 17 double count By default the copier counts each A3 11 x 1...

Page 151: ...l Accounting mode and Security Accounting mode In normal Accounting mode all of the operators can use Accounting mode in the user tools In Security Accounting mode only key operators whose user codes...

Page 152: ...ss electricity The copier can be set to start the Energy Saver after the selected time Your service representative can select this time Paper guides lock When you use only one size of paper your servi...

Page 153: ...SERVICE REPRESENTATIVE SETTINGS b na 10 144...

Page 154: ...MAINTAINING YOUR COPIER CLEARING PAPER AND ORIGINAL MISFEEDS b na 11 145...

Page 155: ...posure glass will be copied Recirculating Document Handler Belt Lift the recirculating document handler and clean the belt with a damp cloth then wipe it with a dry cloth If there are marks on the bel...

Page 156: ...Document Feeder Clean the feed in unit with a dry cloth MAINTAINING YOUR COPIER b na 11 147...

Page 157: ...e rep resentative Caution When removing misfed paper do not touch the fusing sec tion because it could be very hot See page 4 for the position of the fusing section Do not touch the originals in the r...

Page 158: ...ee pages 156 to 171 When removing misfed paper touch only the parts specified in the instructions on the sticker inside the copier s front cover The position misfeeds occur is indi cated on the displa...

Page 159: ...When you make 2 sided copies Paper tray Fusing unit Duplex tray Duplex tray Fusing unit Finisher CLEARING COPY PAPER MISFEEDS b na 11 150...

Page 160: ...splay as shown appears 4 If you want to continue copying press the Start key When you set originals in the document feeder the original number you should copy again is indicated on the display See pag...

Page 161: ...structs you to remove mis copies from the copy tray check the copy tray Copies which were stopped inside the copier when the misfeed occurred are delivered to the copy tray Remove them Do not mistake...

Page 162: ...display instructs you to re set 2 originals remove the 2 top originals from the original stacker 3 Remove the originals from the document feeder 4 Place the originals removed in step 2 at the bottom o...

Page 163: ...tion to the 3 copies delivered to the copy tray 7 more copies are fed from the duplex tray and are waiting inside the copier After clearing the misfeed condition the copies wainting in the copier will...

Page 164: ...back side copies Example continued 17 copies for the back side are required because 3 completed copies were al ready delivered to the copy tray 5 Press the Start key Example continued Seventeen comple...

Page 165: ...e unable to remove torn scraps of paper When you pull the paper trays you might hear the sound of paper tearing Make sure that there are no scraps of paper within the copier and the misfed paper you r...

Page 166: ...When the B indicator is lit The sticker inside the front door has instructions on how to clear misfeeds Securely close knob B2 until it clicks CLEARING COPY PAPER MISFEEDS b na 11 157...

Page 167: ...nside of the front cover has instructions on how to clear misfeeds If misfed paper is near the photocon ductor belt remove the misfed paper without damaging the photoconductor belt Photoconductor Belt...

Page 168: ...u might be unable to remove scraps of paper Open the copy tray upper cover first then turn D1 knob as shown If you cannot find misfed paper when you pull out the fusing unit make sure that you open th...

Page 169: ...copying and the misfed paper is curled load paper into the paper tray upside down 1 Open the upper cover 2 Grasp the knob as shown and open the guide plate Put the guide plate to the upper cover 3 Re...

Page 170: ...he duplex tray the page order of copies will be wrong In this case duplex multi feed or misfeed display appears at the end of the copy run and you will have to make copies again 5 Set the paper that y...

Page 171: ...e knob and open the guide plate as shown Remove any misfed paper After removing the misfed paper gen tly close the guide plate 9 Close the knob opened in step 7 and the upper cover CLEARING COPY PAPER...

Page 172: ...tray The sticker inside the right front cover has instructions on how to clear misfeeds Securely close the lever F until it clicks in position When F misfeeds occur frequently the paper in the large c...

Page 173: ...1 Remove the paper from the copy tray 2 Remove misfed paper from the copy tray 3 If you cannot find misfed paper on the copy tray open the upper cover 4 Remove misfed paper 5 Close the upper cover CL...

Page 174: ...first the misfed paper might be torn and scraps of paper which could cause more misfeeds might be left 3 Pull the large capacity tray all the way out Remove misfed paper Pull out the tray slowly If mi...

Page 175: ...tray This procedure is required only when the copier is equipped with the optional large capacity tray 1 Open the LCT door 2 Grasp the light blue knob and open the guide plate Then re move misfed pape...

Page 176: ...opier is equipped with the optional finisher 1 Open the finisher door and the inverter unit door 2 Grasp the light blue knobs and open the guide plates Then re move misfed paper 3 Close the inverter u...

Page 177: ...the inverter unit door 2 Grasp knob and open the guide plate as shown Then remove misfed paper 3 If you cannot find misfed paper turn knob clockwise as shown Then open the inverter guide plate and re...

Page 178: ...inside the finisher door has instructions on how to clear misfeed Remove paper that is not delivered to the shift tray completely Do not add it to the copies on the shift tray manually Otherwise iden...

Page 179: ...paper and return the R3 knob to its original position 3 If you cannot remove misfed pa per grasp the R4 knob and open the guide plate Then remove misfed paper and return the R4 knob to its original p...

Page 180: ...l appear 4 If you want to continue copying press the Start key If you want to stop copying touch the Can cel key The originals set in the recirculating document handler are automatically re ordered If...

Page 181: ...ving misfed originals The originals are counted automatically and the copier starts copying from the originals that was misfed 1 Open the original feed out unit cover and remove misfed paper 2 Lift th...

Page 182: ...2 Sided Original To 2 Sided Copy mode the originals in step 5 or the originals in step 4 are returned to the recirculating document handler upside down When you make 2 sided copies in Cover Paper Desi...

Page 183: ...cument handler are re ordered automatically 3 The display opposite will appear 4 If you want to continue copying reset the originals in order and press the Start key If you want to cancel copying touc...

Page 184: ...he sticker inside the finisher cover has instructions on how to clear jammed staples After clearing jammed staples sta ples might not be ejected the first few times you try to use the stapler b na 12...

Page 185: ...b na 12 REMOVING JAMMED STAPLES 176...

Page 186: ...WHAT TO DO IF SOMETHING GOES WRONG b eu 13 177...

Page 187: ...is almost empty Or toner cartridge is empty Add toner See page 52 i The display instructs you to add sta ples Add staples See page 53 Staples misfeed occurs Remove jammed staples See page 175 System e...

Page 188: ...staples staples might not be ejected the first few times you try to use the stapler Paper misfeeds occur fre quently Is the right kind of paper in the paper tray Paper size and weight must be within t...

Page 189: ...ginals in the recirculating document handler or document feeder Always use dry undamaged originals See page 25 Are the originals properly set in the recirculating document handler or document feeder A...

Page 190: ...pears again contact your service representative Tell your service representative the error code that is indicated You can isolate a defective unit with the user tools and continue copying until your s...

Page 191: ...See page 63 The image density is too light Damp or rough grain paper is used Use dry paper without rough grain The pick off pawls of the fusing unit sometimes make slight oil marks on the leading edge...

Page 192: ...SPECIFICATIONS WHERE TO PUT YOUR COPIER b na 14 183...

Page 193: ...73 F First Copy Time Less than 6 5 seconds Setting A4 or smaller original on the exposure glass and paper is fed from 3rd tray and deliv ered to the copy tray Maximum Copying Speed 105 copies minute...

Page 194: ...aper not exceeding load limit sticker Oil Tank Capacity 3 000 cc Power Source 240 V 60 Hz 30 A Power Consumption Copier only Full system Warm up 2 3 kW 2 4 kW Stand by 0 33 kW 0 41 kW Copying 3 4 kW 3...

Page 195: ...measurements are made according to ISO 7779 Full system Operator position 74 dB A bystander position 74 dB A Sound power level The measurements are made according to ISO 7779 Full system Stand by 67...

Page 196: ...rt One falt belt Weight 25 kg 55 1 lb Dimensions W x D x H 548 x 675 x 148 mm 21 6 x 26 6 x 5 9 Document Feeder Original Size See page 24 Original Weight See page 24 Original Set Capacity See page 24...

Page 197: ...mm 15 7 x 28 5 x 38 4 FINISHER Paper for Shift Tray Maximum 11 x 17 A3 Minimum B5 81 2 x 11 Paper Weight Standard copying Stack mode See page 64 Staple mode See page 67 Paper Capacity See page 64 Sta...

Page 198: ...a b a b a b a 5 2 mm 1 5 2 25 b 5 2 5 mm 1 5 1 10 a 5 2 mm 1 5 2 25 b 5 2 5 mm 1 5 1 10 a 5 2 mm 1 5 2 25 b 132 2 mm 51 5 2 25 A4 81 2 x 11 or smaller size b 265 2 mm 102 5 2 25 B4 or larger size FIN...

Page 199: ...nt 40 cm 15 8 in rear and 30 cm 11 8 on both sides for operation and service Environments to avoid Locations exposed to direct sunlight or strong light more than 1 500 lux Locations directly exposed t...

Page 200: ...DO S DON TS REMARKS USE AND STORAGE OF SUPPLIES 191...

Page 201: ...sation heaters are on Also some cooling fans in the copier con tinue to operate Unplug the machine s power cord only in the case of an emer gency If the copier must be transported by vehicle please co...

Page 202: ...erature and high humidity or low temperature and low humidity conditions store paper in a vinyl bag Do not store paper where it will be exposed to heat Store on a flat surface Use older stock first Do...

Page 203: ...STORAGE OF SUPPLIES b na 15 194...

Page 204: ...et 118 Auto start 104 Auto tray switching 121 B B misfeed 157 Back cover 71 Basic Operations 56 63 Beeper pitch 121 Beeper volume 121 C C misfeed 158 Cautions iii Changing paper size 47 48 Chapters 82...

Page 205: ...lex copy onto cover 116 Duplex copy onto slip sheet 116 Duplex multi feed 171 Duplex tray 4 E E misfeed 160 Energy saver 58 108 Energy Saver key 7 Enter key 6 Entering copy job settings during warm up...

Page 206: ...Maintaining your copier 146 147 Document feeder 147 Exposure glass 146 Recirculating document handler 146 Making 1 sided copies from 2 sided originals 90 Making 2 sided copies from 1 sided originals...

Page 207: ...t unit cover 3 Original multi feed 174 Original stacker 3 Original types Originals on the exposure glass 25 Setting one original in the DF 24 Setting originals in the DF 24 Setting originals in the RD...

Page 208: ...ttings 141 144 A3 11 x 17 double count 141 Accounting mode 142 Auto energy saver time 143 Fixed reproduction ratios 141 Initial display 142 Key counter 142 Maximum copy set number 142 Maximum staple c...

Page 209: ...106 System error 181 T Tab sheet 75 Temporarily stopping one job to copy else 100 101 toner adding 50 52 Toner cartridge 4 Toner end display 50 Toner replenishing cover 3 Total copies 126 Touch panel...

Reviews: