
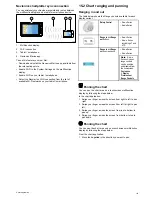


3. Select
Layers
.
4. Select
3D Display Options
.
5. Select
Transducer Cone
so that On is highlighted.
Selecting Transducer cone will switch the function on and off.
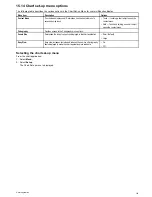
Enabling depth scale
To enable a depth indicator at your vessels location follow the
steps below:
In 3D view:
1. Select
Menu
.
2. Select
Presentation
.
3. Select
Layers
.
4. Select
3D Display Options
.
5. Select
Depth Scale
so that On is highlighted.
Selecting depth scale will switch depth indicator on and off.
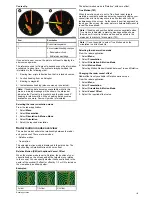
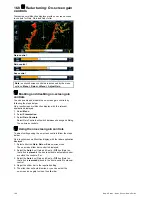
2D Chart Use
In addition to normal navigation charts Fish mode provides
bathymetric contour data on the chart for use during fishing.
Before you can display bathymetric data in the chart application
you must have chart cards with the relevant level of detail.
When you change the
2D Chart Use
to the Fish option,
bathymetric data is shown on the chart (providing that the chart
card contains bathymetric data for that particular location).
Certain chart detail is also removed to ensure the bathymetric
data can be seen clearly on the chart display.
If the chart card does NOT contain bathymetric data the chart
reverts to the default NAV (navigation) data.
Note:
Fish mode is not suitable for navigation.
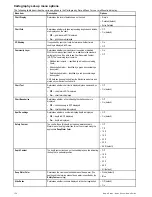
Selecting fish mode
From the chart application:
1. Select
Menu
.
2. Select
Presentation
.
3. Select
2D Chart Use
so that Fish is highlighted.
Selecting 2D chart use will switch the chart between Fish
and Navigation modes.
Multiple chart synchronization
You can synchronize the heading, range, and position
information across multiple chart views and networked displays.
When chart synchronization is enabled:
• It is indicated by “CHRT Sync” in the chart application title bar.
• Any changes made to the heading, range or position in any
chart instance will be reflected in all other chart instances.
Note:
When the 2D and 3D chart views are synchronized, the
Motion Mode is always Relative Motion.
Synchronizing multiple chart instances
From the chart application:
1. Select
Menu
.
2. Select
Presentation
.
3. Select
Chart Sync
.
4. Select Chart from the list.
A tick is placed next to the selected option.
5. Repeat the steps above for each chart instance and if
required on each networked multifunction display you want
to sync the chart view.
Note:
You cannot sync to another chart if radar sync is turned
on.
154
New a Series / New c Series / New e Series
Summary of Contents for a67
Page 2: ......
Page 4: ......
Page 8: ...8 New a Series New c Series New e Series...
Page 12: ...12 New a Series New c Series New e Series...
Page 20: ...20 New a Series New c Series New e Series...
Page 36: ...36 New a Series New c Series New e Series...
Page 70: ...70 New a Series New c Series New e Series...
Page 100: ...100 New a Series New c Series New e Series...
Page 110: ...110 New a Series New c Series New e Series...
Page 116: ...116 New a Series New c Series New e Series...
Page 158: ...158 New a Series New c Series New e Series...
Page 182: ...182 New a Series New c Series New e Series...
Page 204: ...204 New a Series New c Series New e Series...
Page 214: ...214 New a Series New c Series New e Series...
Page 236: ...236 New a Series New c Series New e Series...
Page 240: ...240 New a Series New c Series New e Series...
Page 260: ...260 New a Series New c Series New e Series...
Page 290: ...290 New a Series New c Series New e Series...
Page 306: ...306 New a Series New c Series New e Series...
Page 314: ...314 New a Series New c Series New e Series...
Page 329: ......
Page 330: ...www raymarine com...