© Copyright QVIS ®. All documentation rights reserved.
30
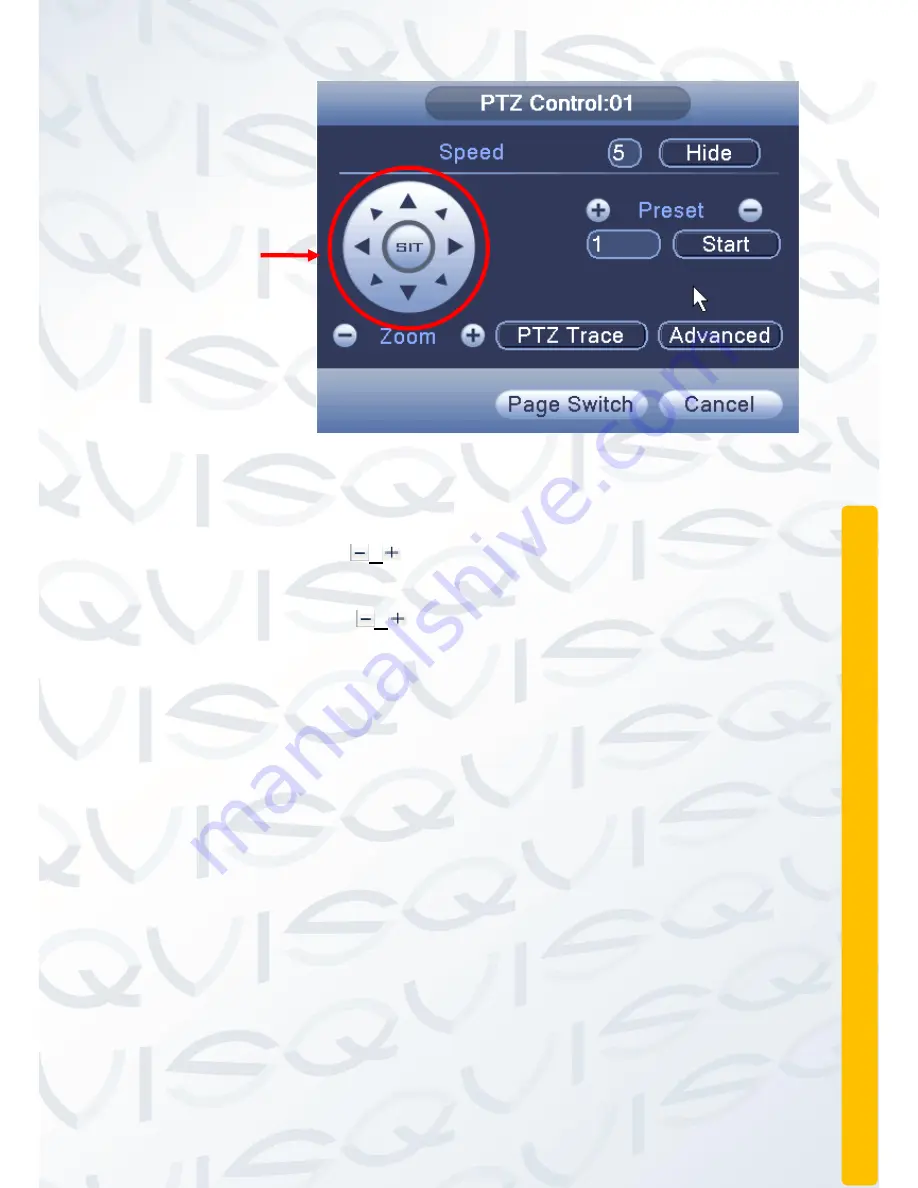
Figure 2.12 PTZ settings
[
Speed
]:
Set the PTZ rotation range. Range: 1 ~ 8, Default: 5.
[
Zoom
]:
Click the
/
buttons to increase/decrease the zoom function of
the camera by multiple increments.
[
Preset
]:
Click the
/
buttons to call up each of the preset points, the PTZ
automatically turns to the given preset position.
[
Hide
]:
The
current interface will be temporarily hidden after clicking this
button.
[
Direction controls
]:
Controls the PTZ
’s rotation within 8 different directions.
You can also use the NVR
’s front panel directional controls to control the PTZ’s
rotation in 4 different directions (up, down, left and right).
[
PTZ Trace]:
Selecting this will provide you with a
full-screen display of the
video channel. Click the left mouse button and control the PTZ
’s rotate
orientation. Click the left mouse button and then rotate the mouse to adjust the
zoom function of the camera.
[
Page switch
]:
Switch between different pages.
Special functions:
Preset:
Set a location for the preset, calls the preset points, PTZ
automatically turns to the setting position, shown in Figure 2.12.
Directional
Controls
Summary of Contents for PIONEER 3
Page 1: ...Copyright QVIS All documentation rights reserved i MAIN USER S MANUAL V1 0 04 2016...
Page 14: ...Copyright QVIS All documentation rights reserved 7 8 Channel NVR...
Page 15: ...Copyright QVIS All documentation rights reserved 8 16 Channel NVR...
Page 17: ...Copyright QVIS All documentation rights reserved 10 NVR NVR...
Page 18: ...Copyright QVIS All documentation rights reserved 11...
Page 99: ...Copyright QVIS All documentation rights reserved 92 Figure 3 58 LOG...


