


95
1001108-01-F
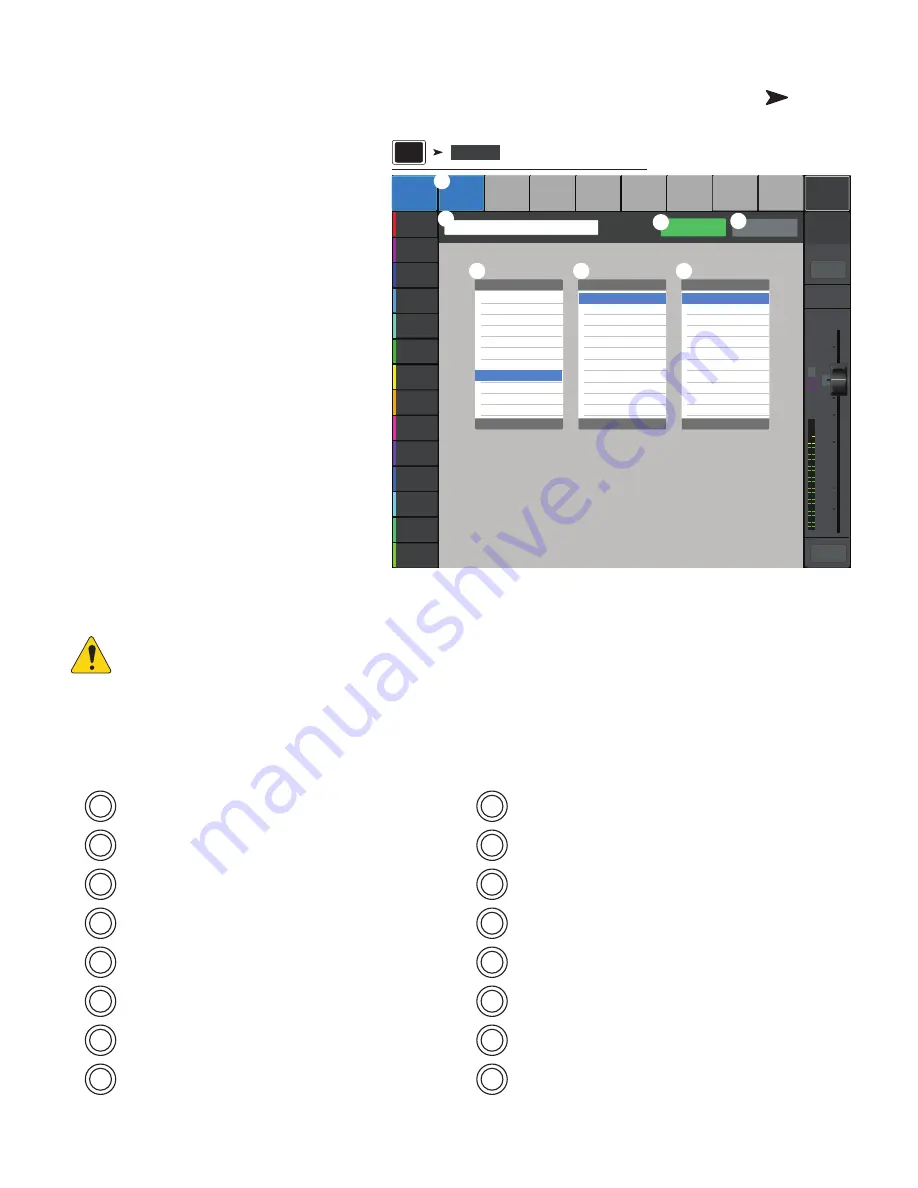
User Buttons
Assign alternate functions to the User Buttons.
1.
User 1
through
User 8
– Displays the
current
Detail
(function) assigned to the
selected User 1–8 button. Touch a button to edit
its function.
2. User Button Name – Displays the
Detail
name
associated with the selected
User 1–8
button. Changing the function assigned to the
button will automatically enter a new name,
or touch the keyboard icon to enter a custom
name.
3. a.
Action
, b.
Selection
, c.
Detail
–
Select an item from each list in the order shown.
4.
Assign
– Touch to complete the assignment.
5.
Reset
– Resets the selected
User 1–8
button to default setting.
Alternate Method
of setting a User button to
navigate to a specific screen. Does not apply to remote
devices.
1. Navigate to the desired screen.
2. Press and hold a user button for 2 – 3 seconds.
3. Upon release, a message displays. Touch
Yes
to accept the change or
Cancel
to reject it.
4. If desired, assign the user button a friendly name
from the User Button Setup screen.
To return the user button to the factory default, press it one time to access the assigned page. Then push and hold the user button for 2-3 seconds.
NOTE:
PITCH CORRECT
– This function disables or enables the Pitch Correct feature, it does not affect the assignment
of the feature to a channel. The only way to tell if this feature is enabled or disabled at the User Button level is to see if you can hear a
difference when Pitch Correct is assigned to a channel. If you select Utility > Pitch Correct >, you need two user buttons, one to
enable the feature, the other to disable it. Refer to the Pitch Correction topic for information about assigning or enabling Pitch Correct
for a channel.
User button defaults:
TouchMix-30 Pro
TouchMix-8 / TouchMix-16
•
U1
– Navigate Left (moves the selection left)
•
U2
– Clear Clip (clears clipping indication from the Nav Strip)
•
U3
– Clear Cue (clears all cue selections)
•
U4
– Navigate Right (moves the selection right)
•
U5
– Play/Stop (starts or stops playback)
•
U6
– Rec/Stop (starts or stops recording)
•
U7
– Copy (see Copy & Paste)
•
U8
– Paste (see Copy & Paste)
•
U1
– Navigate Left (moves the selection left)
•
U2
– Copy (see Copy & Paste)
•
U3
– Paste (see Copy & Paste)
•
U4
– Navigate Right (moves the selection right)
•
U5
– Play/Stop (Tablet app only)
•
U6
– Rec/Stop (Tablet app only)
•
U7
– Clear Clip (Tablet app only)
•
U8
– Clear Cue (Tablet app only)
Press Menu
Touch
User Buttons
Joe’s Monitor
Aux 1
Aux 2
Aux 2
Aux 3
Aux 3
Aux 4
Aux 4
Aux 5
Aux 5
Aux 6
Aux 6
Aux 7
Aux 7
Aux 8
Aux 8
Aux 9
Aux 9
Aux 10
Aux 10
Aux 11
Aux 11
Aux 12
Aux 12
Aux 13
Aux 13
Aux 14
Aux 14
User 1
Default
Scene:
Main Mix
L/R
User 2
User 3
User 4
User 5
User 6
User 7
User 8
Nav Left
Clear Clip
Clear Cue
Nav Right
Play/Stop
Record/Stop
Copy
Paste
L
AF
∞
10
5
u
5
10
20
0
40
10
Main
Cue
Main
L/R
Mute
Clear
Pitch Correct
Miscellaneous
Nav Right
Fader to 0 dB
Fader off
Recall Output Preset
Recall Scene
Mute
Go to Screen
Recording
Select
Tap Tempo
Nav Left
Recall Input Preset
Selection
Selected Parameter
Detail
Nav Left
Action
Utility
Assign
Reset
Menu
User Buttons
1
2
3a
3b
3c
4
5


