1.
Turn the printer off and remove the power cord. Disconnect
all interface cables from the printer.
2.
Position the printer so that the back is facing you.
3.
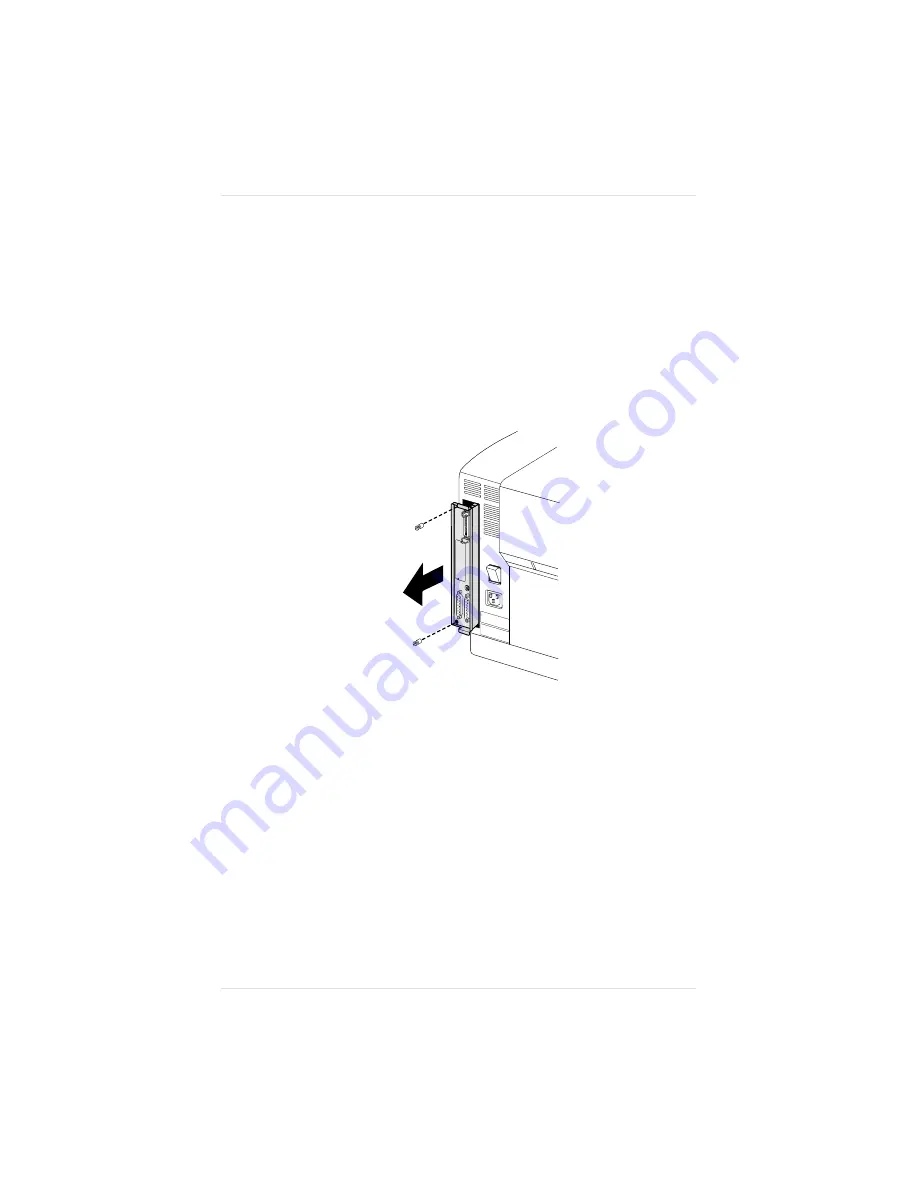
Using a screwdriver, loosen the two mounting screws that
hold the controller board to the printer (fig. 8.12).
4.
Grasping the board by the top and bottom metal rims, gently
pull the controller board straight out and lay it on a flat surface
(fig. 8.12).
5.
Install your printer option and then refer to the following
section, “Replacing the Controller Board.”
Fig. 8.12 Remove the Mounting Screws
Chapter 8
P r i n t e r O p t i o n s
8 - 1 9
Summary of Contents for 1800409-001A
Page 1: ...QMS magicolor LX Printer User s Guide 1800409 001A...
Page 4: ...4...
Page 15: ...Chapter 1 Introduction Chapter highlights About the documentation About your printer...
Page 16: ......
Page 32: ......
Page 39: ...Fig 2 2 Unpacking the Printer Chapter 2 I n i t i a l P r i n t e r S e t u p 2 7...
Page 80: ......
Page 106: ......
Page 166: ......
Page 190: ......
Page 234: ......
Page 256: ......
Page 320: ...Chapter 8 8 6 4 P r i n t e r O p t i o n s...
Page 322: ......
Page 357: ...Appendix A QMS Customer Support...
Page 358: ......
Page 363: ...Appendix B Technical Specifications...
Page 364: ......
Page 368: ...Environmental Requirements Appendix B B 4 T e c h n i c a l S p e c i f i c a t i o n s...
Page 381: ...Appendix C Notices...
Page 382: ......
Page 387: ...Appendix D Additional Technical Information...
Page 388: ......
Page 436: ...I 2 0 I n d e x...


