4
Connecting the Recorder to Other Devices
There are numerous connections on the rear of the recorder that may be used to connect to
other devices for video and audio playback and recording.
Connecting to a Display Using Component Video
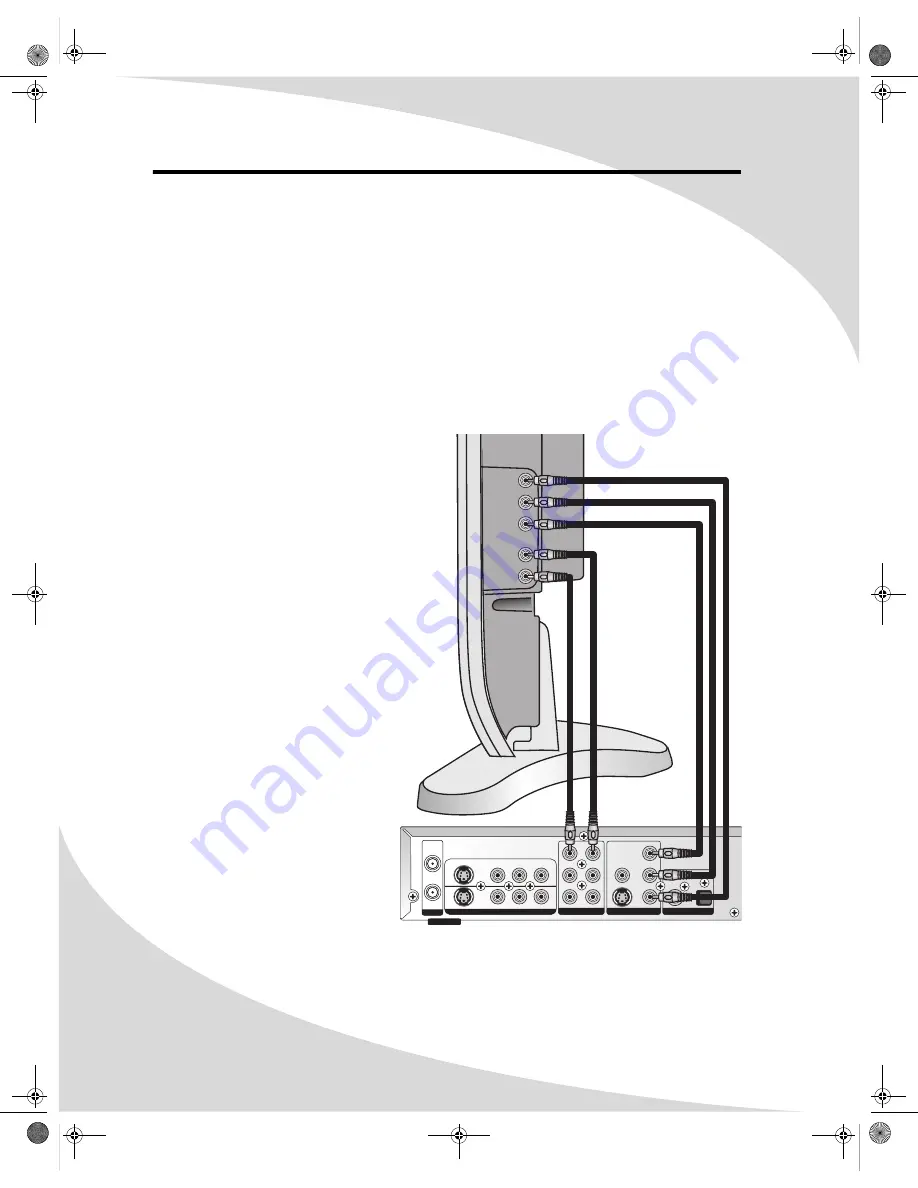
Component video offers higher quality than all other video outputs on the recorder. In addition,
you can configure the component video output to transmit progressive scan video, which offers
crisp, flicker-free video.
The Y, Pb, and Pr outputs in the VIDEO OUT block on the rear of the recorder are the recorder’s
component video outputs.
To connect to a display using component video:
1. Using three RCA cables, connect the
Y, Pb, and Pr outputs in the VIDEO
OUT block on the rear of the
recorder to the corresponding
component video inputs on the
display.
2. If you would also like to connect the
audio output to the display, connect
the FR (right) and FL (left) outputs
in the AUDIO OUT block on the rear
of the recorder to the display’s
audio input.
3. If you have connected the audio
output to the display, go to the
Setup menu, select the Playback
sub-menu and set Analog Audio
Output to 2 CH (see “Playback” on
page 36).
4. In the Setup menu, select the
General sub-menu and set Video
Output Format as appropriate for
your display (see “General” on
page 35).
5. Also in the General sub-menu, set
Progressive/Interlace as desired.
Note:
Progressive scan
only
works
with component video con-
nections to displays that sup-
port it. Check to ensure your
display supports progressive
scan before configuring the
recorder to use it.
FR
C
SR
FL
SW
SL
Video
S-Video
Y/G
Pr/R
Pb/B
Coaxial
Optical
S-Video
Video
R --- Audio --- L
IN
1
IN
2
RF IN
RF OUT
UHF/VHF
SOURCE INPUT
AUDIO OUT
VIDEO OUT
DIGITAL AUDIO OUT
Y
Pr
Pb
L
AUDIO
(OPTIONAL)
VIDEO
R
OMPDDVR100.book Page 4 Monday, September 19, 2005 8:35 AM


