


Startup and validation
108580_en_02
PHOENIX CONTACT
4.5.4
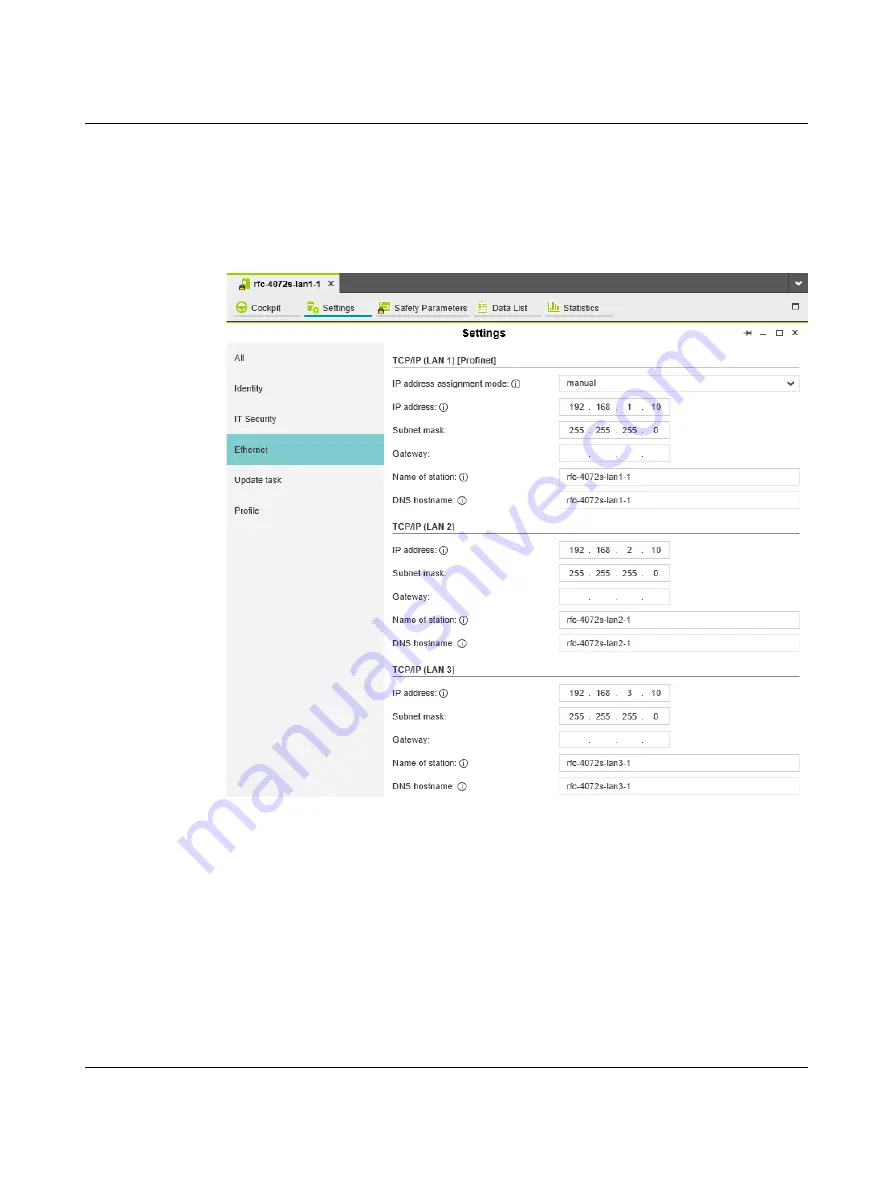
Setting the IP address
•
Double-click on the controller node in the “PLANT” area.
The controller editor group opens.
•
Select the “Settings” editor.
•
Select the “Ethernet” view.
Figure 4-5
Setting the IP address
The IP address of the controller can be set automatically or manually. The IP address is
assigned to the controller when you have connected PLCnext Engineer to the controller, see
.
Setting the IP address
automatically
•
Select “automatic” in the “IP address assignment mode” drop-down list.
PLCnext Engineer automatically assigns an IP address to the controller from the set IP
address range (see
Section 4.5.3, “Setting the IP address range”
) as soon as a connection
is established to the controller (see
Summary of Contents for RFC 4072S
Page 22: ...RFC 4072S 22 272 PHOENIX CONTACT 108580_en_02...
Page 68: ...RFC 4072S 68 272 PHOENIX CONTACT 108580_en_02...
Page 82: ...RFC 4072S 82 272 PHOENIX CONTACT 108580_en_02...
Page 142: ...RFC 4072S 142 272 PHOENIX CONTACT 108580_en_02...
Page 154: ...RFC 4072S 154 272 PHOENIX CONTACT 108580_en_02...
Page 222: ...RFC 4072S 222 272 PHOENIX CONTACT 108580_en_02...
Page 234: ...RFC 4072S 234 272 PHOENIX CONTACT 108580_en_02...
Page 254: ...RFC 4072S 254 272 PHOENIX CONTACT 108580_en_02...
Page 264: ...RFC 4072S 264 272 PHOENIX CONTACT 108580_en_02...
Page 268: ...RFC 4072S 268 272 PHOENIX CONTACT 108580_en_02...
Page 271: ......