


Additional settings as well as features and what you need to know about the RFC 4072S
108580_en_02
PHOENIX CONTACT
165 / 272
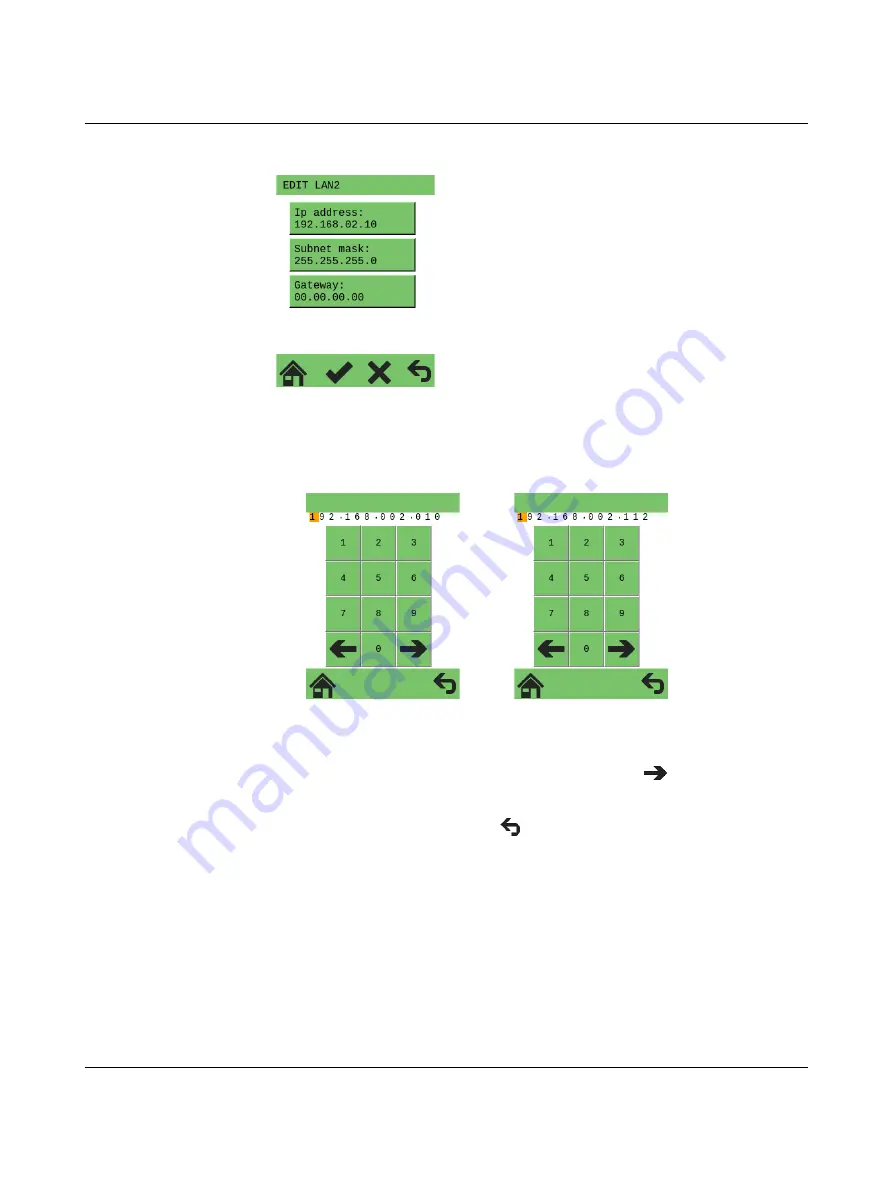
The following menu shows the default IP-settings of the LAN2 interface:
Figure 7-3
“CONFIG DETAILS, … EDIT LAN2” menu: default settings
•
Select the “IP address: …” menu item.
The following menu appears (A):
Figure 7-4
“CONFIG DETAILS, … EDIT LAN2” menu: edit LAN2 IP address
•
Set the IP address “192.168.2.112” shown in
(B).
•
Change the number position in the IP address by tapping
.
•
Select the corresponding numbers by tapping on the numbers.
•
Exit the entry window by tapping
.
A
B
Summary of Contents for RFC 4072S
Page 22: ...RFC 4072S 22 272 PHOENIX CONTACT 108580_en_02...
Page 68: ...RFC 4072S 68 272 PHOENIX CONTACT 108580_en_02...
Page 82: ...RFC 4072S 82 272 PHOENIX CONTACT 108580_en_02...
Page 142: ...RFC 4072S 142 272 PHOENIX CONTACT 108580_en_02...
Page 154: ...RFC 4072S 154 272 PHOENIX CONTACT 108580_en_02...
Page 222: ...RFC 4072S 222 272 PHOENIX CONTACT 108580_en_02...
Page 234: ...RFC 4072S 234 272 PHOENIX CONTACT 108580_en_02...
Page 254: ...RFC 4072S 254 272 PHOENIX CONTACT 108580_en_02...
Page 264: ...RFC 4072S 264 272 PHOENIX CONTACT 108580_en_02...
Page 268: ...RFC 4072S 268 272 PHOENIX CONTACT 108580_en_02...
Page 271: ......