


Startup and validation
108580_en_02
PHOENIX CONTACT
101 / 272
4.8.2
Assigning online devices (device naming)
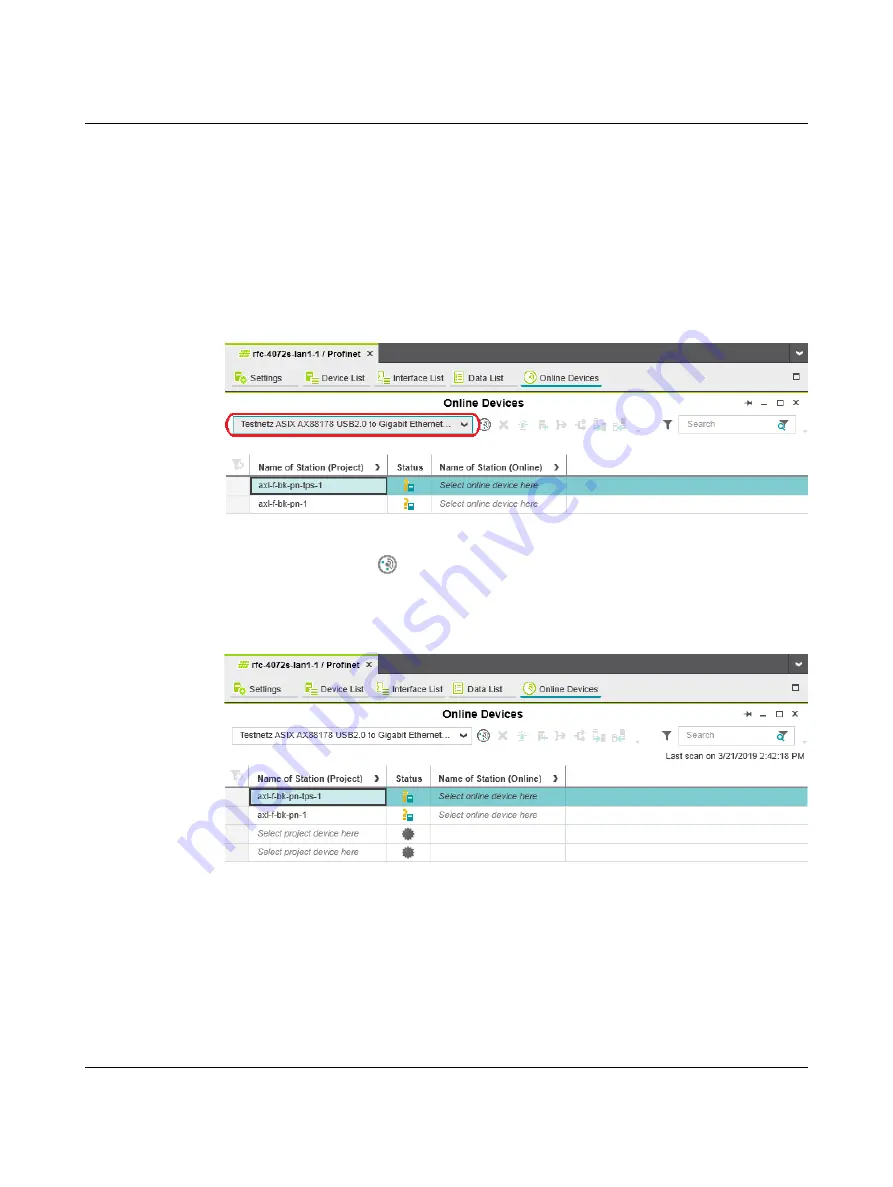
After you add PROFINET devices to the project, you must assign each configured
PROFINET device to the corresponding PROFINET device of your actual bus configuration
(online device). By performing this assignment, you are giving the PROFINET devices their
IP settings and their PROFINET device names. To do this, proceed as follows:
•
Double-click on the “Profinet (x)” node in the “PLANT” area.
The “/ Profinet” controller editor group opens.
•
Select the “Online Devices” editor.
•
Select the appropriate network card from the drop-down list.
Figure 4-14
Selecting the network card
•
Click on the
button to search the network for connected PROFINET devices.
You can see the configured PROFINET devices under “Name of Station (Project)”.
You can see the PROFINET devices that have been found online in the network (online
devices) under “Name of Station (Online)”.
Figure 4-15
Assigning online devices
Summary of Contents for RFC 4072S
Page 22: ...RFC 4072S 22 272 PHOENIX CONTACT 108580_en_02...
Page 68: ...RFC 4072S 68 272 PHOENIX CONTACT 108580_en_02...
Page 82: ...RFC 4072S 82 272 PHOENIX CONTACT 108580_en_02...
Page 142: ...RFC 4072S 142 272 PHOENIX CONTACT 108580_en_02...
Page 154: ...RFC 4072S 154 272 PHOENIX CONTACT 108580_en_02...
Page 222: ...RFC 4072S 222 272 PHOENIX CONTACT 108580_en_02...
Page 234: ...RFC 4072S 234 272 PHOENIX CONTACT 108580_en_02...
Page 254: ...RFC 4072S 254 272 PHOENIX CONTACT 108580_en_02...
Page 264: ...RFC 4072S 264 272 PHOENIX CONTACT 108580_en_02...
Page 268: ...RFC 4072S 268 272 PHOENIX CONTACT 108580_en_02...
Page 271: ......