


Startup and validation
108580_en_02
PHOENIX CONTACT
103 / 272
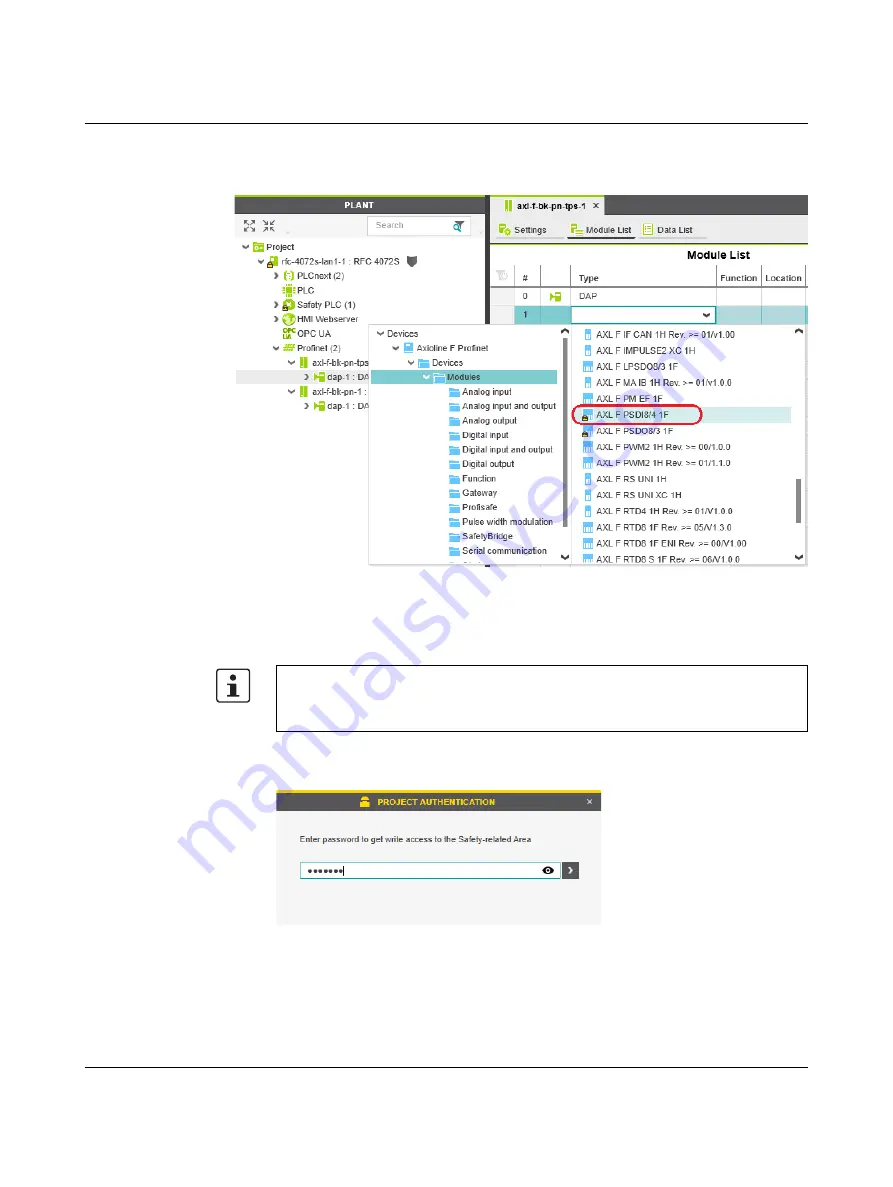
The role picker opens. Only the elements from the “COMPONENTS” area that you can actu-
ally use are displayed in the role picker.
Figure 4-17
Role picker for selecting I/O modules
•
Select the relevant I/O module in the role picker.
Project login required
Enter project password
•
Enter the project password in the “PROJECT AUTHENTICATION” dialog (see
Figure 4-18
Entering the project password
•
Click on the arrow in the dialog to confirm your entry.
Successful login to the safety-related area is indicated by the text highlighted in yellow
Safety-related changes to the project – Login required
If you make changes to the safety-related project at this point, PLCnext Engineer requires
you to enter a password (e.g., if you add F-Devices to your project).
Summary of Contents for RFC 4072S
Page 22: ...RFC 4072S 22 272 PHOENIX CONTACT 108580_en_02...
Page 68: ...RFC 4072S 68 272 PHOENIX CONTACT 108580_en_02...
Page 82: ...RFC 4072S 82 272 PHOENIX CONTACT 108580_en_02...
Page 142: ...RFC 4072S 142 272 PHOENIX CONTACT 108580_en_02...
Page 154: ...RFC 4072S 154 272 PHOENIX CONTACT 108580_en_02...
Page 222: ...RFC 4072S 222 272 PHOENIX CONTACT 108580_en_02...
Page 234: ...RFC 4072S 234 272 PHOENIX CONTACT 108580_en_02...
Page 254: ...RFC 4072S 254 272 PHOENIX CONTACT 108580_en_02...
Page 264: ...RFC 4072S 264 272 PHOENIX CONTACT 108580_en_02...
Page 268: ...RFC 4072S 268 272 PHOENIX CONTACT 108580_en_02...
Page 271: ......