


RFC 4072R
34 / 128
PHOENIX CONTACT
110146_en_00
Figure 4
-
10
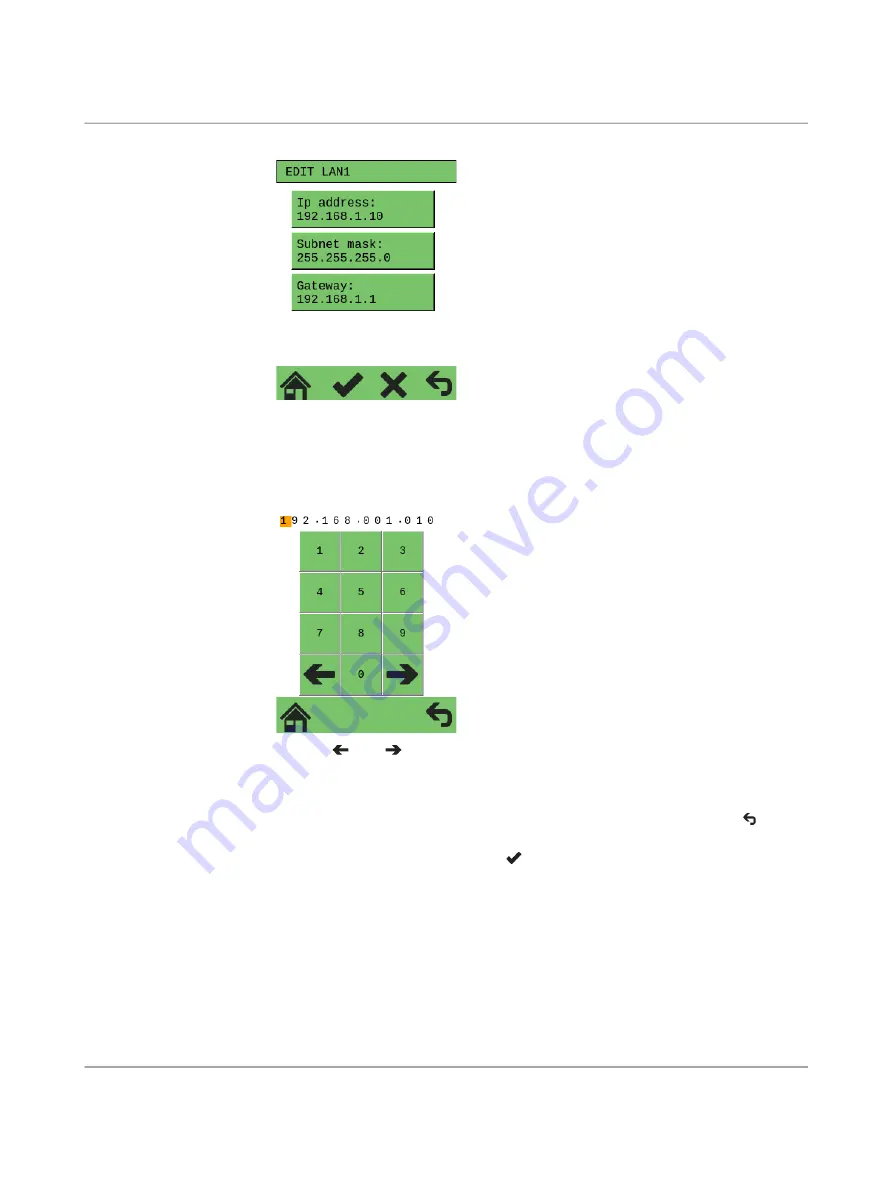
“EDIT LANX” submenu (in the example: “EDIT LAN1”)
•
To change the “IP address”, “Subnet mask”, or “Gateway” settings, tap the correspond
-
ing setting.
⇒
A menu opens to enter the digits.
Figure 4
-
11
Menu for entering the digits
•
Use
and
to navigate to the desired position of the digit that needs to be
changed.
•
Then tap the desired digit.
Save and apply changes
•
To save the modified setting and return to the “EDIT LANX” submenu, tap
.
⇒
The modified setting is now displayed in the “EDIT LANX” submenu.
•
To apply the modified setting, tap
.
⇒
The message “LAN Setting changed” appears in the display (
A
in
).