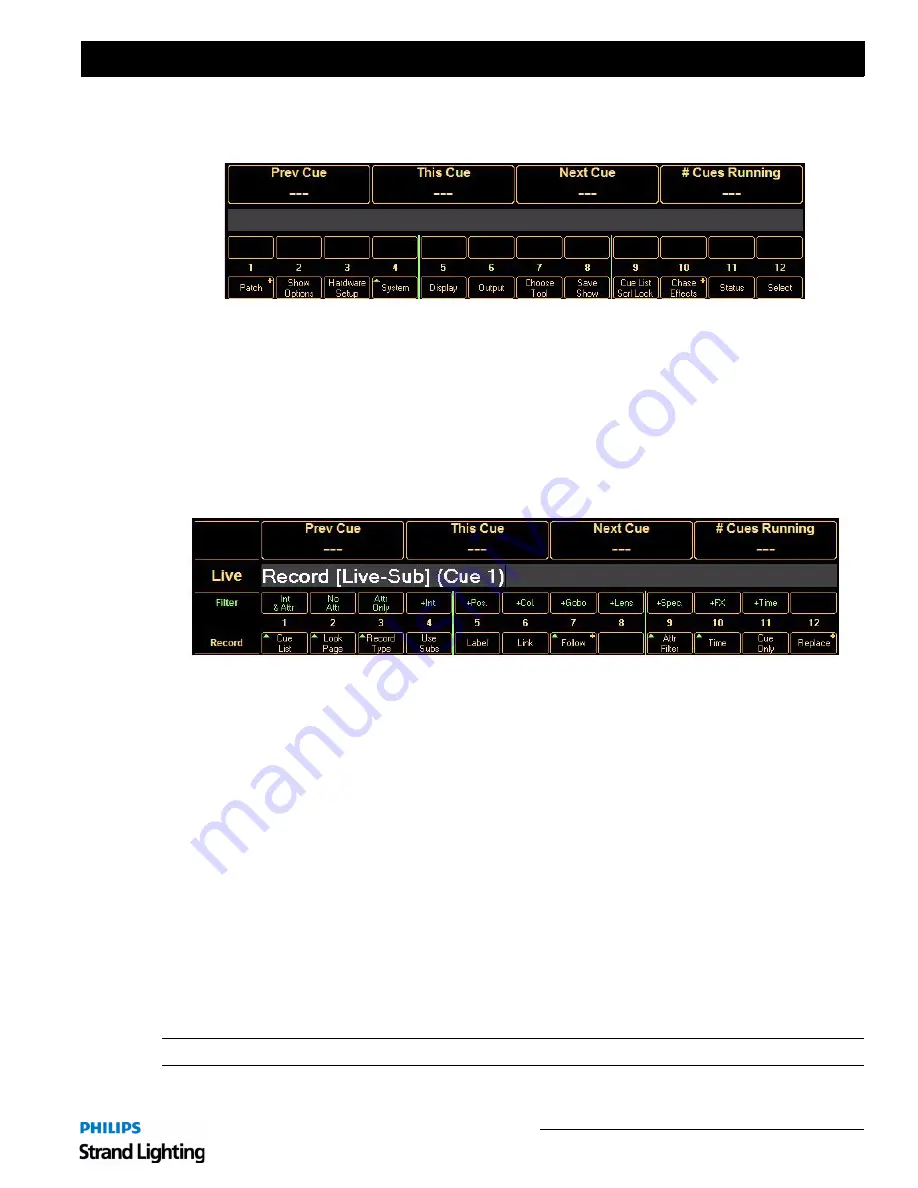
Button Details
29
Palette II Lighting Control Console
Installation & Setup Guide
25. Softkeys
The softkey buttons are context sensitive to what you are doing. When no dialogue boxes are open, they provide
additional functionality that is not available with the hard buttons on the console. When a dialogue box is open, the
LEDs show you what buttons are used to jump to specific controls (lists, checkboxes, etc.). You can always see what
each button will do by reading the bubbles at the bottom of the screen. The LED will blink showing you what control
currently has focus.
Once a command is entered into the command line, you may notice green arrows appearing next to selected S-
softkeys. These arrows correspond with the M-keys above. By selecting an S-key with an arrow you will notice the
M-keys change. For example, by pressing [RECORD], you will notice many of the S-keys have the option to select
additional M-keys. By selecting [S3] [RECORD TYPE], you now have four options to choose from in the M-keys
[M1-M4].
26. Step Forward / Step Back
• Pressing the relevant button steps you through the selected Cue List using the step-time set in the properties of the
Cue List ([VIEW] [SELECT]).
• If the Cue List is active ([GO] had been pressed at some point), the effect will be seen on stage. If it is not active,
only the Cue List pointer will move, awaiting a Go command.
• Use with [SHIFT] to move to the top or bottom of the selected Cue List.
• If a long cue is running (green LED is flashing on Go button) and you want to quickly complete it, press [STEP
FORWARD]. The cue will complete in the Cue List's step-time as determined by the Properties of the Cue List.
27. Tools
• Press [SHIFT] [TOOLS] to change the softkeys to the available tools. Select a tool ([S12] gives more options). Ini-
tiates softkey tool functions such as flip, channel check, flash, etc.
• If the LED is on, the tool is active. Press the button to turn off the tool.
• Pressing and releasing this button when the LED is off will toggle the last selected tool on.
Note:
The status area at the bottom of the screen shows the current active tool.
Summary of Contents for basicPalette II
Page 1: ......
Page 4: ...Installation Setup Guide Palette II Lighting Control Console ii Notes ...
Page 16: ...Installation Setup Guide Palette II Lighting Control Console 8 Overview Notes ...
Page 60: ...Installation Setup Guide Palette II Lighting Control Console 52 Controls Notes ...
Page 68: ...Installation Setup Guide Palette II Lighting Control Console 60 Setup Notes ...
Page 79: ...71 Palette II Lighting Control Console Installation Setup Guide A Specifications ...
Page 81: ...73 Palette II Lighting Control Console Installation Setup Guide B Software Tips ...
Page 87: ...Notes ...
Page 88: ...Part No 2 450181 010 ...


