


6-16
Defining Bar Code Fields
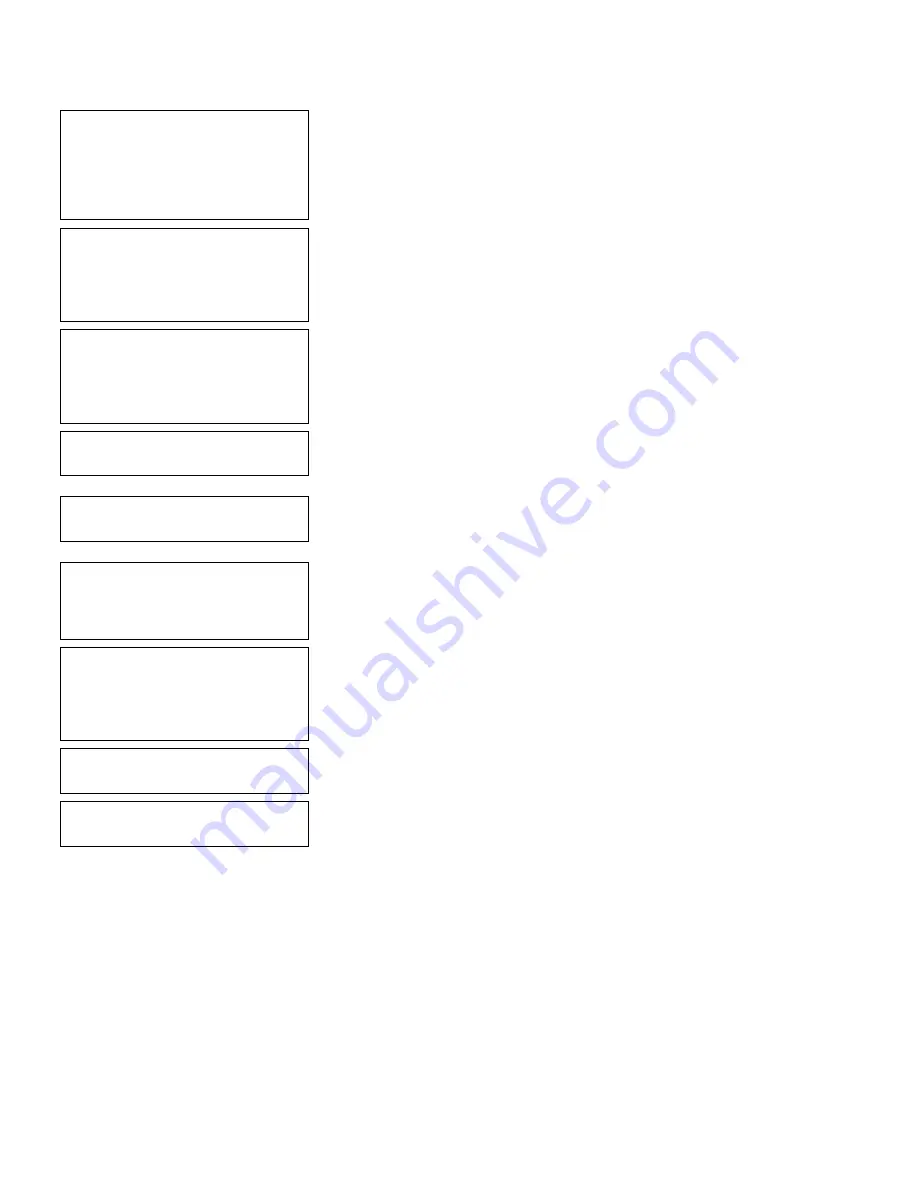
Select Type: Fld #1
1. Text Field
2. Bar Code Field
3. Constant Text
4. Line
5. Finished
6.
Press
1
to define a text field.
Select Field Class
1. Simple Field
2. Price Field
3. System Date/Time
4. Combo (Merged)
7.
Press
1
to define a simple field.
Numeric or
Alpha-Numeric Data?
A/N > _
L
8.
Press
N
(alpha-numeric).
Enter Max. Length
> _ _ _
9.
Type
6
as the maximum number of characters
in the field. Press
e
.
Enter Min. Length
> _ _ _
10.
Type
6
as the minimum number of characters
in the field. Press
e
.
Enter Field Prompt
> _ _ _ _ _ _ _ _ _ _ _ _ _ _ _ _
L
11.
Type
ENTER DATA 1
. Press
e
.
Enter Fixed Data
Press ENTER if none
> _ _ _ _ _ _ _ _ _ _ _ _ _ _ _ _
L
12.
Press
e
, for no fixed data.
Enter Row #
> _ _ _
13.
Type
10
for the row location. Press
e
.
Enter Col. #
> _ _ _
14.
Type
10
for the column location. Press
e
.
Summary of Contents for Monarch DOS-based Pathfinder Ultra System
Page 8: ...vi Table of Contents ...
Page 22: ...2 10 Getting Started Sample Operator Data Entry Form ...
Page 23: ...Getting Started 2 11 Operator Data Entry Form Page 1 ...
Page 24: ...2 12 Getting Started Operator Data Entry Form Page 2 ...
Page 40: ...4 8 Designing a Format ...
Page 81: ...Defining Bar Code Fields 6 23 This sample prints the following label ...
Page 86: ...6 28 Defining Bar Code Fields ...
Page 148: ...10 32 Applying Data Edits ...
Page 162: ...11 14 Editing a Format ...
Page 198: ...A 24 Sample Formats ...
Page 209: ......
Page 210: ......


