


97
5
OPERATING PROCEDURE
Before starting the following procedures, all system compo-
nents should be turned on.
■
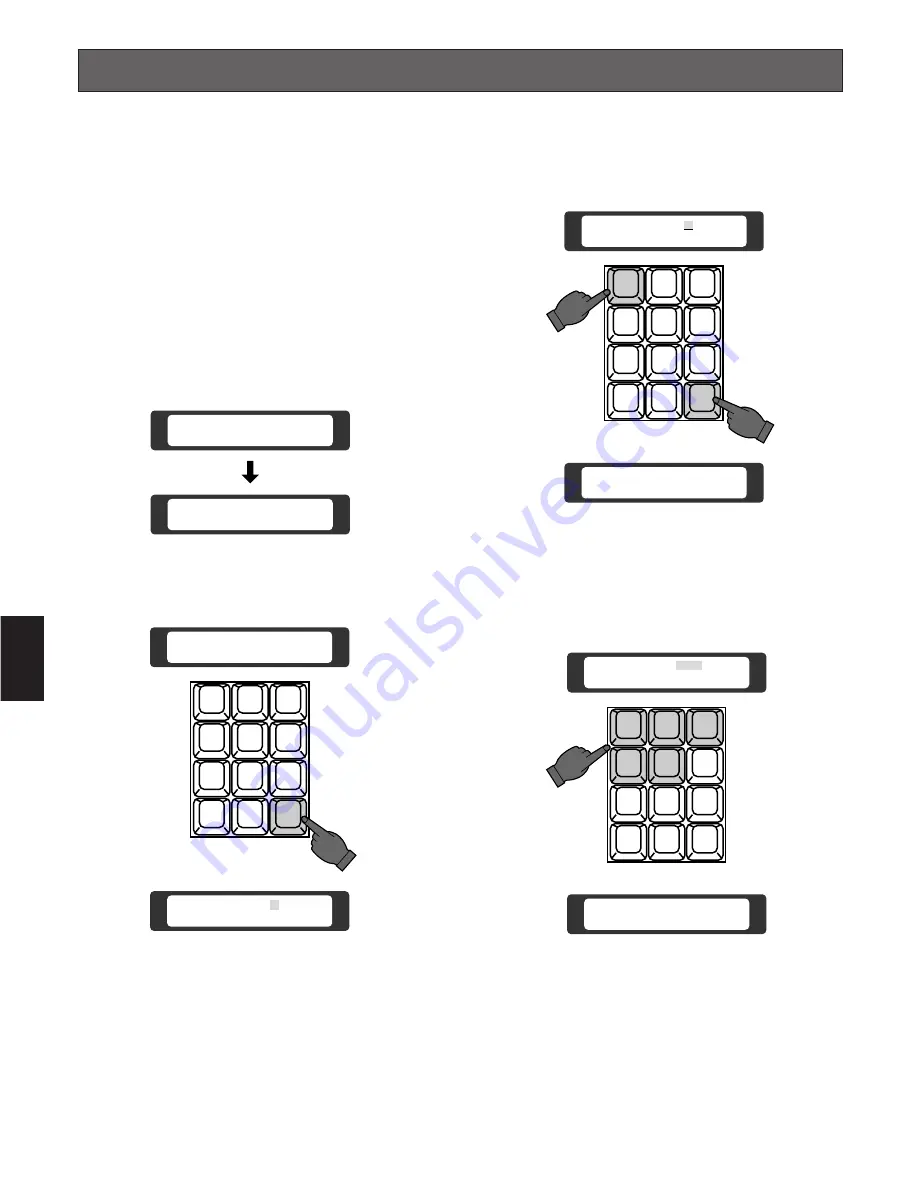
Log-in
1. Turn on the power switches of all system components.
Caution:
If the WJ-AD550 Extension Unit is used in the
system, turn the Extension Unit power on before
turning on the power of the WJ-SX550C Matrix
Switcher.
2. Turn on the power of the system controller by pressing
the Controller On/Off Switch located on the rear of the
System Controller to the ON position.
The following displays appear on the LCD display.
3. Press the
CAM (SET)
key, the Operator No. display
now appears on the LCD display.
4. Select your registered Operator Number (up to 30) by
pressing the Numeric keys, then press the
CAM (SET)
key.
The initial factory setting is 1.
See page 83 for details on registering operator num-
bers.
5. Select your registered Password (five digits) by press-
ing the Numeric keys.
The initial factory setting is 12345.
See page 83 for details on registering password num-
bers.
Note:
If the Auto Log-in setting is set to On mode, any
operator can Log-in automatically as any operators
previously.
Refer to the Auto Log-in Setting on page 126.
The Auto Log-in function may not work, if a previ-
ous operator has not logged out properly. In this
case, follow the above procedure to log in manual-
ly.
Initial Check
9600 BPS
Log-in
1
2
3
4
5
6
7
8
9
MON
CAM
ESC
SET
0
Log-in
Operator No :
2
3
4
5
6
7
8
9
MON
CAM
ESC
SET
0
1
Operator No :
Operator No : 1
1
2
3
4
5
6
7
8
9
MON
CAM
ESC
SET
0
Password :
Welcome
....
Summary of Contents for WVCU550C - SYSTEM CONTROLLER UNIT
Page 8: ...9 1 SECTION 1 FEATURES OF THE SYSTEM 500 MATRIX SWITCHER ...
Page 19: ...21 2 SECTION 2 DETAILED PRODUCT DESCRIPTION AND SELECTION ...
Page 45: ...47 3 SECTION 3 INSTALLATION AND SYSTEM CONNECTIONS ...
Page 61: ...65 4 SECTION 4 SOFTWARE SETUP ...
Page 90: ...95 5 SECTION 5 OPERATING PROCEDURES ...
Page 122: ...127 6 SECTION 6 TROUBLESHOOTING ...
Page 126: ...131 7 SECTION 7 SPECIFICATIONS ...


