


●
Backlight Compensation (BLC) Mode
The following function requires the use of cameras
equipped with the specific feature.
1. Select the desired Monitor and camera.
Refer to the Monitor Selection and Camera Selection.
2. Select the BLC
(D2)
Menu on the LCD display by
pressing the appropriate Direction button.
3. Press the Function
(F1)
button to toggle the Auto BLC
Mode on and off.
4. Press the Function
(F2)
button to toggle the Preset BLC
Mode on and off.
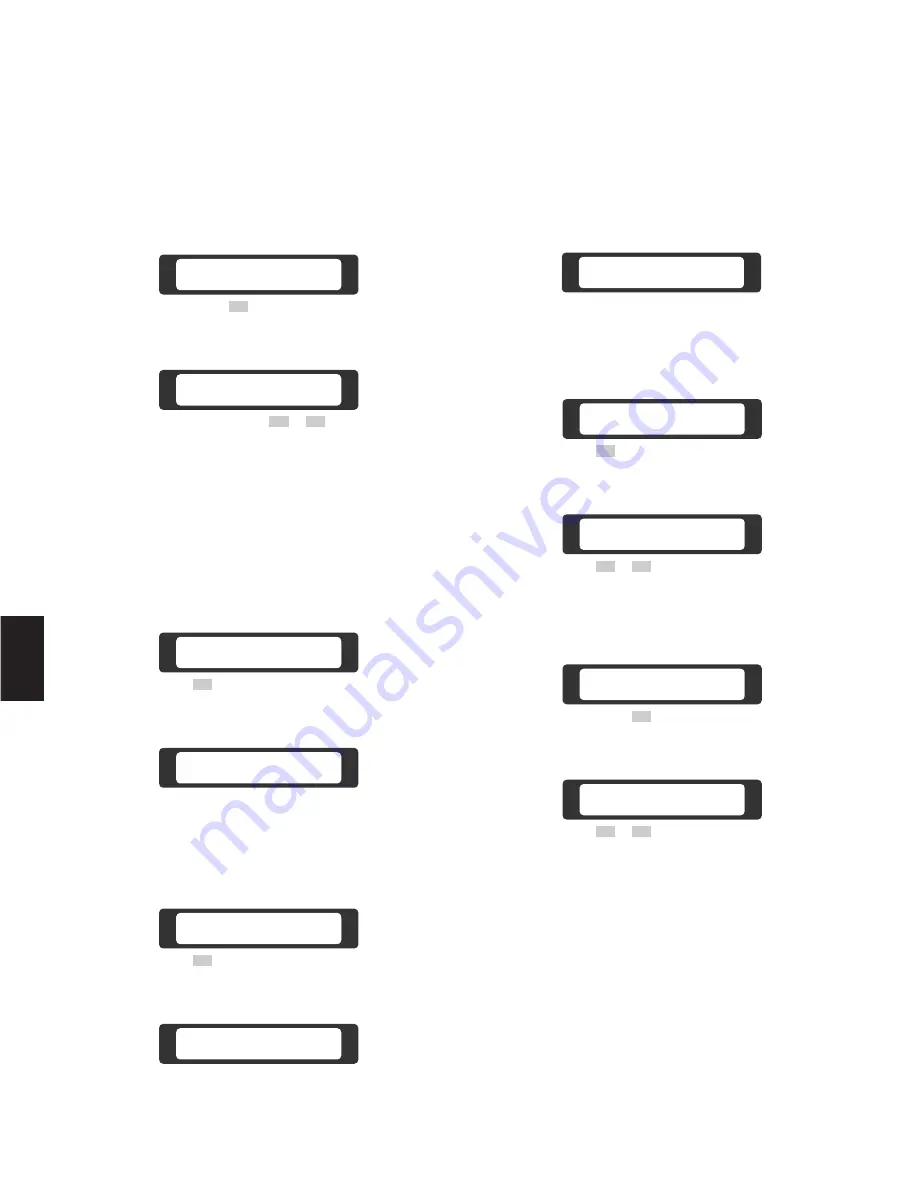
b) Selecting Area before Zooming Procedures:
1. Select the desired monitor and camera.
Refer to the Monitor Selection and Camera Selection.
2. Select the Ele Zoom
(C3)
Menu on the LCD display by
pressing the appropriate Direction buttons.
3. Press the Function
(F2)
button to select the Zooming
Position Mode.
4. Press the Function
(F3
or
F4)
button repeatedly to
select the desired zooming area.
The emphasized area is switched over on the monitor
as shown in the previous table.
5. Press the Function
(F1)
button to select the Electronic
Zoom Mode.
A zoomed picture of the area selected in step 4 above
appears on the monitor.
6. Press the Function
(F1)
button to turn the Electronic
Zoom Mode off.
116
5
F 1
F 2
F 3
F 4
Ele Zoom Posi
On Off < >
F 1
F 2
F 3
F 4
Ele Zoom On
Off Posi < >
F 1
F 2
F 3
F 4
F 1
F 2
F 3
F 4
Ele zoom OFF
ON Posi
Ele Zoom On
Off Posi < >
F 1
F 2
F 3
F 4
BLC Off
Auto Preset
D2
F 1
F 2
F 3
F 4
Ele Zoom Off
On Posi
F 1
F 2
F 3
F 4
Ele Zoom Posi
On Off < >
C3
F 1
F 2
F 3
F 4
BLC Off
Auto Preset
F 1
F 2
F 3
F 4
BLC Preset
Auto Off
F 1
F 2
F 3
F 4
BLC Off
Auto Preset
F 1
F 2
F 3
F 4
BLC Auto
Off Preset
Summary of Contents for WVCU550C - SYSTEM CONTROLLER UNIT
Page 8: ...9 1 SECTION 1 FEATURES OF THE SYSTEM 500 MATRIX SWITCHER ...
Page 19: ...21 2 SECTION 2 DETAILED PRODUCT DESCRIPTION AND SELECTION ...
Page 45: ...47 3 SECTION 3 INSTALLATION AND SYSTEM CONNECTIONS ...
Page 61: ...65 4 SECTION 4 SOFTWARE SETUP ...
Page 90: ...95 5 SECTION 5 OPERATING PROCEDURES ...
Page 122: ...127 6 SECTION 6 TROUBLESHOOTING ...
Page 126: ...131 7 SECTION 7 SPECIFICATIONS ...


