Setting up
ENGLISH - 23
Getting Started
Setting up
Projection method
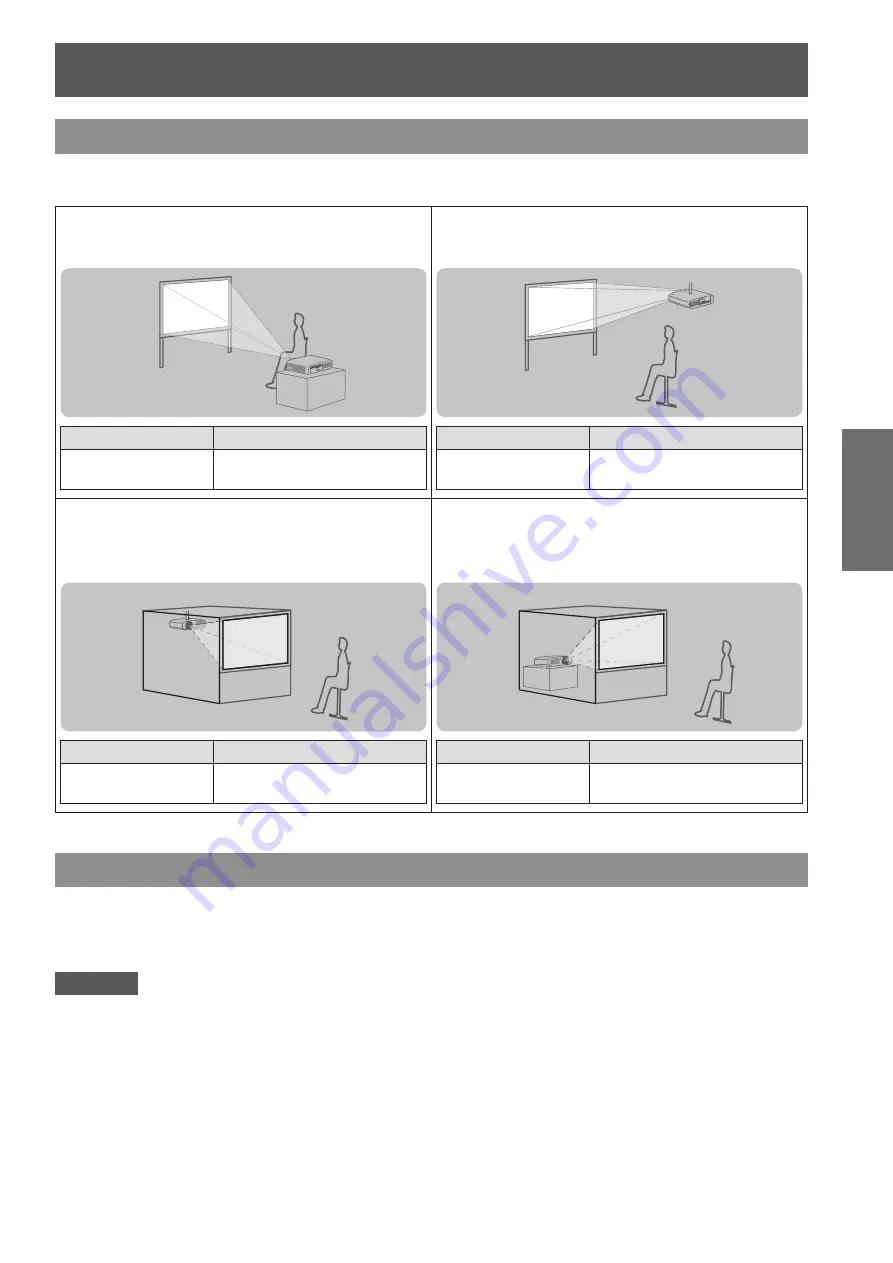
You can use the projector with any of the following four projection methods. Select the appropriate method
depending on the environment.
▶
■
Setting on a desk/floor and
projecting forward
▶
■
Mounting on the ceiling and
projecting forward
Menu item
*1
Method
[PROJECTION
METHOD]
[FRONT/DESK]
Menu item
*1
Method
[PROJECTION
METHOD]
[FRONT/CEILING]
▶
■
Mounting on the ceiling and
projecting from rear
(Using the translucent screen)
▶
■
Setting on a desk/floor and
projecting from rear
(Using the translucent screen)
Menu item
*1
Method
[PROJECTION
METHOD]
[REAR/CEILING]
Menu item
*1
Method
[PROJECTION
METHOD]
[REAR/DESK]
*1: For details of the menu items, confirm from the [PROJECTOR SETUP] menu
→
[PROJECTION METHOD] (
page 65).
Parts for ceiling mount (optional)
You can install the projector on the ceiling using the optional ceiling mount bracket (ET-PKA110H: for high
ceilings, ET-PKA110S: for low ceilings).
z
Use only the ceiling mount brackets specified for this projector.
z
Refer to the installation manual for the ceiling mount bracket when you install the bracket and the projector.
Attention
z
To ensure the projector performance and security, installation of the ceiling mount bracket must be carried out
by your dealer or a qualified technician.


