Chapter 5
Operations — Content Manager
ENGLISH - 195
6) Click .
f
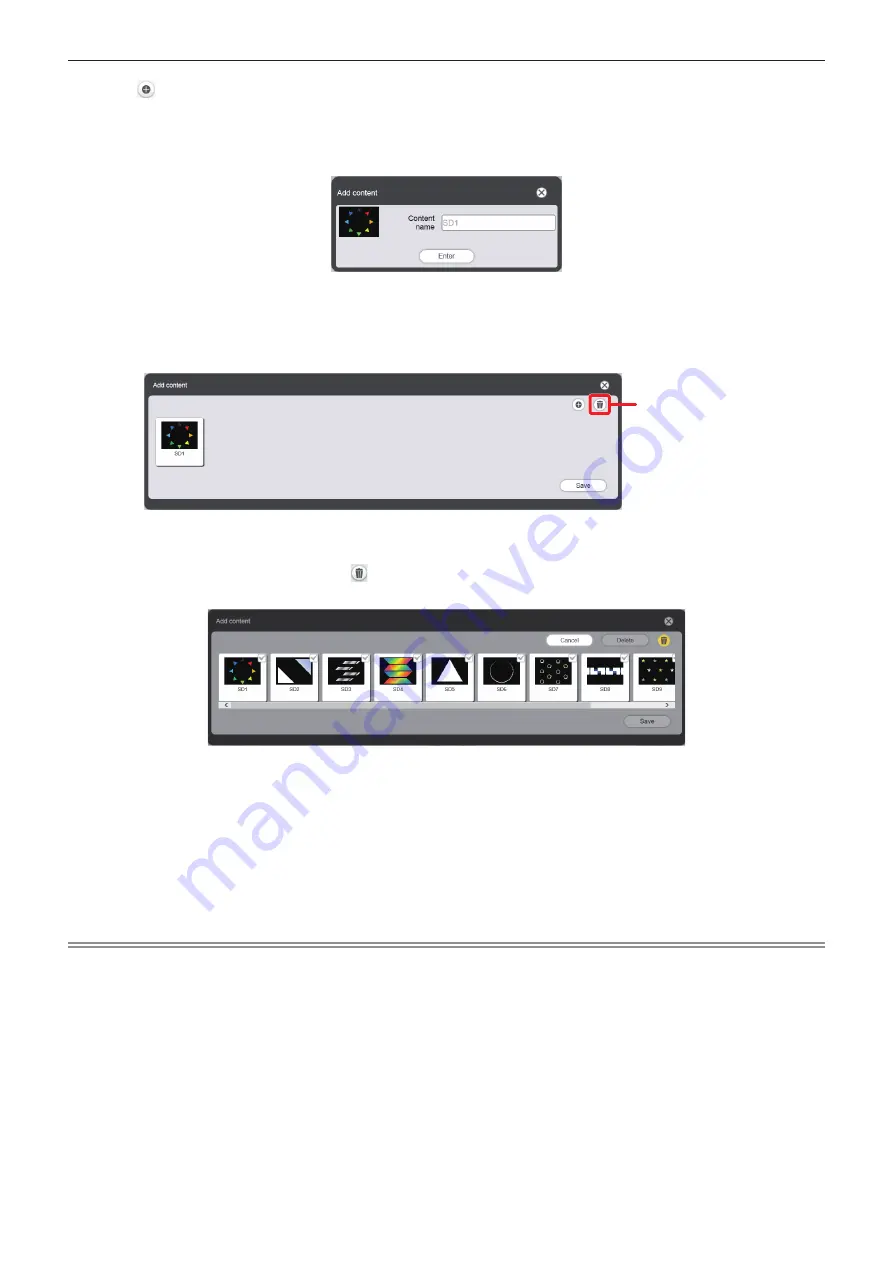
The file selection screen is displayed.
7) Select the still image file to register (1 file at a time), and click the [Open] button.
f
The content name entry screen is displayed.
8) Enter any [Content name], and click the [Enter] button.
f
For [Content name], up to 24 characters in single byte can be entered.
f
Even when the content name is different from the file name, the file name itself is not changed.
f
The content is registered in the [Add content] screen.
Content deletion
f
To continue to add content, go back to Step
6)
, or to delete content from the [Add content] screen, go to
Step
9)
, and to end adding content, proceed to Step
13)
.
9) To cancel addition of content, click on the [Add content] screen.
f
The mode changes to deletion mode.
10) Select the content for which you want to cancel addition.
f
You can select multiple contents.
11) Click the [Delete] button.
12) When the confirmation screen is displayed, click the [OK] button.
13) When addition of contents to register is complete, click the [Save] button.
f
Added contents are registered in the SD card.
Note
f
You can also register lighting patterns in the SD card as still image contents from the [Timetable] screen of [Schedule].
f
To delete or change the registered lighting patterns, refer to
“Deleting or changing registered patterns” (
x
page 196).


