


52
RQT7751
Recording from a video cassette recorder
Refer to the control reference on page 51.
[HDD]
[RAM]
When the “DV AUTO REC” function is used, programmes are
recorded as a title while at the same time chapters are created at
each break in the images and the play list is created automatically.
Preparation
1 Turn off the main unit and DV equipment, then connect the
equipment with the unit’s DV input terminal (
2 Turn on the main unit and DV equipment.
3 Pause play of the DV equipment at the point you want recording
to start.
4 Press [HDD] or [DVD] to select the recording drive.
≥
When the output signal from the external equipment is NTSC,
change the “TV System” to “NTSC” in the SETUP menu (
1
While stopped
Press [FUNCTIONS].
2
Press [
3
,
4
,
2
,
1
] to select “DV
AUTO REC” and press [ENTER].
3
Press [REC MODE] to select the
recording mode.
4
Press [
2
,
1
] to select “Rec” and
press [ENTER].
Recording starts.
When recording finishes
The confirmation screen appears. Press [ENTER] to finish DV
automatic recording.
To stop recording
Press [
∫
].
[Note]
≥
Only one piece of DV equipment (e.g., digital video camcorder) can
be connected to the unit via the DV input terminal.
≥
It is not possible to operate the unit from the connected DV equipment.
≥
The DV input on this unit is for use with DV equipment only. (It
cannot be connected to a computer, etc.)
≥
The DV equipment name may not be shown correctly.
≥
Depending on the DV equipment, the images or audio may not be
input properly.
≥
The date and time information on the tape of the DV equipment will
not be recorded.
≥
You cannot record and play simultaneously.
≥
Even if you set the simultaneous MPEG4 recording function
page 24), MPEG4 recording will not take place.
DV automatic recording (DV AUTO REC)
If the DV automatic recording function does not work properly,
check the connections and DV equipment settings, and turn the
unit off and back on.
If that does not work, follow the instructions for manual
recording (
Transferring (dubbing) still pictures
[HDD]
[RAM]
[SD]
[PC]
1
While stopped
Press [FUNCTIONS].
2
Press [
3
,
4
,
2
,
1
] to select
“DUBBING” and press [ENTER].
≥
If you are not going to change the registered list press [
4
]
several times (
page 53, step 7).
3
Press [
3
,
4
] to select “Dubbing
Direction” and press [
1
].
1
Press [
3
,
4
] to select “Source” and press [ENTER].
2
Press [
3
,
4
] to select the drive and press [ENTER].
3
Press [
3
,
4
] to select “Destination” and press
[ENTER].
4
Press [
3
,
4
] to select the drive and press [ENTER].
The same drive as the transfer (dubbing) source can be
selected.
5
Press [
2
] to confirm.
4
Press [
3
,
4
] to select “Dubbing
Mode” and press [
1
].
1
Press [
3
,
4
] to select “Format” and press [ENTER].
2
Press [
3
,
4
] to select “PICTURE” and press [ENTER].
“Recording Mode” is automatically set to “High Speed”.
3
Press [
2
] to confirm.
5
Press [
3
,
4
] to select “Create List”
and press [
1
].
Select the transferring (dubbing) items and register on the list.
Still pictures and folders cannot be registered on the same list.
∫
To register individual still pictures
1
Press [
3
,
4
] to select “New item” and press [ENTER].
2
Press [
3
,
4
,
2
,
1
] to select the still picture and press
[ENTER].
≥
To select a multiple number of items together, press [
;
]
to add the check mark and press [ENTER] (
≥
To show other pages (
≥
To select the still pictures in another folder (
≥
To edit the transferring (dubbing) list (
Transferring (dubbing) using the
transferring (dubbing) list
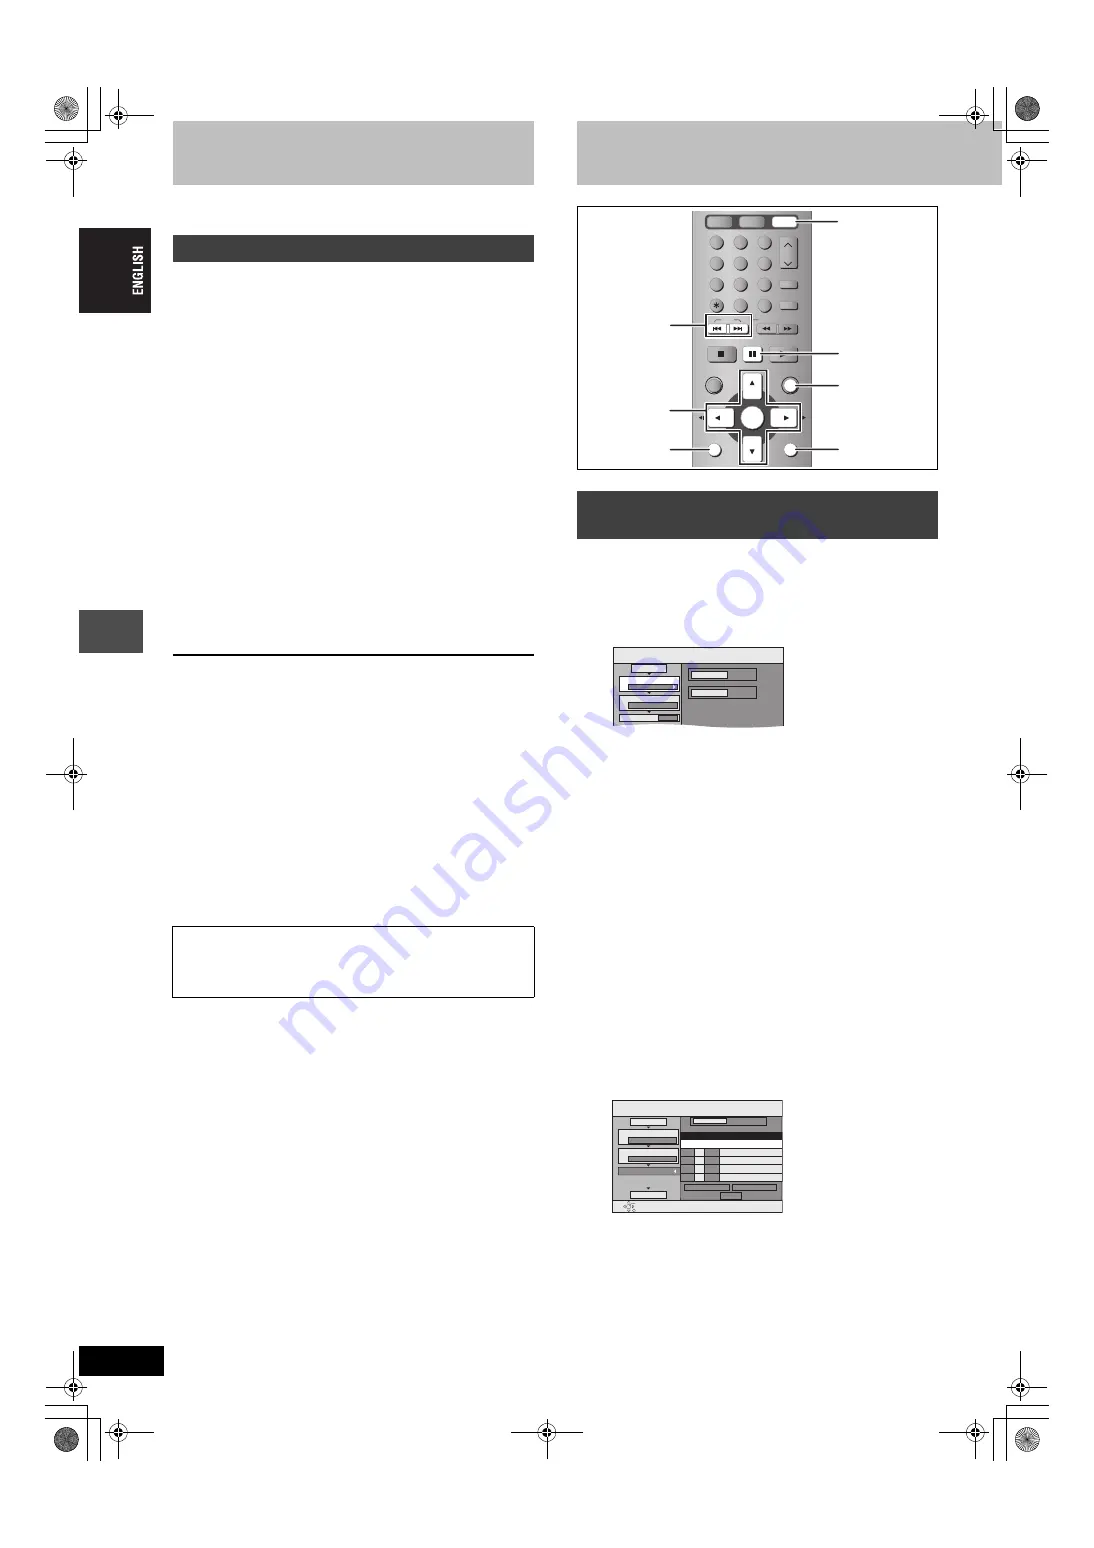
1
2
3
4
5
6
7
8
0
9
MANUAL SKIP
ShowView
CH
CANCEL
INPUT SELECT
SKIP
STOP
PAUSE
PLAY/x1.3
SLOW/SEARCH
FUNCTIONS
ENTER
DIRECT NAVIGATOR
TOP MENU
RETURN
SUB MENU
HDD
DVD
SD/PC
3
,
4
,
2
,
1
ENTER
SUB MENU
RETURN
FUNCTIONS
SD/PC
:
,
9
;
DUBBING
SD CARD
HDD
Select the dubbing direction.
1
2
3
Source
Destination
Cancel All
Dubbing Direction
Dubbing Mode
Create List
SD CARD
>
HDD
PICTURE High Speed
0
01/01
DUBBING
Create dubbing list.
Destination Capacity: 4343MB
No. Size
Previous
New item
Next
Set
ENTER
RETURN
1
2
3
Cancel All
Picture
Dubbing Direction
Dubbing Mode
Create List
Picture/Folder
Start Dubbing
SD CARD
>
HDD
PICTURE High Speed
Name of item
52
7551-EN.book 52 ページ 2004年8月26日 木曜日 午後4時34分


