


6
7
GB
Our products are developed to the highest standards of quality, functioning and design. We hope you enjoy your new
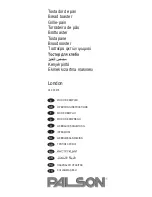
PALSON LONDON bread toaster.
SAFETY INFORMATION
When you use an electrical appliance, you must take all the basic safety precautions, including the following:
1. Read all the instructions.
. Ensure that the power supply matches the power indicated on the bread toaster’s technical specifications label.
3. Do not touch any hot surface.
4. To avoid an electric shock, do not submerge the cable, the plug or any other part of the toaster in water or other
liquid.
5. Do not obstruct the bread slot, as this could cause a fire.
6. Pay particular attention when the bread toaster is being used by children, or near children.
7. Unplug the appliance from the mains power supply when it is not in use and before cleaning it.
8. If the power cable is damaged, it must be replaced by the manufacturer, his authorised technical service agent or by
a qualified technician, in order to avoid any risks.
9. Do not allow the cable to hang over the edge of a table or work surface or to touch a hot surface.
10. Do not position the bread toaster on or near an electric or gas ring or a hot oven.
11. Do not use the appliance for purposes other than that for which it was intended.
1. Overly large slices of bread, metal accessories or utensils must not be put into the toaster, as this could be dangerous
and could give you an electric shock.
13. Bread can burn, and so toasters must not be used near or below curtains or other inflammable materials and must
be monitored when in use.
14. The use of accessories not recommended by the manufacturer of the appliance could be harmful.
15. Do not try to remove food while the toaster is toasting.
16. Be sure to remove the bread carefully after toasting it, to avoid hurting yourself.
17. Do not use the bread toaster outside.
18. Keep these instructions.
19. This product must not be used by children or by others without assistance or supervision if their physical, sensory
or mental state prevents them from using it safely. Children must be supervised to ensure they do not play with the
product.
USING THE BREAD TOASTER FOR THE FIRST TIME
The bread toaster may smell the first time that it is used, due to the oil and manufacturing residues that are left in the
bread toaster or on the heating element. This is normal and the smell will disappear after the toaster has been used a
few times. Before toasting bread for the first time, it is strongly recommended that the appliance is used in accordance
with the instructions below.
FUNCTIONING
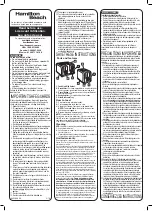
1. Position the slice of bread in the bread slot.
Note: Before using the toaster, ensure that the crumb collecting tray is correctly positioned.
. Plug in the power cable into the mains supply.
3. Turn the browning control to the desired level. There are 7 level positions: the lowest is for making lightly toasted
bread and the highest is for making very toasted bread. In position “4” slices can be toasted to a golden colour.
Note: if you toast several slices one after another, the colour of the last slices will be darker than the first slices at the
same setting.
4. Push the carriage lever straight downwards until it stays in place and toasting starts. Once the bread has been
toasted to the level set, the carriage lever will spring up automatically.
Note: the carriage lever will only stay down when the toaster is plugged in to the mains.
5. While toasting, you can watch the colour of the toast. If you wish, you may interrupt the toasting process, by pressing
the “cancel” button at any time.
6. If you have taken the bread out of the freezer, press the carriage lever straight downwards until it stays in position
and then press the “defrost” button and the Defrost light will come on. In this way the bread will be toasted until it
reaches the desired colour.
7. If you wish to reheat cold toast, press the carriage lever vertically downwards until it stays in place and then press
the “reheat” button and the Reheat light will come on. This sets the appropriate reheating time. The carriage lever
will spring up automatically and the reheating process will end.
WARNING
1. Before toasting, remove all protective wrapping.
. If smoke starts to come out of the bread toaster, press Cancel so that the toaster stops toasting immediately.
3. Avoid toasting food with very liquid ingredients such as butter.
4. Never try to remove toast stuck in the slots without first unplugging the toaster from the mains supply. Ensure that
you do not damage the internal mechanism or the heating elements when extracting the bread.
5. The bread slot is only for toasting slices of bread.
CLEANING AND MAINTENANCE
1. Unplug the toaster from the mains supply before cleaning it.
. Clean the outside with a soft, damp cloth once the toaster has cooled down. Never use metal polish.
3. Remove the crumb collecting tray from the bread toaster and empty it. If you use the toaster frequently, the crumbs
that accumulate must be removed quite frequently. Make sure that the crumb collecting tray is fully inserted before
using the toaster again.
4. When not in use or when in storage, the power cable can be rolled up in the base of the toaster.
ENVIRONMENTALLY FRIENDLY WASTE DISPOSAL.
You can help protect the environment.
Do not forget to comply with local regulations. Take electrical equipment that does not work to a suitable waste collection
site.
Thank you for putting your trust in one of our products.
Summary of Contents for LONDON
Page 12: ...22 23 AR...