8
Palmgren Operating Manual & Parts List
84315
OPERATION (CONTINUED)
For example, to locate the position of six flutes on a cylinder:
•
Open the upper rear cover.
•
Pull back on index pin lever until the index pin engages one of
the 24 holes in the spindle pulley.
•
Adjust the 12
″
tool rest to the centerline of the workpiece and
make a mark.
•
Push index pin lever forward to release pin. Slowly rotate the
workpiece until pin is located 60° (4 holes) from initial position.
(The spindle pulley has a degree scale). Engage index pin into
the pulley and place another mark on the workpiece.
•
Continue these steps until there are 6 marks on the workpiece.
•
Bowl turnings or wheel turnings can be marked in the same
manner.
WARNING:
The indexing pin must be disengaged for all other
operations on the lathe.
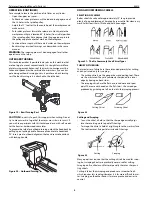
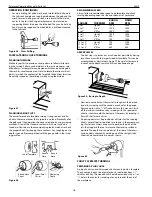
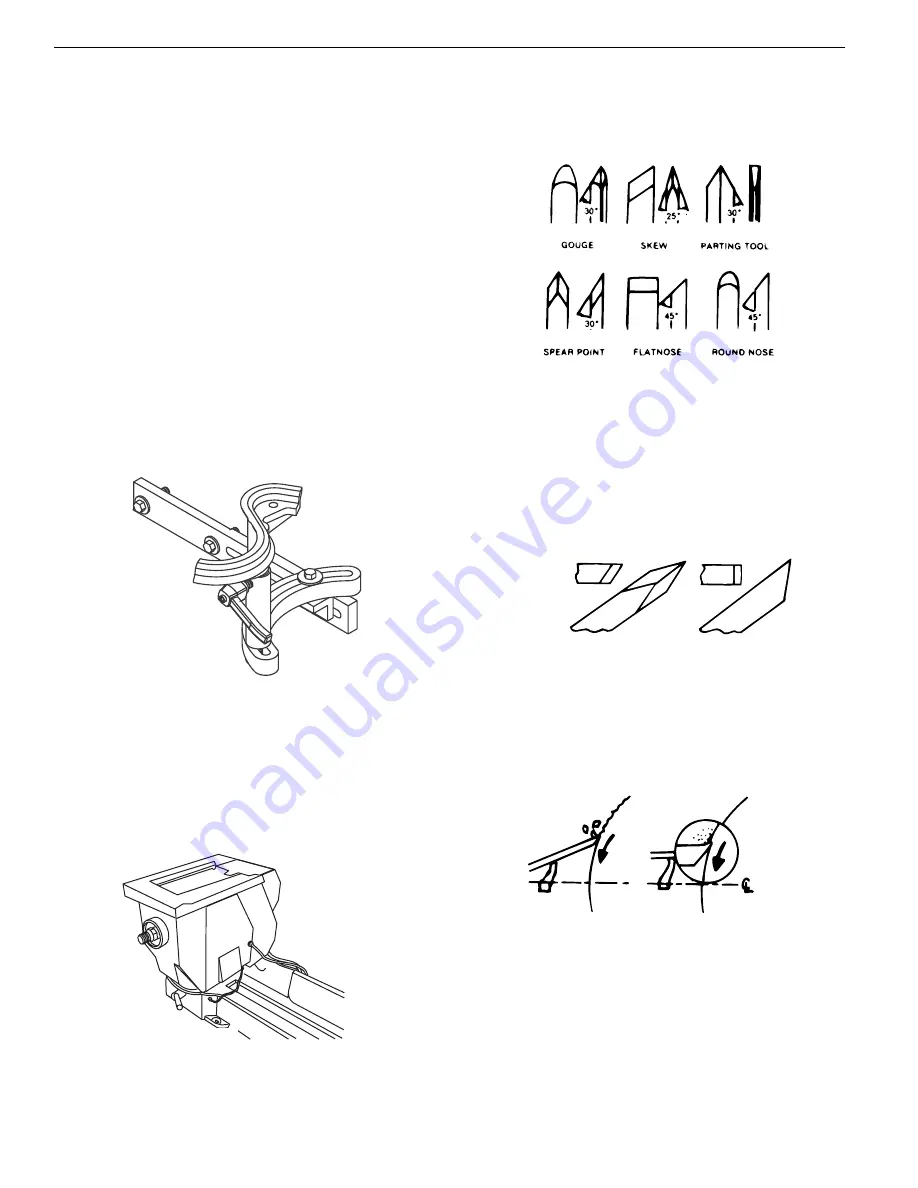
OUTBOARD TURNING
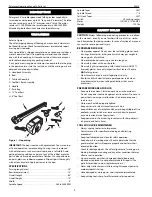
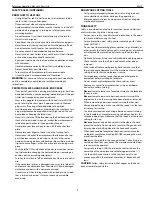
This technique makes it possible to do jobs on this machine that
are too large to mount conventionally. It is straight forward face-
plate turning, except, because of the work size, caution must be
taken and speeds must be restricted to minimums. If you antici-
pate doing outboard turning you must purchase a bowl turning
rest. The bowl turning rest is attached to the lathe bed.
CAUTION:
Do not try to push this support when cutting. Do not
try to mount work so large that the motor must strain to turn it. If
you wish to experiment with this technique, do so with soft woods.
Let the heavier, harder wood come later.
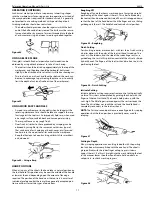
To prepare the lathe for outboard turning, unlock the headstock by
pulling up on locking handle. Remove pin and rotate headstock
90°. Insert pin at outboard alignment hole and secure headstock
with locking handle.
USING WOODWORKING CHISELS
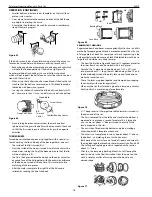
SELECTION OF CHISELS
Better chisels have handles approximately 10
″
long to provide
plenty of grip and leverage. Sharp tools are essential for clean, easy
work. Select tools that will take and hold keen edges.
THEORY OF TURNING
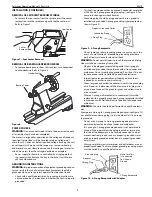
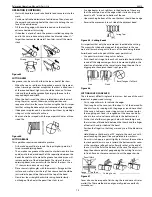
The two classes of chisels are those intended primarily for cutting,
and chisels used only for scraping.
•
The cutting chisels are the gouge, skew and parting tool. These
are the most used. They are commonly sharpened to a razor
edge by honing on both sides.
•
The scraping chisels are the flat nose, round nose and spear
point. These are not honed on the flat sides – the wire edges
produced by grinding are left on to aid in the scraping process.
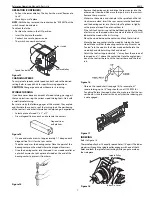
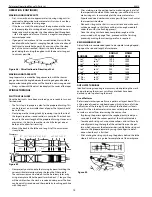
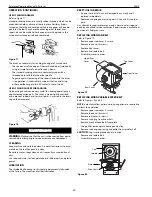
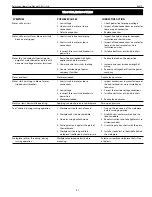
Cutting and Scraping
•
To cut, the chisel is held so that the sharp edge actually digs
into the revolving work to peel off shavings.
•
To scrape, the chisel is held at a right angle to the work surface.
This tool removes fine particles instead of shavings.
Many operations require that the cutting chisels be used for scrap-
ing, but scraping chisels are practically never used for cutting.
Scraping dulls a chisel much faster, especially the razor sharp cut-
ting chisels.
Cutting is faster than scraping and produces a smoother finish
which requires less sanding. However, it is far more difficult to mas-
ter. Scraping, on the other hand, is far more precise and easier to
control.
Figure 21 – The Six Commonly Used Chisel Types
Figure 20 – Outboard Turning
Figure 19 – Bowl Turning Rest
Figure 22
Cutting Chisel
Scraping Chisel
Figure 23
Cutting
Scraping


