15
Palmgren Operating Manual & Parts List
84315
OPERATION (CONTINUED)
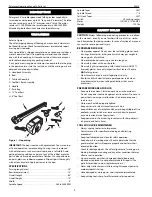
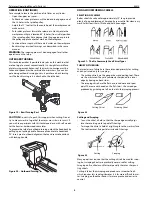
Using a Template and a Diameter Board
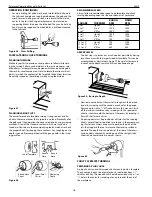
When many identical turnings are to be produced, it is convenient
to have a prepared template. This can be made of thin wood or
cardboard. It is cut on a band saw or scroll saw to have the exact
contour or the finished turning. The number one finished turning
can also be used as a template. Attach the template to a board and
then mount the board behind the lathe, on hinges, so that the
template can be moved down to touch the workpiece and allow
you to closely observe progress of your work.
If a great many turnings are being produced, a diameter board will
save the time used for resetting calipers. This is simply a thin board
along the edge of which a number of semicircular cuts have been
prepared to represent all the various caliper settings required for
measuring the sizing cuts. Each semi-circular cut is held against the
workpiece instead of using the calipers.
LONG SPINDLES
A long turning can be worked in short sections, with joints
arranged to be at shoulders where they will not be noticed.
•
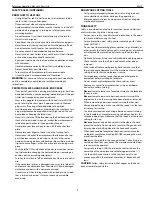
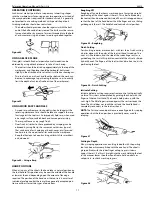
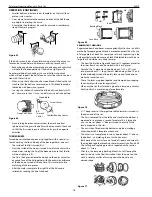
Long thin work that is likely to whip while turning should be sup-
ported at one or two places by a backstick.This is easy to make. A
simple backstick consists of a short length of wood mounted ver-
tically in an extra tool rest and notched so that it can be used to
support the spindle from behind. An improved type, which uses 2
roller skate wheels to form the notch, also is shown.
•
Position the backstick against a pre-turned portion near the
center of the spindle, this portion being at least
1
/
8
″
over finish
size to allow for later removal of any marks made upon it.
•
Operate lathe at a slower speed than normal. Lubricate the
workpiece at point of contact with the backstick. Use beeswax
(preferred), lard or grease.
•
After completing the turning, remove the backstick and finish
off the original point of contact. Sand off any slight burns
remaining on workpiece.
CUTTING DOWELS
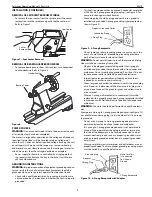
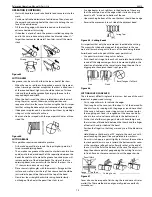
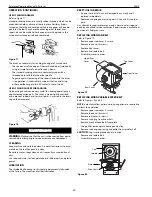
Dowels of any size can be turned quickly with the simple jig shown.
If the stock is prepared as a split or quartered turning, half round and
quarter rounds will be produced.
The jig uses a
1
/
2
″
gouge as the cutting tool and will produce dow-
els up to
7
/
16
″
diameter. Make the jig from suitable hardwood stock
as shown.
•
The hole through the jig must be large enough at the side to
the left of the gouge to allow passage of the square stock. At
the right of the gouge, this hole must be just the diameter of
the finished dowel. Make the jig so that you can hold and guide
it by hand.
•
To start, center the stock like a spindle turning and turn down
about 2
″
at the right end to desired size.
•
Then, remove the stock. Place your jig over the turned end, with
turned portion through the smaller jig hole, and recenter the
stock on the lathe.
•
Hold the jig firmly and start the lathe.
•
Push the jig slowly right to left along the stock until the whole
dowel is completed.
MISCELLANEOUS OPERATIONS
GUIDE BLOCKS FOR SCRAPING OPERATIONS
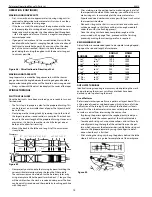
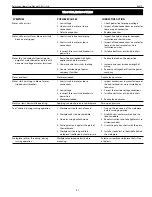
A guide block can be clamped to a chisel to limit the depth of cut
and aid in the production of perfect cylinders, tapers and facings
on faceplate turnings. Scraping methods must be used when the
guide block is employed.
DRILLING
There are several methods of using the lathe for drilling center
holes through wood stock. When the drill is properly mounted,
centering of the hole is automatic.
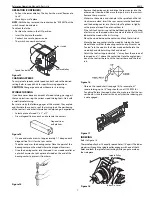
•
One method is to mount a drill in the tail stock. The workpiece
is held and revolved by the headstock. If the drill has a Morse
taper shank, it can be mounted directly in some tail stock rams.
Otherwise, it can be mounted in a chuck fitted with the proper
type shank.
•
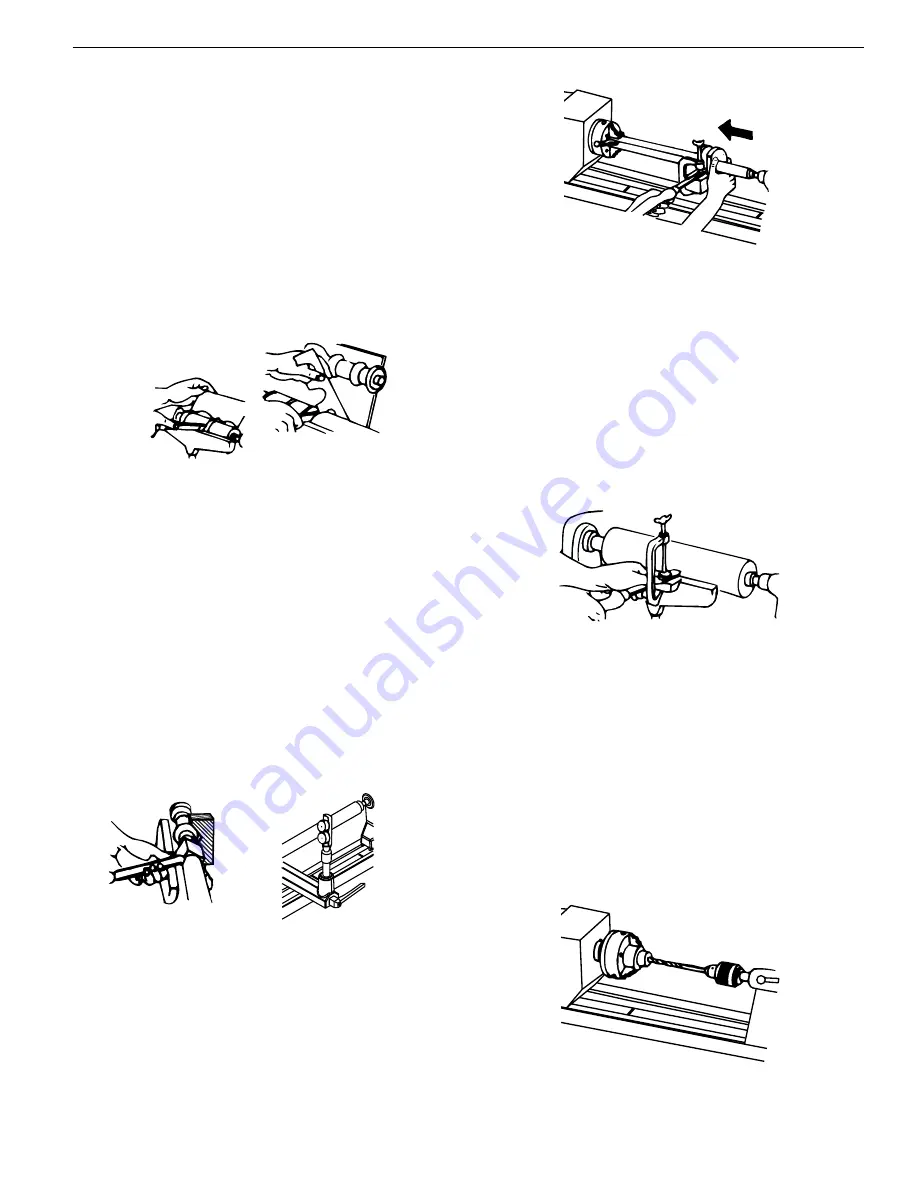
Another method of holding the drill is to mount it in the head-
stock using a 4-jaw (metal-lathe) chuck or a Jacobs chuck.
When this method is employed, there is no accurate support
for the workpiece so that center drilling is difficult. However,
cross drilling, or drilling random holes through stock can be
accomplished quickly in this manner.
Using a Template
Using a Diameter Board
Figure 51
Figure 52 – Use of Backsticks
Figure 53
Figure 55
Figure 54


