


5. Discard the storage solution from the inner bag package.
Proceed to flushing step.
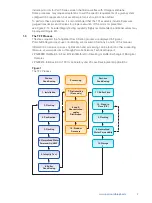
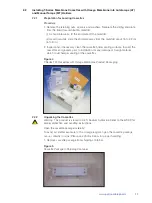
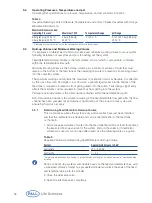
Figure 9
Preservative Solution Level
2.2.3
Installing Cassettes and Gaskets
Preparation
Remove the film cover from the gaskets and discard before installation.
Caution: Use only the gaskets supplied with the cassettes. Using thinner gaskets
(as supplied with C and F Series cassettes) may not allow proper sealing of the
cassette into the holder.
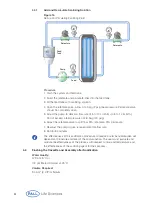
Procedure
1. Rinse the silicone gaskets (supplied with the cassettes) with deionized or
pharmaceutical grade water. Place a gasket flat against the manifold, aligning the
holes in the gasket with the holes in the manifold.
2. Place the cassette into the holder against the gasket.
Place another gasket flat against the cassette. Ensure the holes in the manifold,
gaskets, and the cassette line up.
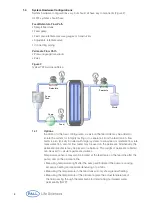
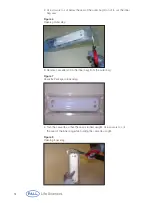
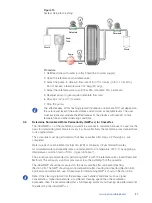
3. If your application requires multiple cassettes, continue the same gasket-cassette-
gasket pattern, ending with a gasket between the last cassette and the end plate
(Figure 10).
Install multiple cassettes with the printed cassette information all facing the same
side and direction. Try to position cassettes so that they can be read without having
to reopen the holder.
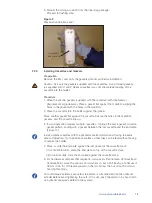
4. Place or slide the end plate against the last gasket of the cassette stack:
(i) for horizontal units, place the end plate on top of the cassette stack;
(ii) for vertical units, slide the end plate against the cassette stack.
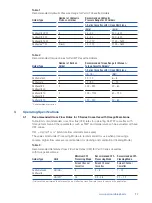
5. For hardware assemblies that require tie-rod spacers (Centramate, Centrasette LV,
Centrasette 5), place the spacers and washers on each bolt leaving a minimum of
18 mm (0.75 in.) of thread exposed on the rod. Screw the nut on each bolt and
hand tighten firmly.
For auto-torque holders, ensure that the piston is fully retracted into the hydraulic
cylinder before hand tightening the nuts. If it is not, push the piston in by hand (with
no hydraulic pressure applied to the system).
Preservative
Solution Level
13
www.pall.com/biopharm


