


2.
Select
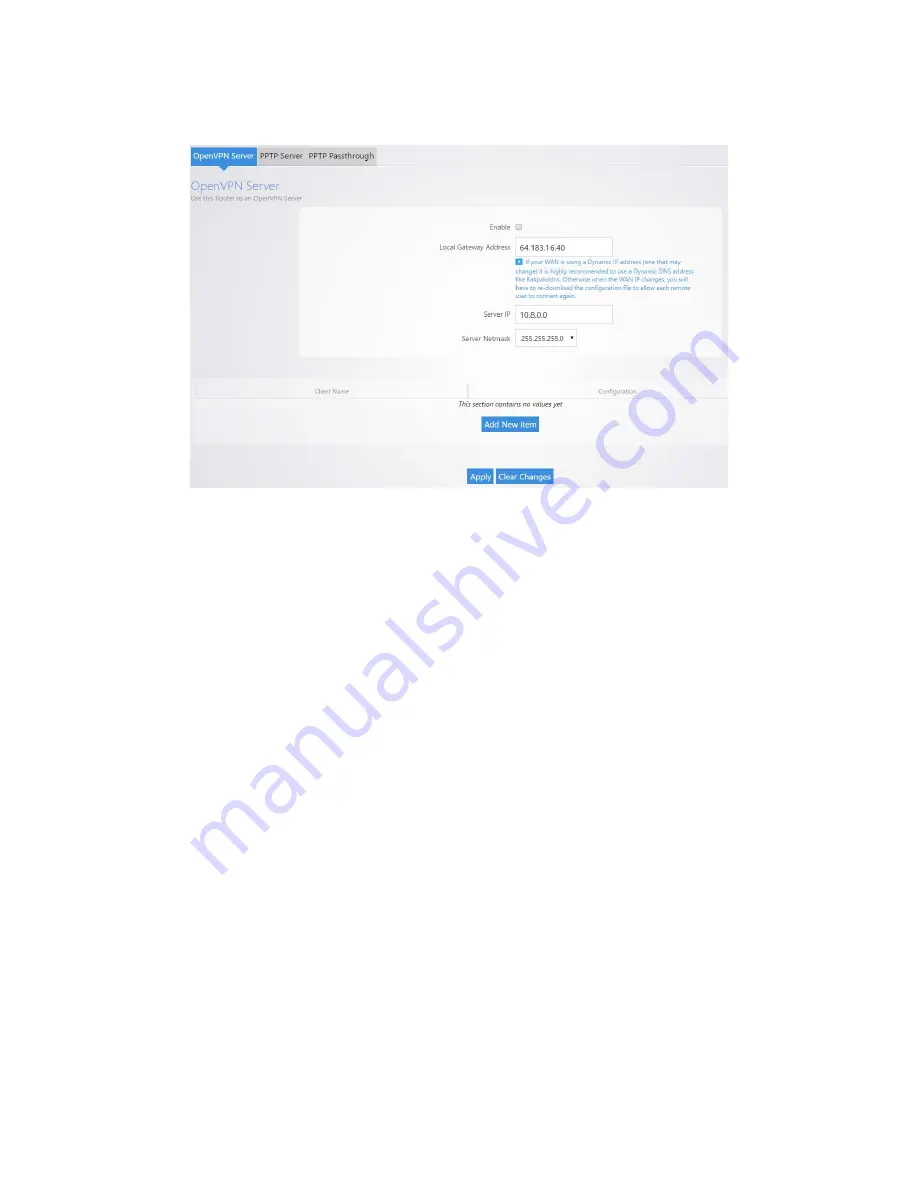
Enable
, then complete the following fields:
•
Enable:
Turn OpenVPN Server on/off
•
Local Gateway Address:
The Public IP address or DDNS name of the WAN1 interface. We
recommend that you use DDNS or BakPakDDNS because if the WAN IP changes, all remote
clients will require new configurations made for them.
•
OpenVPN Subnet:
The IP Subnet used by the OpenVPN connected clients. The OpenVPN
clients will connect using their own dedicated IP subnet. This IP subnet cannot overlap with any
of the local LAN or VLAN networks on the router. This is why the default is set to 10.8.0.0. This
should be in IP Subnet notation (with 0 at the end of the address).
•
Netmask:
The subnet mask size to use for the OpenVPN network.
•
Connection Profiles:
Each remote client connecting to the routers OpenVPN server will need
to have a profile created for them. The profile only requires a name given to it. Then the profile
is downloaded as a configuration file and sent to the device that will be connecting.
•
Client Name:
The name given to that profile. This is only to differentiate between connection
profiles.
•
Configuration:
Download the “.ovpn” configuration file for that user. This Configuration file
can then be emailed to the device that will be connecting so it can be loaded into the
OpenVPN app and the connection can be made.
•
Delete:
Delete the profile
•
Add New Item:
Add new connection profile
•
Apply:
Apply the configuration settings.
After creating a client profile and downloading the configuration file, you need to load the configuration
file into the OpenVPN program you are using.
•
Each operating system has its own version of an OpenVPN client. The connecting device will
need to download an OpenVPN client (which we have recommendations on below).
Summary of Contents for RE-1
Page 1: ...RE 1 RE 2 RK 1 High Speed Gigabit AV Router User Guide...
Page 46: ...11 Navigate to the file you want to upload and select it 12 Click Upload...
Page 56: ...6 Select the folder you want to map and click OK 7 Enter the credentials to access the folder...
Page 59: ...3 Click Browse 4 Select the folder you want to map Click OK...
Page 60: ...5 Click Finish 6 Enter the credentials to access the folder...
Page 61: ...You will now have access to the folder Your folder will now be mapped on your computer...
Page 74: ...5 Then tap Connect...
Page 75: ......
Page 76: ...6 Allow permission to run OpenVPN by tapping OK You are connected to OpenVPN...
Page 77: ......


