


3.
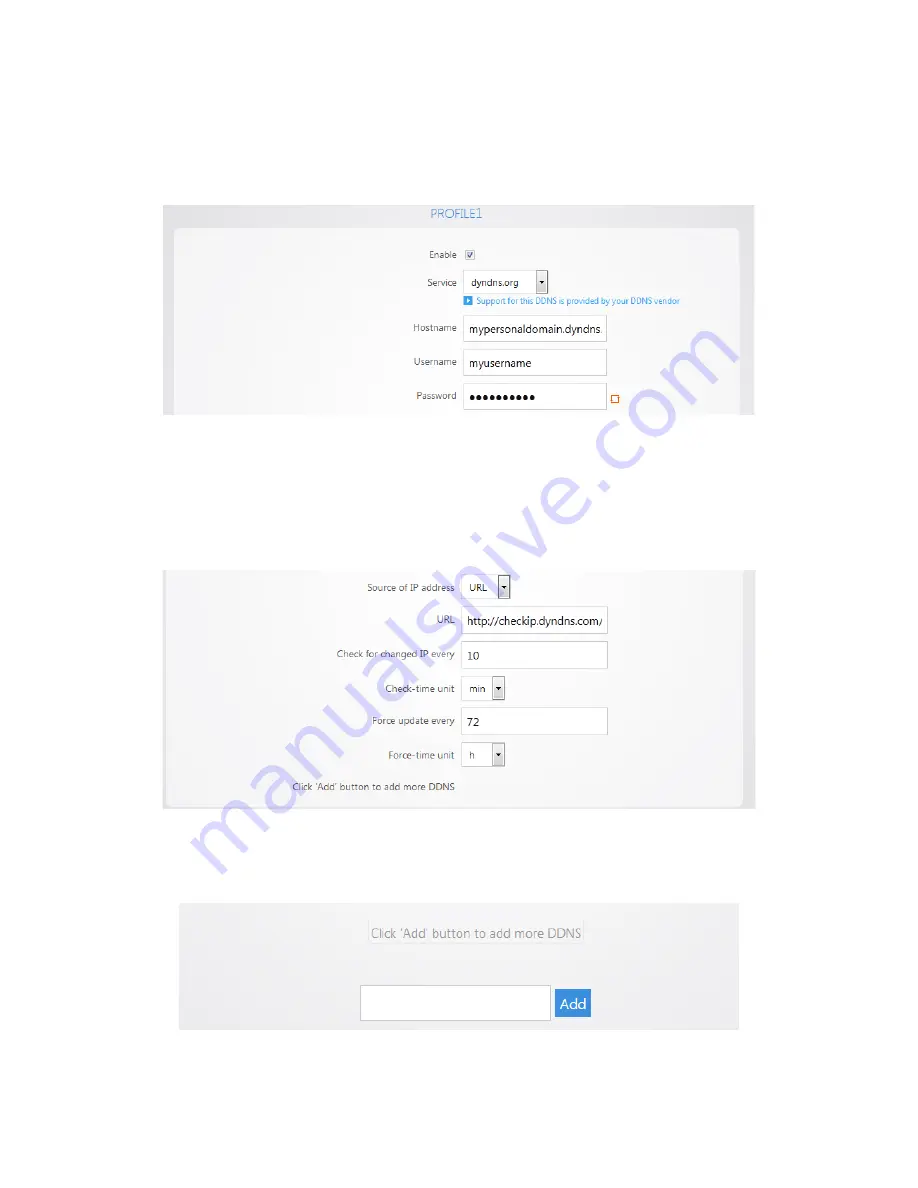
Select Enable. For the
Service
drop down menu, select your DDNS provider. For the
Hostname
,
enter the full domain name that you signed up for. In the
Username
field enter the username for
your account with your DDNS provider. For the
Password
field, enter the password for your
account.
4.
For the
Source of IP address
field select
Zone
. For the
Zone
field select
WAN
. The
Check for
change IP every
field indicates how often the router will check to see if the WAN IP address has
changed. The
Check-time unit
indicates the unit of time that is used for the
Check for changed IP
every
field. The
Force update every
field indicates when the router will force an update with the
DDNS provider.
The Force-time unit
indicates the unit of time that is used for the
Force update
every
field. Click
Apply
.
5.
You can add a secondary DDNS profile to the router. In case the first DDNS provider does not work
the secondary profile can act as a backup. To add a secondary profile simply click
Add
and fill out
the information as you did in steps 2 and 3.
Summary of Contents for RE-1
Page 1: ...RE 1 RE 2 RK 1 High Speed Gigabit AV Router User Guide...
Page 46: ...11 Navigate to the file you want to upload and select it 12 Click Upload...
Page 56: ...6 Select the folder you want to map and click OK 7 Enter the credentials to access the folder...
Page 59: ...3 Click Browse 4 Select the folder you want to map Click OK...
Page 60: ...5 Click Finish 6 Enter the credentials to access the folder...
Page 61: ...You will now have access to the folder Your folder will now be mapped on your computer...
Page 74: ...5 Then tap Connect...
Page 75: ......
Page 76: ...6 Allow permission to run OpenVPN by tapping OK You are connected to OpenVPN...
Page 77: ......


