Digital Video Recorder
41
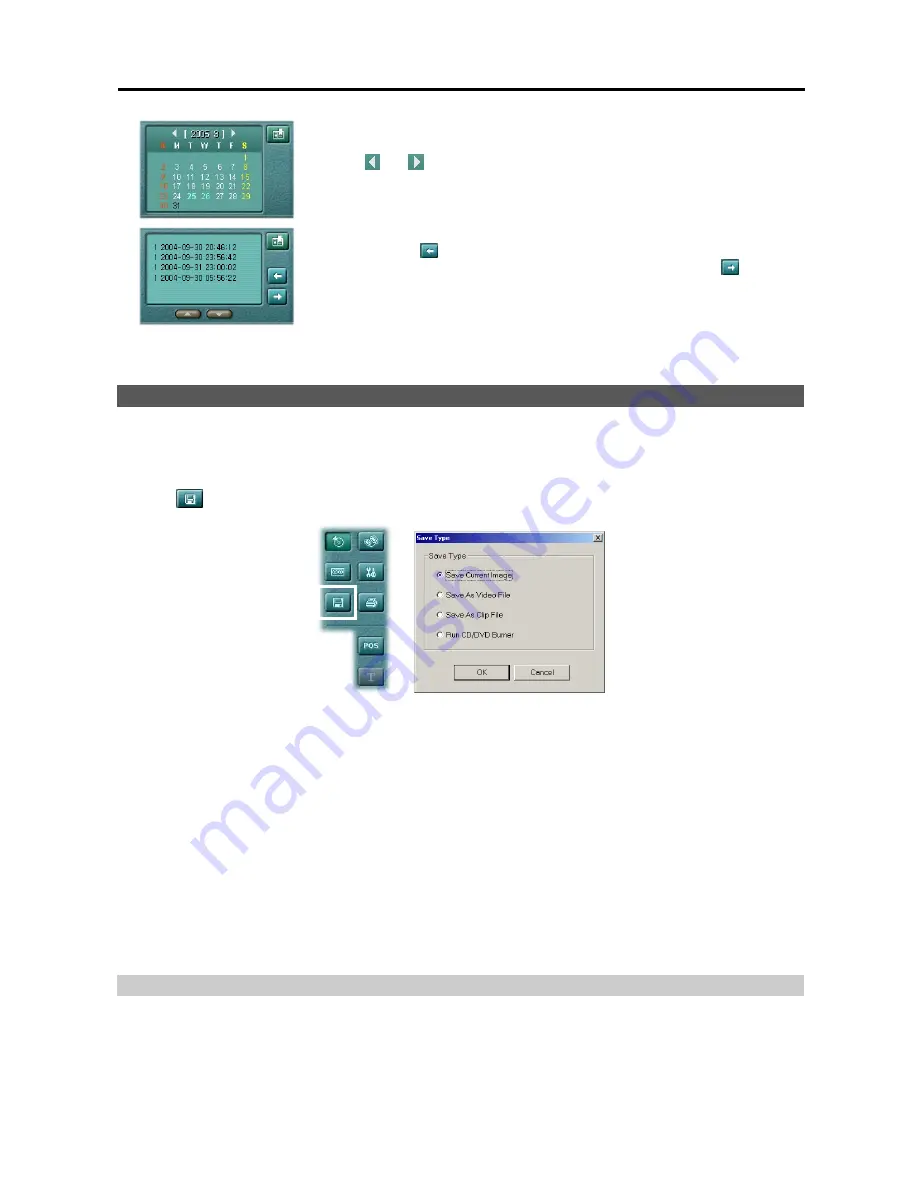
Select recorded data from the calendar. The calendar provides access to single day
recorded data. Click the date you want to search. Scroll through the months by
clicking and . Clicking the button again goes to the bookmark.
You can review the specific image fast and easily by adding bookmarks for recorded
images. Click the
button to bookmark the currently displayed image. If you want
to delete the bookmark, select the target information and then click the
button. A
bookmark lists the camera number, date and time, and bookmark description. The
bookmark description will be shown automatically when the mouse cursor is not
moving on a bookmark data for a while. Clicking the button again goes to the calendar.
NOTE:
When adding bookmarks on the BASE system, the bookmarks are saved separately for each remote site.
SAVING OF RECORDED VIDEO
NOTE:
The user can save recorded video when the user has an authority with
External Save
. The
External Save
option should be selected during the
SmartGuard – Authority
setup. Refer to Chapter 2
— SmartGuard
,
Setting
Up the Authority
for details.
Click the
(External Save) button. The
Save Type
screen appears.
Save Current Image:
Saves the current image as a bitmap or JPEG file. Refer to the
Save Current Image
section (p. 2) for details.
Save As Video File:
Saves any video clip as an AVI file. Refer to the
Save As Video File
section (p. 2) for details.
Save As Clip File:
Saves any video clip as an “.exe” file. Refer to the
Save As Clip File
section (p. 2) for details.
Run CD/DVD Burner:
Saves the recorded data on the CD or DVD drive using the CD/DVD burning program.
Refer to the
Run CD/DVD Burner
section (p. 2) for details.
NOTE:
When you save the current image as a bitmap file (*.bmp file format only) the watermark will be included
on the image, so you can check whether the saved image has been forged using the
SmartWatermark
(watermark
viewer program).
NOTE:
Starting to burn a CD/DVD might interrupt DVR recording.
NOTE:
The image and video clip can be saved only under the “
C:\IDR-Series\temp
” directory or on the removable
disk including CD-RW, DVD RW and USB storage.
Save Current Image
Click the
Save Current Image
radio button in the
Save Type
dialog box, and click the
OK
button.
Summary of Contents for H264
Page 1: ......
Page 2: ......
Page 10: ...User s Manual 4 ...
Page 40: ...User s Manual 34 ...
Page 70: ...User s Manual 64 ...


