User’s Manual
18
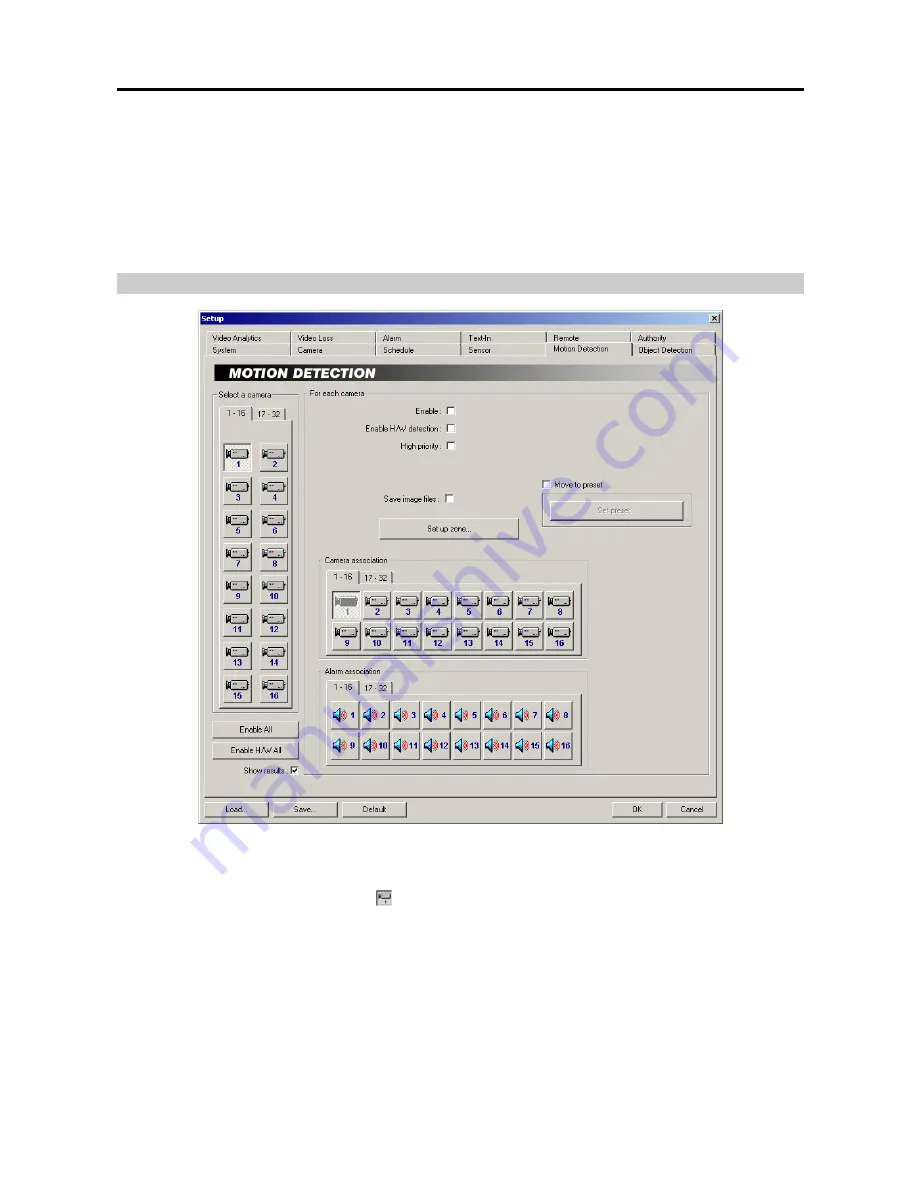
Camera association:
Click the camera icon to associate it with a selected sensor. Up to 16 cameras can be selected.
Video from associated camera(s) will be recorded when a related sensor is activated.
NOTE:
Selecting
1-16
tab displays camera channels 1 to 16 and selecting
17-32
tab displays 17 to 32.
Alarm association:
Click the alarm icon to be associated with a selected sensor. The alarm will go off when a related
sensor is activated.
NOTE:
Selecting
1-16
tab displays alarm channels to 16 and selecting
17-32
tab displays 17 to 32.
Setting Up the Motion Detection
NOTE:
When using the video analytics function, the motion detection function except the H/W detection will not be
available for the same camera.
Select a camera:
Select a camera icon to set up.
NOTE:
The camera number indicates the input signal number set during the
Change Signal
setup. Refer to the
Change Signal
setup of the
Setting Up the System
(p. 2) section for details.
NOTE:
Selecting
1-16
tab displays camera channels 1 to 16 and selecting
17-32
tab displays 17 to 32.
Enable All:
Click the button to enable motion detection for all cameras.
Enable H/W All:
Click the button to enable hardware motion detection for all cameras.
NOTE:
Using hardware motion detection will increase system performance by decreasing a system load; however,
hardware motion detection might be less sensitive than general motion detection.
Show results:
Check the box to display detection results on the monitoring image for all cameras set to enable motion
detection. If you want to use the Show results, the
Show OSD
option should be selected during the
System
setup.
Summary of Contents for H264
Page 1: ......
Page 2: ......
Page 10: ...User s Manual 4 ...
Page 40: ...User s Manual 34 ...
Page 70: ...User s Manual 64 ...


