Digital Video Recorder
11
– Monitoring without login:
Check the box if you want to view video on the Spot monitor without login.
Set up Time Sync…:
Set up the time synchronization if required. Refer to
Appendix 6 — Time Synchronization
for details.
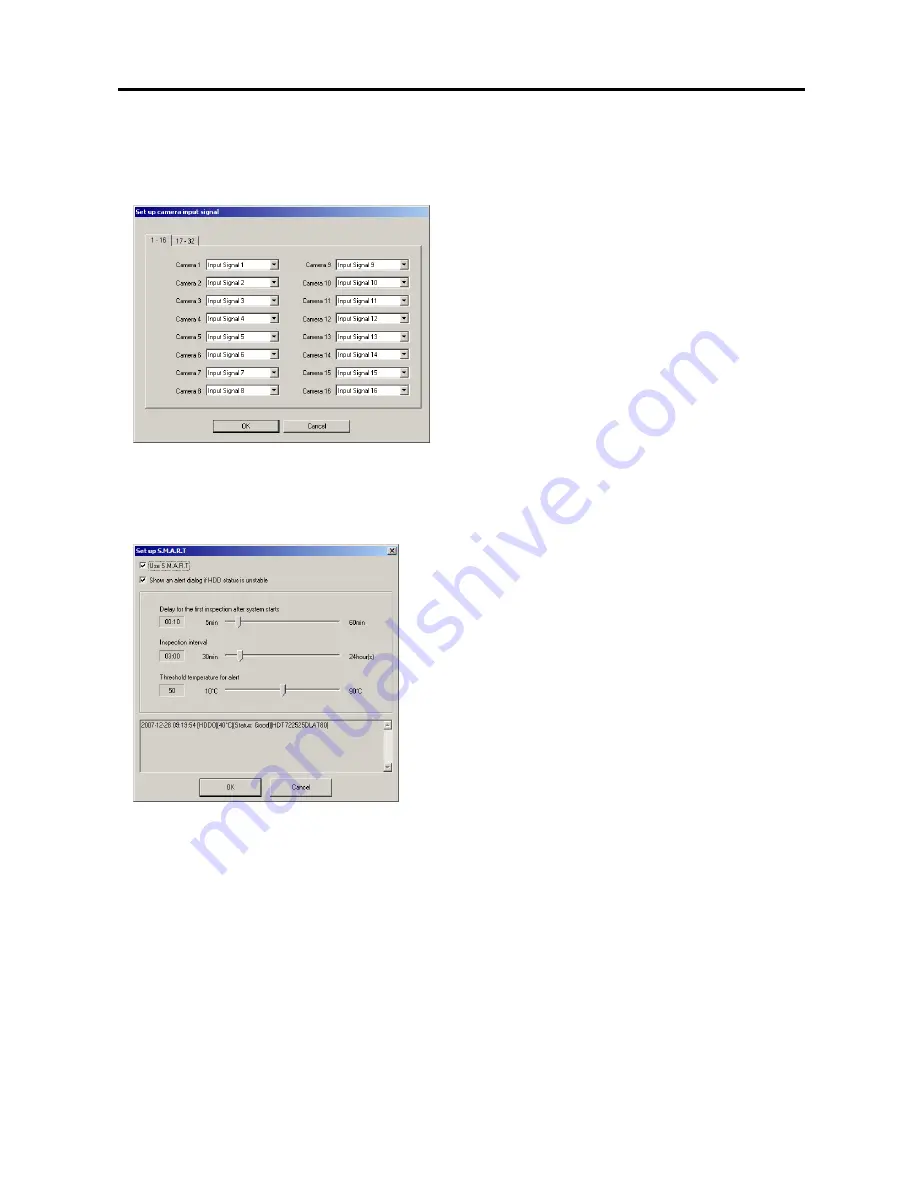
Change Signal…:
Select the video input signal to each camera number from a drop-down list.
NOTE: Input Signal 1
to
Input Signal 16
can be selected
for
Camera 1
to
Camera 16
, and
Input Signal 17
to
Input
Signal 32
for
Camera 17
to
Camera 32
.
NOTE:
The input signal number indicates the
VIDEO IN
port number on the DVR rear panel.
Note…:
Set up the note function. The user can add or delete notes. If you want to read the note, select the line and
click the
View
button. Click the
Load
button to load the saved note, the
Save
button to save the current note, and
the
Text Save
button to save the current note to the text file.
Set up S.M.A.R.T. …:
Set up the S.M.A.R.T. function
when the installed hard disk drives support S.M.A.R.T. (Self-
Monitoring, Analysis and Reporting Technology) Monitoring program (Internal hard disk drives only).
−
Use S.M.A.R.T.:
Check the box if you want to use S.M.A.R.T.
function.
−
Show an alert dialog if HDD status is unstable:
Check the
box if you want to display an alert message when the DVR senses
that the hard disk drive status is Poor. Once the alert message
displays, replacing the hard disk drive as soon as possible is
recommended, usually within 24 hours.
−
Delay for the first inspection after system starts:
Set the
standby time until the system performs the first inspection after
the system starts.
−
Inspection interval:
Set the inspection interval.
−
Threshold temperature for alert:
Set the threshold temperature
of hard disk drives. The DVR logs an event when the temperature
of hard disk drives exceeds the defined threshold.
Set up backup...:
Set up backup information. Refer to
Chapter 4 — SmartBackup
for details.
Set up Web Server...:
Set up an IIS (Internet Information Services) for the WebGuard program.
Click the
Load...
button if you want to load typical settings. Click the
Save...
button if you want to save the current
settings. Click the
Default
button if you want to load default settings. You can save your changes by clicking the
OK
button. Selecting
Cancel
exits the dialog box without saving the changes.
NOTE:
Only the administrator level user can use the
Load
,
Save
and
Default
buttons.
Summary of Contents for H264
Page 1: ......
Page 2: ......
Page 10: ...User s Manual 4 ...
Page 40: ...User s Manual 34 ...
Page 70: ...User s Manual 64 ...


