B_PM_UMCbox_en04.doc
ÖSTLING Markiersysteme GmbH
Operation
4-9
Creating a new text field
1. Select
File > New mask
.
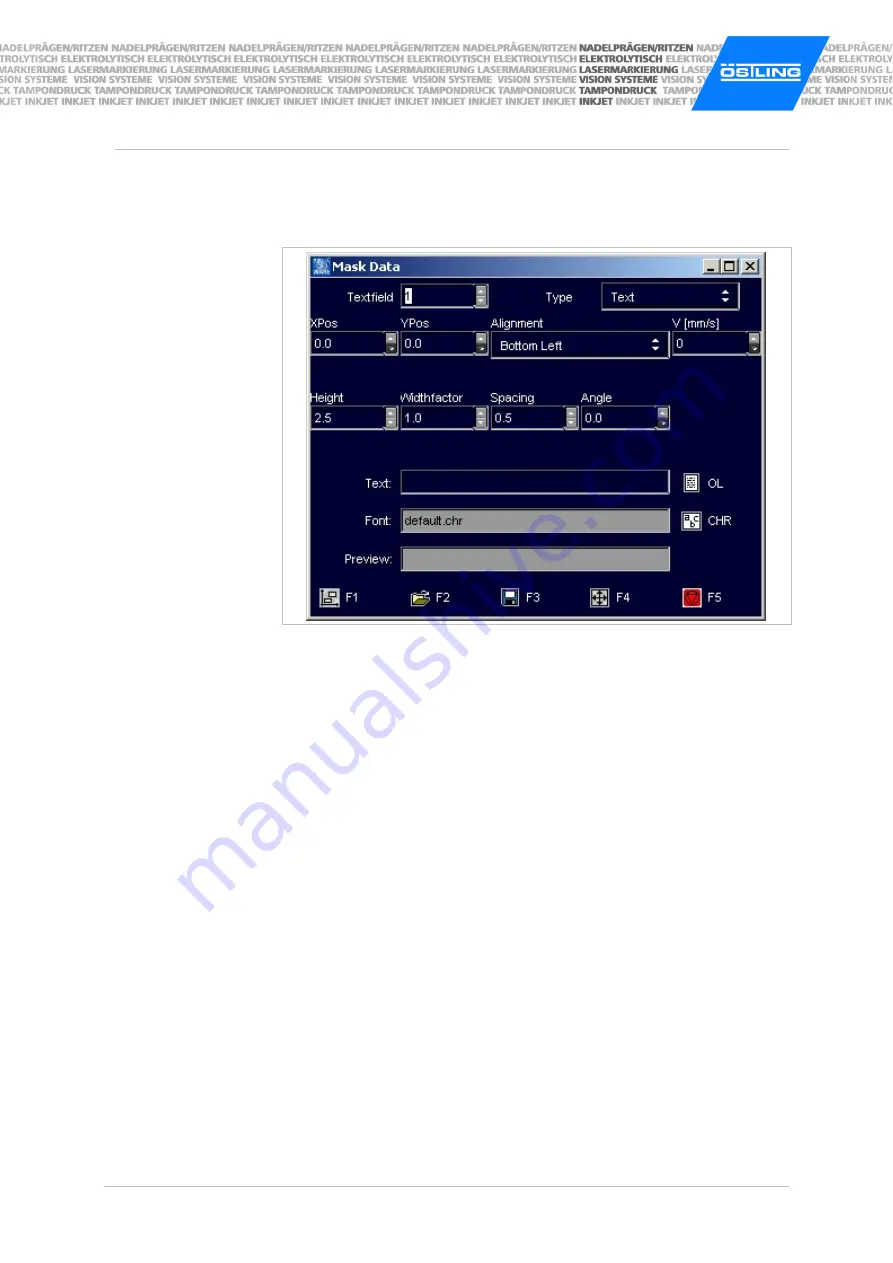
"Mask Data" appears.
Mask "Mask Data"
Fig. 10221en
2. Enter the number of the text field behind "Textfield".
3. Select the desired type of text field (see page 4-8) behind "Type".
Depending on the selected "Type" a different number of further input fields
are displayed.
4. Select the desired alignment of the text field (see page 4-8) under "Align-
ment".
5. Enter the X- and Y-position of the reference point (see Alignment on page
4-8) under "XPos" and "YPos".
6. Enter the marking speed under "V [mm/s]".
Note
Text field with V = 0 mm/s are not marked and are displayed in the preview
in blue colour.
7. Enter the character height of the capital letters in [mm] under "Height".
Heights from 0.5 to 99.9 mm can be entered. When marking a data matrix
enter the "Dot size" in [mm].
8. If the characters of the text shall be marked wider or smaller than standard:
enter a value unequal to 1.0 under "Widthfactor". Character widths from 0.1
to 10 can be entered.
0.5 causes half character width, 2.0 double character width.
9. If the spacing between 2 adjacent characters shall be larger than standard:
enter a value between 0 and 10 in [mm] under "Spacing".
Summary of Contents for PinMark UMC box
Page 14: ...B_PM_UMCbox_en01 doc 1 8 Safety ÖSTLING Markiersysteme GmbH ...
Page 32: ...B_PM_UMCbox_en03 doc 3 12 Description ÖSTLING Markiersysteme GmbH ...
Page 91: ...B_PM_UMCbox_en07 doc ÖSTLING Markiersysteme GmbH Index 7 1 Chapter 7 Index ...
Page 94: ...B_PM_UMCbox_en07 doc 7 4 Index ÖSTLING Markiersysteme GmbH ...
Page 96: ...B_PM_UMCbox_en08 doc 8 2 Drawings parts lists ÖSTLING Markiersysteme GmbH ...
Page 98: ...B_PM_UMCbox_en09 doc 9 2 EC declaration of conformity ÖSTLING Markiersysteme GmbH ...
Page 100: ......
Page 102: ...B_PM_UMCbox_en10 doc 10 2 Service request ÖSTLING Markiersysteme GmbH ...
Page 104: ......


