Install an Internal USB Flash Drive
2.
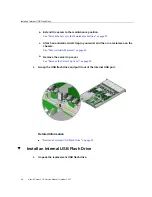
Insert the USB flash drive into the internal USB port.
3.
Return the server to operation.
a.
Install the server top cover.
“Install the Server Top Cover” on page 210
.
b.
Return the server to the normal rack position.
“Return the Server to the Normal Rack Position” on page 212
c.
Reconnect the power cords to the server power supplies and reconnect the
data cables.
“Reconnect Data Cables and Power Cords” on page 214
d.
Power on the server.
“Power On the Server” on page 214
.
Verify that the power supply AC OK LED is lit.
Related Information
■
“Install an Internal USB Flash Drive” on page 94
Servicing an Internal USB Flash Drive (CRU)
95
Summary of Contents for X7-2
Page 1: ...Oracle Server X7 2 Service Manual Part No E72445 03 October 2017 ...
Page 2: ......
Page 14: ...14 Oracle Server X7 2 Service Manual October 2017 ...
Page 86: ...86 Oracle Server X7 2 Service Manual October 2017 ...
Page 96: ...96 Oracle Server X7 2 Service Manual October 2017 ...
Page 110: ...110 Oracle Server X7 2 Service Manual October 2017 ...
Page 136: ...136 Oracle Server X7 2 Service Manual October 2017 ...
Page 150: ...150 Oracle Server X7 2 Service Manual October 2017 ...
Page 162: ...162 Oracle Server X7 2 Service Manual October 2017 ...
Page 168: ...168 Oracle Server X7 2 Service Manual October 2017 ...
Page 178: ...178 Oracle Server X7 2 Service Manual October 2017 ...
Page 184: ...184 Oracle Server X7 2 Service Manual October 2017 ...
Page 192: ...192 Oracle Server X7 2 Service Manual October 2017 ...
Page 216: ...216 Oracle Server X7 2 Service Manual October 2017 ...
Page 252: ...252 Oracle Server X7 2 Service Manual October 2017 ...
Page 282: ...282 Oracle Server X7 2 Service Manual October 2017 ...
Page 306: ...306 Oracle Server X7 2 Service Manual October 2017 ...

