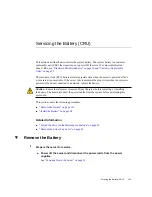


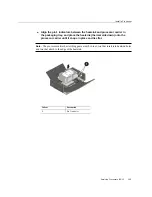


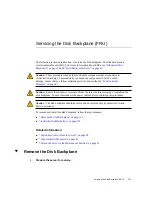
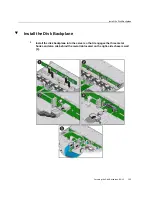

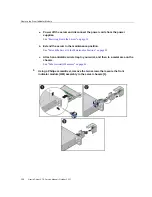

Identify and Remove a Faulty Processor
d.
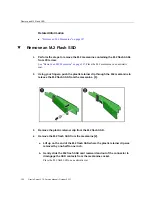
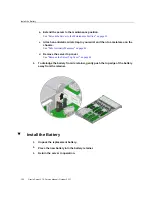
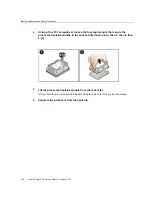
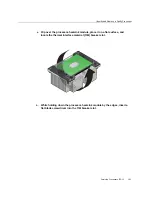
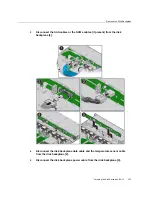
Remove the processor carrier with processor from the heatsink by prying or
pinching the plastic latch tabs that attach the processor to the heatsink.
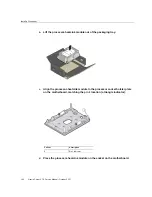
Note -
A thin layer of thermal grease separates the heatsink and the processor. This grease
acts as an adhesive. Do not allow the thermal grease to contaminate the work space or other
components.
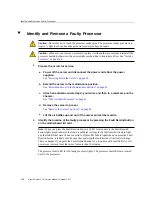
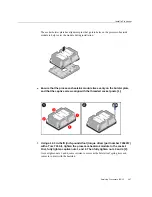
6.
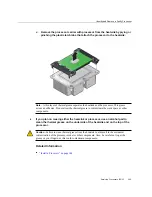
If you plan on reusing either the heatsink or processor, use an alcohol pad to
clean the thermal grease on the underside of the heatsink and on the top of the
processor.
Caution -
Failure to clean thermal grease from the heatsink could result in the accidental
contamination of the processor socket or other components. Also, be careful not to get the
grease on your fingers, as this could contaminate components.
Related Information
■
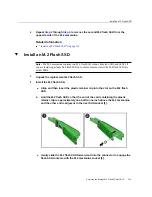
“Install a Processor” on page 144
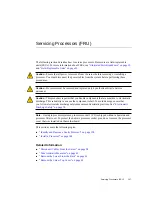
Servicing Processors (FRU)
143
Summary of Contents for X7-2
Page 1: ...Oracle Server X7 2 Service Manual Part No E72445 03 October 2017 ...
Page 2: ......
Page 14: ...14 Oracle Server X7 2 Service Manual October 2017 ...
Page 86: ...86 Oracle Server X7 2 Service Manual October 2017 ...
Page 96: ...96 Oracle Server X7 2 Service Manual October 2017 ...
Page 110: ...110 Oracle Server X7 2 Service Manual October 2017 ...
Page 136: ...136 Oracle Server X7 2 Service Manual October 2017 ...
Page 150: ...150 Oracle Server X7 2 Service Manual October 2017 ...
Page 162: ...162 Oracle Server X7 2 Service Manual October 2017 ...
Page 168: ...168 Oracle Server X7 2 Service Manual October 2017 ...
Page 178: ...178 Oracle Server X7 2 Service Manual October 2017 ...
Page 184: ...184 Oracle Server X7 2 Service Manual October 2017 ...
Page 192: ...192 Oracle Server X7 2 Service Manual October 2017 ...
Page 216: ...216 Oracle Server X7 2 Service Manual October 2017 ...
Page 252: ...252 Oracle Server X7 2 Service Manual October 2017 ...
Page 282: ...282 Oracle Server X7 2 Service Manual October 2017 ...
Page 306: ...306 Oracle Server X7 2 Service Manual October 2017 ...


