


Remove Antistatic Measures
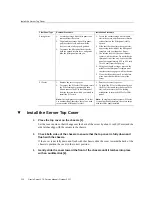
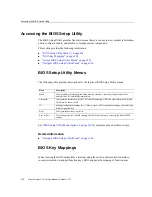
As you slide the cover toward the front of the server, the release button on the top of the server
automatically rotates downward to the closed position. Latch the top cover by pushing down
on the button until it is flush with the cover and you hear an audible click. An audible click
indicates that the cover is latched.
4.
Use a Torx T10 screwdriver to turn the release button latch counter-clockwise to
the locked position.
Related Information
■
“Remove the Server Top Cover” on page 62
Remove Antistatic Measures
Remove any antistatic straps or conductors from the server chassis.
Related Information
■
“Take Antistatic Measures” on page 61
Reinstall the Server Into the Rack
After servicing the system, reinstall it into the rack.
Returning the Server to Operation
211
Summary of Contents for X7-2
Page 1: ...Oracle Server X7 2 Service Manual Part No E72445 03 October 2017 ...
Page 2: ......
Page 14: ...14 Oracle Server X7 2 Service Manual October 2017 ...
Page 86: ...86 Oracle Server X7 2 Service Manual October 2017 ...
Page 96: ...96 Oracle Server X7 2 Service Manual October 2017 ...
Page 110: ...110 Oracle Server X7 2 Service Manual October 2017 ...
Page 136: ...136 Oracle Server X7 2 Service Manual October 2017 ...
Page 150: ...150 Oracle Server X7 2 Service Manual October 2017 ...
Page 162: ...162 Oracle Server X7 2 Service Manual October 2017 ...
Page 168: ...168 Oracle Server X7 2 Service Manual October 2017 ...
Page 178: ...178 Oracle Server X7 2 Service Manual October 2017 ...
Page 184: ...184 Oracle Server X7 2 Service Manual October 2017 ...
Page 192: ...192 Oracle Server X7 2 Service Manual October 2017 ...
Page 216: ...216 Oracle Server X7 2 Service Manual October 2017 ...
Page 252: ...252 Oracle Server X7 2 Service Manual October 2017 ...
Page 282: ...282 Oracle Server X7 2 Service Manual October 2017 ...
Page 306: ...306 Oracle Server X7 2 Service Manual October 2017 ...


