
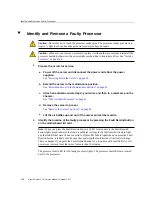


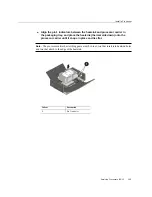
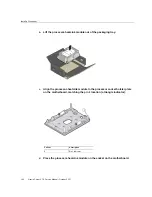
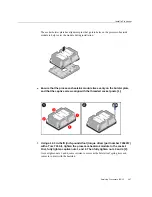


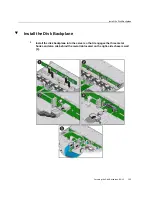


Install a Processor
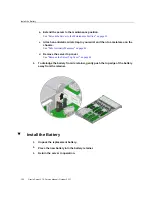
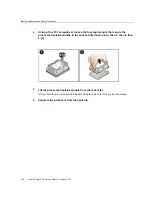
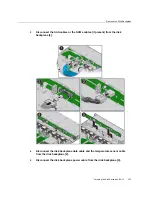
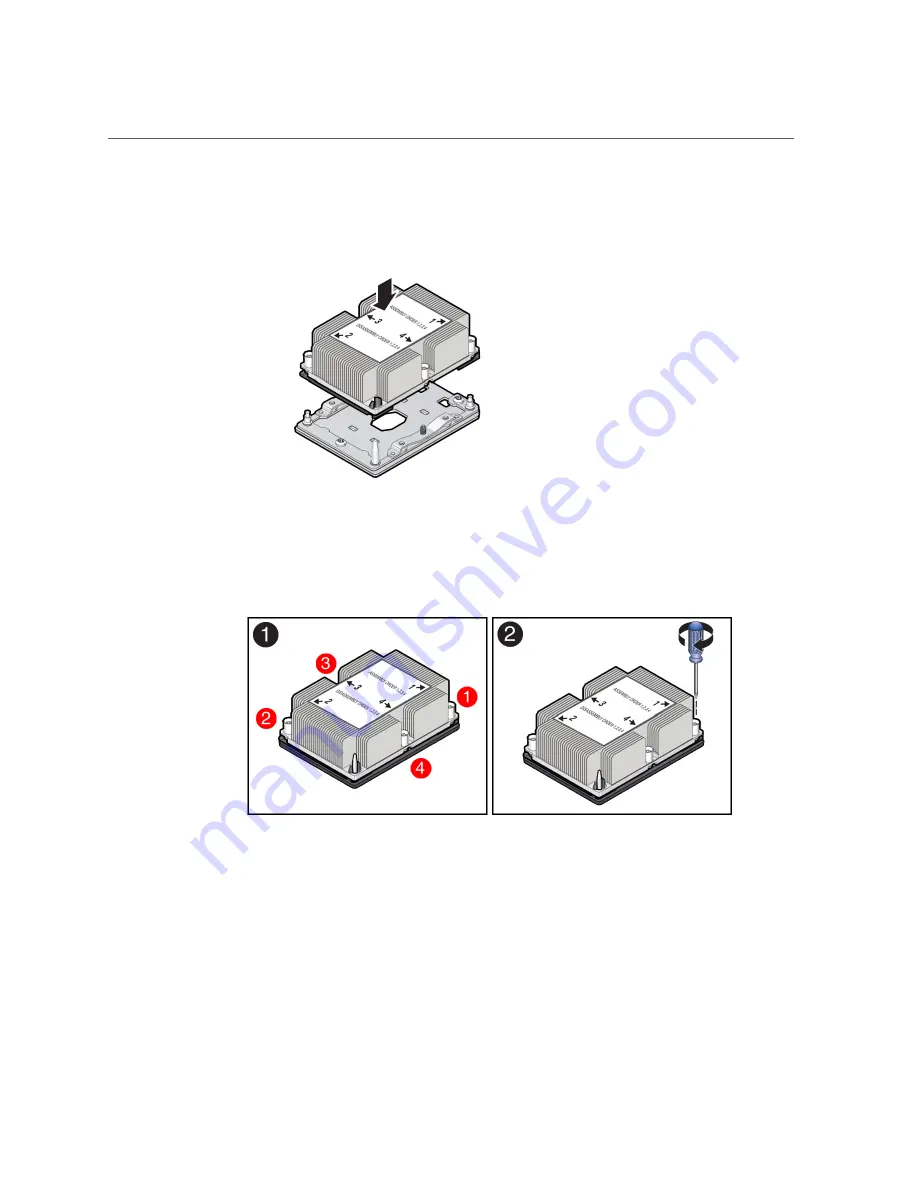
The socket bolster plate has alignment pins that go into holes on the processor-heatsink
module to help center the module during installation.
e.
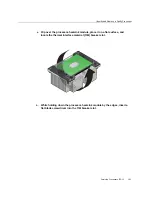
Ensure that the processor-heatsink module lies evenly on the bolster plate
and that the captive screws align with the threaded socket posts [1].
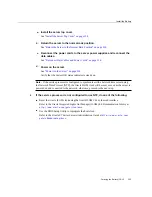
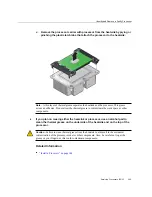
f.
Using a 12.0 in-lbs/ft (inch-pounds/foot) torque driver (part number 7352217)
with a Torx T30 bit, tighten the processor-heatsink module to the socket.
First, fully tighten captive nuts 1 and 2. Then fully tighten nuts 3 and 4 [2].
As you tighten nuts 3 and 4, some resistance occurs as the bolster leaf spring rises and
comes in contact with the heatsink.
Servicing Processors (FRU)
147
Summary of Contents for X7-2
Page 1: ...Oracle Server X7 2 Service Manual Part No E72445 03 October 2017 ...
Page 2: ......
Page 14: ...14 Oracle Server X7 2 Service Manual October 2017 ...
Page 86: ...86 Oracle Server X7 2 Service Manual October 2017 ...
Page 96: ...96 Oracle Server X7 2 Service Manual October 2017 ...
Page 110: ...110 Oracle Server X7 2 Service Manual October 2017 ...
Page 136: ...136 Oracle Server X7 2 Service Manual October 2017 ...
Page 150: ...150 Oracle Server X7 2 Service Manual October 2017 ...
Page 162: ...162 Oracle Server X7 2 Service Manual October 2017 ...
Page 168: ...168 Oracle Server X7 2 Service Manual October 2017 ...
Page 178: ...178 Oracle Server X7 2 Service Manual October 2017 ...
Page 184: ...184 Oracle Server X7 2 Service Manual October 2017 ...
Page 192: ...192 Oracle Server X7 2 Service Manual October 2017 ...
Page 216: ...216 Oracle Server X7 2 Service Manual October 2017 ...
Page 252: ...252 Oracle Server X7 2 Service Manual October 2017 ...
Page 282: ...282 Oracle Server X7 2 Service Manual October 2017 ...
Page 306: ...306 Oracle Server X7 2 Service Manual October 2017 ...


