


LBL-2008-41-v5 OptoMonitor 3 IFU_en Rev 2021-08
65
|
P a g e
9-
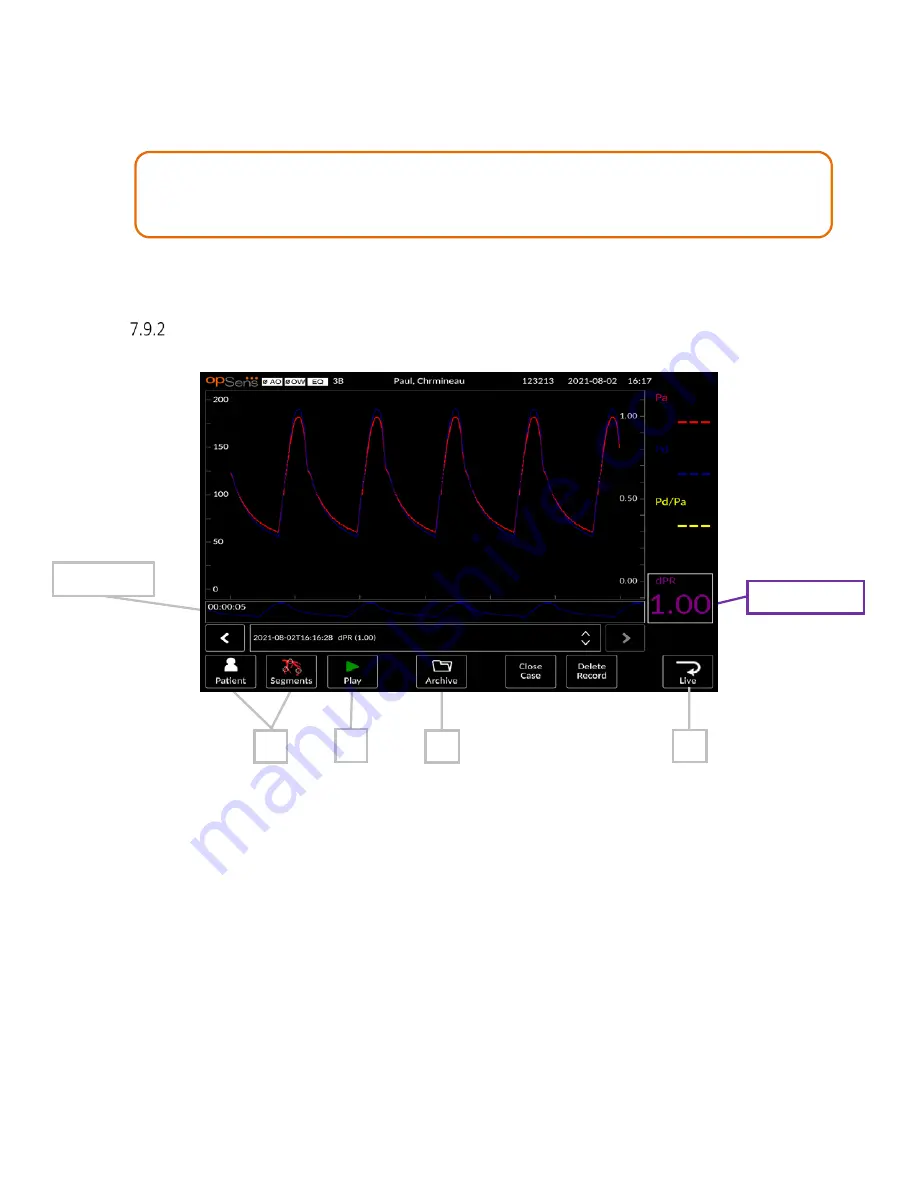
The Archive button enables the viewing of all previous recordings. The user can upload the
recordings to a USB drive (or through DICOM export) by accessing the Archive menu. See section
7.10.4 for more details.
10-
Pressing the “Live” button sends the screen back to the MAIN screen, where live measurements
resume, and another recording can be initiated.
Viewing dPR in Playback Mode
1-
Upon completion of a dPR recording, the screen will automatically switch to playback mode
where the user can see all the recorded data of the current patient. If you wish to access
playback mode without performing a recording, press the “View” button on the MAIN screen.
2-
All locally stored recordings for the current patient will appear in the recording selection box. If
no case is open, all non-case recordings will appear in the selection box. The user can use their
finger to scroll up/down to view all locally stored recordings and can tap a desired recording to
load it into the graphical window and data window.
3-
dPR is calculated using OpSens own algorithm during the diastolic period of the pressure wave
(heart at rest).
4-
4 beats are used to calculate the single dPR measurement and is displayed in the bottom of the
data window (default purple).
5-
The user can apply the ‘patient’ and ‘segments’ functions to the recording,
NOTE: When saving FFR recording to an USB key or via DICOM, ensure to place the FFR
Cursor to the correct FFR value on the DU in the Playback mode so that the OptoViewer
will open the FFR recording with the correct FFR Cursor position.
Recordings
5
6
7
Average dPR
8