background image

Authorized Distributor:

In the interest of product improvement, 
specifications are subject to change without notice.

Cat. No. Z310-E1-08

 © OMRON Corporation 2015  All Rights Reserved.

OMRON Corporation

      Industrial Automation Company

OMRON ELECTRONICS LLC

2895 Greenspoint Parkway, Suite 200 
Hoffman Estates, IL 60169 U.S.A.
Tel: (1) 847-843-7900/Fax: (1) 847-843-7787

 Contact:  www.ia.omron.com

Kyoto, JAPAN

OMRON ASIA PACIFIC PTE. LTD.

No. 438A Alexandra Road # 05-05/08 (Lobby 2), 
Alexandra Technopark, 
Singapore 119967
Tel: (65) 6835-3011/Fax: (65) 6835-2711

OMRON (CHINA) CO., LTD.

Room 2211, Bank of China Tower, 
200 Yin Cheng Zhong Road, 
PuDong New Area, Shanghai, 200120, China
Tel: (86) 21-5037-2222/Fax: (86) 21-5037-2200

Regional Headquarters

OMRON EUROPE B.V.
Sensor Business Unit

Carl-Benz-Str. 4, D-71154 Nufringen, Germany
Tel: (49) 7032-811-0/Fax: (49) 7032-811-199

0715

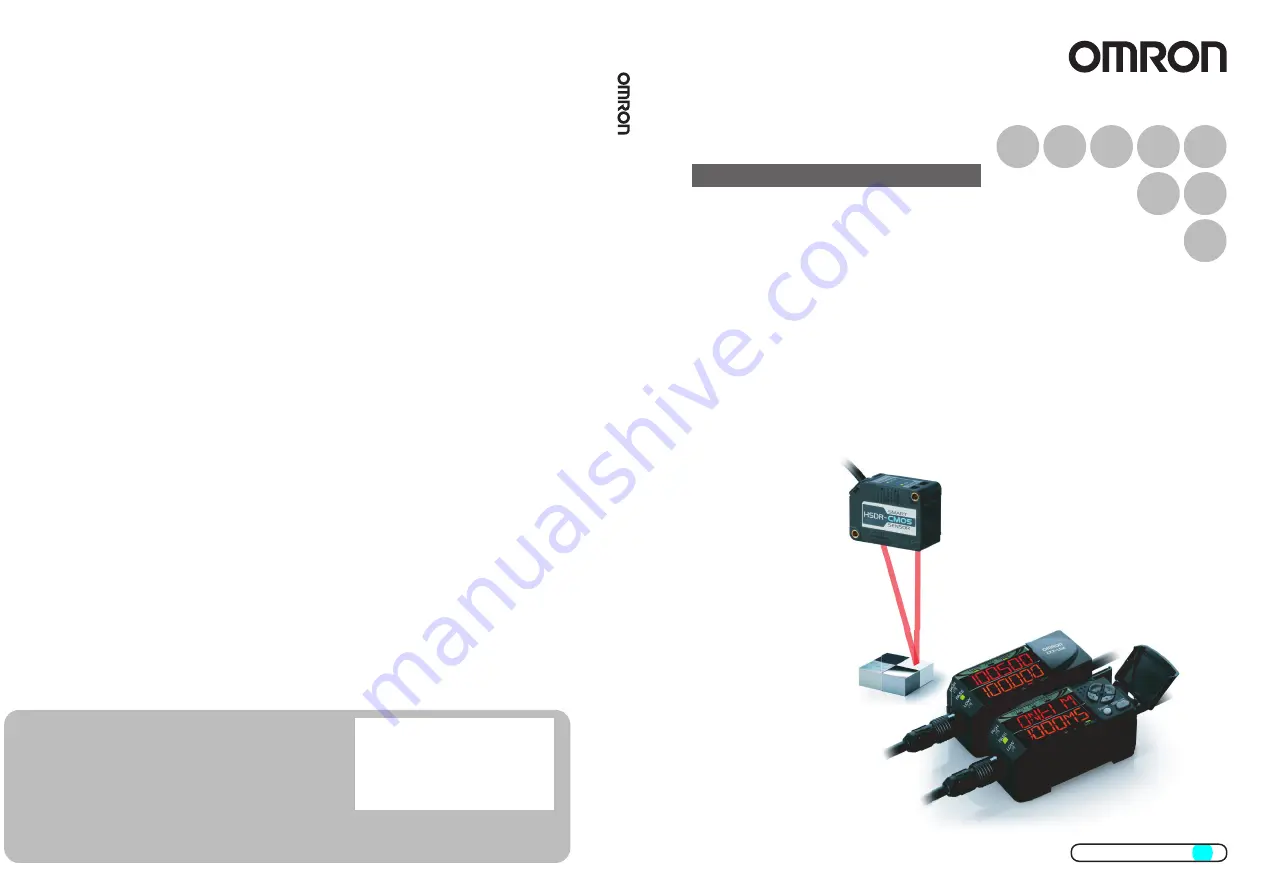
Laser Displacement Sensors CMOS Type 

Cat. No. Z310-E1-08

Smart Sensors

Smart Sensors

ZX2 Series

ZX2 Series

User’s Manual

User

’s

 Manual

Summary of Contents for ZX2-LD100

Page 1: ...oto JAPAN OMRON ASIA PACIFIC PTE LTD No 438A Alexandra Road 05 05 08 Lobby 2 Alexandra Technopark Singapore 119967 Tel 65 6835 3011 Fax 65 6835 2711 OMRON CHINA CO LTD Room 2211 Bank of China Tower 200 Yin Cheng Zhong Road PuDong New Area Shanghai 200120 China Tel 86 21 5037 2222 Fax 86 21 5037 2200 Regional Headquarters OMRON EUROPE B V Sensor Business Unit Carl Benz Str 4 D 71154 Nufringen Germa...

Page 2: ...se 11 Precautions for Correct Use 12 How to Use This Manual 14 PREPARATION FOR MEASUREMENT Part Names and Functions 18 Basic Configuration 18 Amplifier Unit 19 Sensor Head 22 Calculating Unit 22 Installation 23 Installing Sensor Heads 23 Installing the Amplifier Unit 25 Connecting Calculating Units 26 Connecting the Sensor Head to the Amplifier Unit 28 Wiring Diagram 30 Wiring Input Output Cables ...

Page 3: ...01 Scaling 105 Analog Output 109 Output for Non measurement 111 Timer 114 Setting the Differential Function 116 External Input for Bank Timing Input Reset Input 118 Setting the Detection Surface Selection 120 Key Lock Function 122 Initializing Settings Data 123 TROUBLESHOOTING Troubleshooting 128 Error Messages 130 Q A 133 SPECIFICATIONS Specifications and Dimensions 136 Amplifier Units 136 Sensor...

Page 4: ...ction Thank you for purchasing the ZX2 Series Smart Sensor This manual provides information regarding functions performance and operating methods that are required for using the sensor When using the ZX2 Smart Sensor make sure to observe the following The ZX2 Smart Sensor must be operated by personnel knowledgeable in electrical engineering To ensure correct use please read this manual thoroughly ...

Page 5: ...oducts or otherwise of any intellectual property right Buyer Remedy Omron s sole obligation hereunder shall be at Omron s election to i replace in the form originally shipped with Buyer responsible for labor charges for removal or replacement thereof the non complying Product ii repair the non complying Product or iii repay or credit Buyer an amount equal to the purchase price of the non complying...

Page 6: ...ations which apply to the combination of the Product in the Buyer s application or use of the Product At Buyer s request Omron will provide applicable third party certification documents identifying ratings and limitations of use which apply to the Product This information by itself is not sufficient for a complete determination of the suitability of the Product in combination with the end product...

Page 7: ...ormance is subject to the Omron s Warranty and Limitations of Liability Change in Specifications Product specifications and accessories may be changed at any time based on improvements and other reasons It is our practice to change part numbers when published ratings or features are changed or when significant construction changes are made However some specifications of the Product may be changed ...

Page 8: ...he following signal words are used in this manual The following alert symbols are used in this manual Meanings of Signal Words Indicates a potentially hazardous situation which if not avoided will result in minor or moderate injury or may result in serious injury or death Additionally there may be significant property damage Meanings of Alert Symbols Indicates the possibility of laser radiation In...

Page 9: ...icity andSurface Deflection Steps and Warpage Thickness Sensor Head ZX2 LD50L LD50 LD100L LD100 Class 2 Sensor Head ZX2 LD50V Class 1 Laser Safety Never look into the laser beam Doing so continuously will result in visual impairment Do not disassemble the product Doing so may cause the laser beam to leak resulting in the danger of visual impairment Do not disassemble the product Doing so may cause...

Page 10: ...d Radiological Health Accession Number 1020665 Place the laser warning label and the FDA label on the sensor The ZX2 Series is meant to be built into final system equipment Pay special attention to the following precautions for the safe use of the product Note Europe Class 1 and Class 2 of EN 60825 1 1994 A11 1996 A2 2001 IEC 60825 1 1993 A1 1997 A2 2001 U S A Class I and Class II of FDA 21 CFR104...

Page 11: ...thin the rated range DC12 to 24 V 10 Reverse connection of power supply is not allowed Connection to AC power supply is also not allowed Open collector outputs should not be short circuited High voltage lines and power lines must be wired separately from this product Wiring them together or placing in the same duct may cause induction resulting in malfunction or damage Always turn off the power su...

Page 12: ...nsion of the cable of amplifier units shielded cables of the same type must be used When using calculating units make sure that the linear GND lines of the amplifier units are connected to each other Please observe the following precautions to prevent failure to operate malfunctions or undesirable effects on product performance Installation of the Product Installation Site Do not install the produ...

Page 13: ...measure the following types of objects Transparent objects objects with an extremely low reflective sensor ratio objects smaller than the beam size objects with a large curvature excessively inclined objects etc Mutual Interference Inserting a calculating unit between amplifier units can prevent mutual interference between two sensor heads Maintenance Always turn OFF the power supply before adjust...

Page 14: ... so that the height to be measured is near the measurement center distance and install the Sensor Head at this position 2 Set to the MENU mode Button Operation Display Description of Operation Explanation of Selection Menu Hold down the button for three seconds to switch to the MENU mode Press the button to display This operation is not required when hold and trigger conditions are not to be set P...

Page 15: ... page xx Indicates pages where related information can be found white characters on a black background Indicates a required setting in a setup procedure black characters on a white background Indicates an optional setting in a setup procedure Indicates which button to press to display the menu shown in the Display column Select the desired value Indicates that the user can select the menu that acc...

Page 16: ...HODS SPECIFI CATIONS INDEX SETTING TRANSITION CHARTS DETAILED SETTINGS FLOW OF OPERATION CONTENTS PREPARATION FOR MEASUREMENT BASIC SETUP TROUBLE SHOOTING Height Double Sheet Detection Positioning Eccentricity and Surface Deflection Steps and Warpage Thickness MEMO ...

Page 17: ...1 PREPARATION FOR MEASUREMENT PREPARATION FOR MEASUREMENT Part Names and Functions 18 Installation 23 Wiring Diagram 30 ...

Page 18: ...Warpage Thickness Part Names and Functions Basic Configuration The basic configuration of the ZX2 series Smart Sensors is shown below See the following pages for details Part Names and Functions Specifications and Dimensions Sensor Heads p 22 p 138 Amplifier Units p 19 p 136 Calculating Unit p 22 p 143 Extension Cables p 142 Amplifier Unit Power Supply sold separately Sensor Head Calculating Unit ...

Page 19: ... orange Cursor buttons MENU SET button Smart tuning button MENU indicator green LOW threshold indicator orange HIGH threshold indicator orange This indicator lights while the Sensor is ready for measurement It goes out when measurement is not possible e g when the received light amount is excessive or insufficient when the measurement range is exceeded or when the Sensor Head is not connected when...

Page 20: ...tely five seconds and then data for the RUN mode will be displayed For details on setting transition charts see page 158 Alphabet Display Format The alphabet appears on the main and sub displays as shown in the following table Mode Main display upper section red Sub display lower section orange RUN The measured value the value after the measurement conditions have been reflected is displayed For e...

Page 21: ...econds Locks button operation Function changes depending on the setting Switches the function display Selects the digit of numerical values Stops setting button Normal press Executes timing input The function changes depending on the setting Changes the selection menu Changes numerical values button Held down for one second Executes zero reset Both buttons held down for one second Cancels a zero r...

Page 22: ...tor red FAR NEAR Indicator Operation According to Position of Workpiece NEAR side Measurement range FAR side NEAR indicator FAR indicator Measurement center distance Flashing Flashing Lit Flashing Flashing Lit Measurement center distance measurement range x 10 Error outside measurement range Error outside measurement range This mark indicates the emission center position See the table below See th...

Page 23: ...f components are connected or removed while the power is ON Installing Sensor Heads Installation Method Check the Sensor Head setting position by its emission center mark Fix the sensor head in place with M3 screws The screws must be tightened with a torque of 0 5 N m Tilt the regular reflective model as shown below with respect to the workpiece A mounting bracket can also be attached to the regul...

Page 24: ...n Steps and Warpage Thickness Be sure to attach the ferrite core accessory to the Sensor Head Attach it within 100 mm of the Sensor Head side When mounting a Sensor Head take care not to touch the emitter and receiver Finger marks on the emitter and receiver may hinder correct measurements If you have touched them by mistake wipe them with a clean soft cloth Fix the connectors in places that are n...

Page 25: ...m DIN Track Installation Method Hook the connector end of the Sensor Head on the DIN Track and press in at the bottom until the Amplifier Unit locks into place If necessary fix it in place by the End Plate Hook the connector end of the Sensor Head on the DIN Track first The mounting strength may decrease if the output cable end is hooked on the DIN Track first Removal Method Push the Amplifier Uni...

Page 26: ...erforming calculations between Amplifier Units and to prevent mutual interference between Sensor Heads The number of Amplifier Units that can be connected differs depending on the functions to be used For details on the connection method see the next page Function Number of Connectable Amplifier Units See Calculation Up to two units Up to five units can be connected However calculations are done b...

Page 27: ...ctor cover on the Amplifier Unit Open the connector cover by lifting and sliding it 2 Mount the Calculating Unit to the DIN Track 3 Slide and connect the Calculating Unit to the Amplifier Unit connector 4 Slide and connect the second Amplifier Unit to the Calculating Unit connector 5 Fix in place with the End Plate sold separately PFP M To disconnect Amplifier Units and Calculating Units perform t...

Page 28: ...hickness Connecting the Sensor Head to the Amplifier Unit Installation Method Align the position of the connector mark with the S mark on the Amplifier Unit and insert the connector until it is locked in place Extending the Sensor Head cable An optional extension cable ZX2 XC R must be used Only one extension cable can be used Be sure to attach the two supplied ferrite cores within 100 mm of each ...

Page 29: ...face Deflection Steps and Warpage Thickness Removal Method To disconnect the Sensor Head hold the Sensor Head s connector ring and the Amplifier Unit connector and then pull them straight out Do not touch the terminals inside the connector Prevent the connector from being subjected to static electricity When the Sensor Head is replaced with a different type set all the setting data inside the Ampl...

Page 30: ... power supply terminal is also the common I O terminal for all I O except for the analog output Blue GND 0 V The GND terminal is the 0 V power supply terminal When using an Amplifier Unit with an NPN output the power supply terminal is also the common I O terminal for all I O except for the analog output White HIGH judgement output The HIGH judgement output outputs judgement results HIGH Green PAS...

Page 31: ...her Pink LD OFF input If this LD OFF input signal is ON the laser will stop emission causing a light intensity error In this case the analog output digital display judgement output and judgement output display signals will be output according to the non measurement settings The sub display will show Warm up the sensor for at least 10 minutes after canceling LD OFF input For details on the output d...

Page 32: ...put while a reset signal is being input is held in accordance with the output during non measurement setting This feature can be used in cases such as to input a mask signal if you want to stop output for a certain period When the hold function is used If a reset signal is input the state in effect before the hold function was set will be restored For details on the hold function see page 93 and f...

Page 33: ... I O Circuit Diagrams NPN Amplifier Unit Negative Common 100 Ω Brown 10 to 30 VDC 10 to 30 VDC Load Load Load Load Load Blue GND 0 V Pink LD OFF input Purple Timing input BANK input 0 Orange Zero reset input Red Reset input BANK input 1 Current output 4 to 20 mA Voltage output 5 V 1 to 5 V Current voltage output switch Black Shield Analog output Analog GND White HIGH judgement output Green PASS ju...

Page 34: ...e Thickness PNP Amplifier Unit Positive Common 100 Ω Brown 10 to 30 VDC 10 to 30 VDC Load Load Load Load Load Blue GND 0 V Pink LD OFF input Purple Timing input BANK input 0 Orange Zero reset input Red Reset input BANK input 1 Current output 4 to 20 mA Voltage output 5 V 1 to 5 V Current voltage output switch Black Shield Analog output Analog GND White HIGH judgement output Green PASS judgement ou...

Page 35: ...2 FLOW OF OPERATION FLOW OF OPERATION FLOW OF OPERATION 36 ...

Page 36: ...on Positioning Eccentricity and Surface Deflection Steps and Warpage Thickness FLOW OF OPERATION Installing the Sensor p 23 Wiring Diagram p 30 Preparation for Measurement Simple Measurement Setup Basic Setup p 40 Setting Up by 6 Measurement Contents Measuring Height and Dimensions p 42 Measuring Steps and Warpage p 47 Detecting Double Sheet Detection p 52 Measuring Thickness and Insertion p 57 Po...

Page 37: ... Hold Holding Measured Values Under Special Conditions p 93 Bank Setting p 99 Zero Reset p 101 Scaling Changing Digital Values for Specific Measured Values p 105 Analog Output p 109 Output for Non measurement p 111 Output Setting During Input of the Reset Signal at an Error Timer p 114 Setting the Differential Function p 116 External Input for Bank Timing Input Reset Input p 118 Setting the Detect...

Page 38: ...TTING METHODS SPECIFI CATIONS INDEX SETTING TRANSITION CHARTS DETAILED SETTINGS FLOW OF OPERATION CONTENTS PREPARATION FOR MEASUREMENT BASIC SETUP TROUBLE SHOOTING Height Double Sheet Detection Positioning Eccentricity and Surface Deflection Steps and Warpage Thickness MEMO ...

Page 39: ...3 BASIC SETUP BASIC SETUP BASIC SETUP 40 ...

Page 40: ...t or the indicators on the Sensor Head so that the distance between the Sensor Head and the workpiece is the measurement center distance and install the Sensor Head at this position Press the button for one second When is displayed release your finger from the button to start execution of smart tuning If flashes on the sub display for three seconds it indicates that tuning was not possible Change ...

Page 41: ...4 MAIN APPLICATIONS SETTING METHODS MAIN APPLICATIONS SETTING METHODS Height 42 Steps and Warpage 47 Double Sheet Detection 52 Thickness 57 Positioning 66 Eccentricity and Surface Deflection 72 ...

Page 42: ...that the height to be measured is near the measurement center distance and install the Sensor Head at this position 2 Set to the MENU mode Button Operation Display Description of Operation Explanation of Selection Menu Hold down the button for three seconds to switch to the MENU mode Press the button to display This operation is not required when hold and trigger conditions are not to be set Press...

Page 43: ... 12 ms 20 ms 36 ms 66 ms 128 ms 250 ms 500 ms Press the button to apply the setting After the response time is changed the smart tuning results are cleared so be sure to re execute tuning Button Operation Display Description of Operation Explanation of Selection Menu Check that the reference workpiece is set in place Press the button for one second When is displayed release your finger from the bu...

Page 44: ...ing the sampling period is held The measured value at the start of the sampling period is held The minimum value during the sampling period is held The maximum value during the sampling period is held For details see page 95 Press the button to apply the setting When other than is selected proceed to 6 Trigger conditions and when is selected proceed to 7 Threshold setting The clamp value is output...

Page 45: ...mpling period is the period that the measured value is greater than the specified self trigger level For details see page 97 Press the button to apply the trigger conditions When and are selected proceed to the next item and when is selected proceed to 7 Threshold setting Press the button to display Press the button to enable setting of the self trigger level Set any value Press the button to move...

Page 46: ...ed when the cursor is at the left most digit the setting will be canceled Set so that the HIGH threshold is greater than the LOW threshold Press the button to enable setting of the HIGH threshold Set any value Press the button to move the digit press the button to change the numeric value and set the HIGH threshold Press the button to apply the setting Press the button to display the LOW threshold...

Page 47: ...place adjust the position of the Sensor Head while looking at the digital display values on the Amplifier Unit or the indicators on the Sensor Head so that each of the heights to be measured is near the measurement center distance and install the Sensor Head at this position 2 Set to the MENU mode Use CH1 and CH2 for these settings Button Operation Display Description of Operation Explanation of S...

Page 48: ...display of the detail menu Press the button to apply the setting Button Operation Display Description of Operation Explanation of Selection Menu Press the button on the CH1 Amplifier Unit to display Press the button to display Press the button to apply the setting For details on the response time when connecting two or more Amplifier Units see page 86 Button Operation Display Description of Operat...

Page 49: ...etting After the response time is changed the smart tuning results are cleared so be sure to re execute tuning Button Operation Display Description of Operation Explanation of Selection Menu Check that the reference workpiece is set in place Press the button for one second When is displayed release your finger from the button to start execution of smart tuning If flashes on the sub display for thr...

Page 50: ...e setting For details on the response time when connecting two or more Amplifier Units see page 86 Button Operation Display Description of Operation Explanation of Selection Menu Press the button on the CH2 Amplifier Unit to display the HIGH threshold Setting example Non defective product step 3 to 8 mm Set the MAX and MIN steps to be regarded as OK to the HIGH and LOW thresholds respectively Requ...

Page 51: ...so that the HIGH threshold is greater than the LOW threshold Set any value Press the button to move the digit press the button to change the numeric value and set the HIGH threshold Press the button to apply the setting Press the button to display the LOW threshold Press the button to enable setting of the LOW threshold Set any value Press the button to move the digit press the button to change th...

Page 52: ...hat the measured value at measurement of one product and at measurement of two products is within the measurement range and install the Sensor Head at this position 2 Set to the MENU mode Button Operation Display Description of Operation Explanation of Selection Menu Hold down the button for three seconds to switch to the MENU mode Press the button to display This operation is not required when ho...

Page 53: ... ms 8 ms 12 ms 20 ms 36 ms 66 ms 128 ms 250 ms 500 ms Press the button to apply the setting After the response time is changed the smart tuning results are cleared so be sure to re execute tuning Button Operation Display Description of Operation Explanation of Selection Menu Check that the reference workpiece is set in place Press the button for one second When is displayed release your finger fro...

Page 54: ...lues during the sampling period is held The measured value at the start of the sampling period is held The minimum value during the sampling period is held The maximum value during the sampling period is held For details see page 95 Press the button to apply the setting When other than is selected proceed to 6 Trigger conditions and when is selected proceed to 7 Threshold setting The clamp value i...

Page 55: ...l The sampling period is the period that the measured value is greater than the specified self trigger level For details see page 97 Press the button to apply the trigger conditions When and are selected proceed to the next item and when is selected proceed to 7 Threshold setting Press the button to display Press the button to enable setting of the self trigger level Set any value Press the button...

Page 56: ...ressed when the cursor is at the left most digit the setting will be canceled Set so that the HIGH threshold is greater than the LOW threshold Press the button to enable setting of the HIGH threshold Set any value Press the button to move the digit press the button to change the numeric value and set the HIGH threshold Press the button to apply the setting Press the button to display the LOW thres...

Page 57: ...the positions of the Sensor Heads while looking at the digital display values on the Amplifier Units or the indicators on the Sensor Heads so that the clearance between the sensing object and each Sensor Head is near the measurement center distance and install the Sensor Heads at these positions Prepare a reference sensing object of known thickness 2 Set to the MENU mode Use CH1 and CH2 for these ...

Page 58: ...ription of Operation Explanation of Selection Menu Press the button on the CH1 Amplifier Unit to display Press the button to display Press the button to apply the mutual interference prevention setting For details on the response time when connecting two or more Amplifier Units see page 86 Button Operation Display Description of Operation Explanation of Selection Menu Press the button on the CH1 A...

Page 59: ...ing results are cleared so be sure to re execute tuning Button Operation Display Description of Operation Explanation of Selection Menu Check that the reference workpiece is set in place Press the button on the CH1 Amplifier Unit for one second When is displayed release your finger from the button to start execution of smart tuning If flashes on the sub display for three seconds it indicates that ...

Page 60: ... the thickness setting Set any value Press the button to move the digit press the button to change the numeric value and set the thickness numeric value to If the button is pressed when the cursor is at the right most digit or the button is pressed when the cursor is at the left most digit the setting will be canceled Press the button to apply the setting The 2 sensor operation reference value is ...

Page 61: ...t range values CH2 measurement values are assigned as the maximum and minimum analog output range Concerning the minimum and maximum analog output values the analog output minimum value is output for the smaller of the post thickness calculation values and the analog output maximum value is output for the larger of these values Example If the ZX2 LD50 is used a thickness value of 20 mm is entered ...

Page 62: ...ld OFF The average measured value during the sampling period is held The difference between the minimum and maximum values during the sampling period is held The measured value at the start of the sampling period is held The minimum value during the sampling period is held The maximum value during the sampling period is held For details see page 95 Press the button to apply the setting When other ...

Page 63: ...ions Enter the trigger by using the timing input or by pressing the button in the RUN mode The period that the timing signal is ON is the sampling period The sampling period is the period that the measured value is lower than the specified self trigger level The sampling period is the period that the measured value is greater than the specified self trigger level For details see page 97 Press the ...

Page 64: ...es to be regarded as OK to the HIGH and LOW thresholds respectively If the button is pressed when the cursor is at the right most digit or the button is pressed when the cursor is at the left most digit the setting will be canceled Set so that the HIGH threshold is greater than the LOW threshold Press the button to enable setting of the HIGH threshold Set any value Press the button to move the dig...

Page 65: ...ction Positioning Eccentricity andSurface Deflection Steps and Warpage Thickness 10 Return to RUN mode Use CH1 and CH2 for these settings For details on optimizing settings such as output and input see DETAILED SETTINGS Button Operation Display Description of Operation Explanation of Selection Menu Hold down the button for three seconds to switch to the RUN mode Required Switch to the mode in whic...

Page 66: ...ier Unit or the indicators on the Sensor Head so that the upper and lower limits of the distance between the Sensor Head and the sensing object is within the measurement range and install the Sensor Head at this position 2 Set to the MENU mode Button Operation Display Description of Operation Explanation of Selection Menu Hold down the button for three seconds to switch to the MENU mode Press the ...

Page 67: ...ion of Operation Explanation of Selection Menu Press the button to display Select the desired value Press the button to select the response time Select the response time to match the size and moving speed of the sensing object to 60 µs 120 µs 240 µs 500 µs 1 ms 2 ms 4 ms 8 ms 12 ms 20 ms 36 ms 66 ms 128 ms 250 ms 500 ms Press the button to apply the setting After the response time is changed the s...

Page 68: ...e your finger from the button to start execution of smart tuning If flashes on the sub display for three seconds it indicates that tuning was not possible Change the response time setting to a larger value and try again Button Operation Display Description of Operation Explanation of Selection Menu Press the button to display Press the button to display Press the button to enable setting of scalin...

Page 69: ...setting of S1 Before Numeric value before change Set any value Press the button to move the digit press the button to change the numeric value and set the measured value before S1 is changed Press the button to apply the numeric value of S1 Before Press the button to display Press the button to enable setting of S1 After Numeric value after change Set any value Press the button to move the digit p...

Page 70: ...S2 Before Numeric value before change Set any value Press the button to move the digit press the button to change the numeric value and set the measured value before S2 is changed Press the button to apply the numeric value of S2 Before Press the button to display Press the button to enable setting of S2 After Numeric value after change Set any value Press the button to move the digit press the bu...

Page 71: ...igit the setting will be canceled Set so that the HIGH threshold is greater than the LOW threshold Press the button to enable setting of the HIGH threshold Set any value Press the button to move the digit press the button to change the numeric value and set the HIGH threshold Press the button to apply the setting Press the button to display the LOW threshold Press the button to enable setting of t...

Page 72: ...ensor Head so that the clearance between the Sensor Head and the sensing object is near the measurement center distance and install the Sensor Head at this position 2 Set to the MENU mode Button Operation Display Description of Operation Explanation of Selection Menu Hold down the button for three seconds to switch to the MENU mode Press the button to display This operation is not required when sc...

Page 73: ...2 ms 4 ms 8 ms 12 ms 20 ms 36 ms 66 ms 128 ms 250 ms 500 ms Press the button to apply the setting After the response time is changed the smart tuning results are cleared so be sure to re execute tuning Button Operation Display Description of Operation Explanation of Selection Menu Check that the reference workpiece is set in place Press the button for one second When is displayed release your fing...

Page 74: ...will be canceled Press the button to enable setting of S1 Before Numeric value before change Set any value Press the button to move the digit press the button to change the numeric value and set the measured value before S1 is changed Press the button to apply the numeric value of S1 Before Press the button to display Press the button to enable setting of S1 After Numeric value after change Set an...

Page 75: ...e the numeric value and set the measured value before S2 is changed Press the button to apply the numeric value of S2 Before Press the button to display Press the button to enable setting of S2 After Numeric value after change Set any value Press the button to move the digit press the button to change the numeric value and set the measured value after S2 is changed Press the button to apply the nu...

Page 76: ...ampling period is held The measured value at the start of the sampling period is held The minimum value during the sampling period is held The maximum value during the sampling period is held For details see page 95 Press the button to apply the setting When other than is selected proceed to 7 Trigger conditions and when is selected proceed to 8 Threshold setting The clamp value is output until th...

Page 77: ...er level The sampling period is the period that the measured value is greater than the specified self trigger level For details see page 97 Press the button to apply the trigger conditions When and are selected proceed to the next item and when is selected proceed to 8 Threshold setting Press the button to display Press the button to enable setting of the self trigger level Set any value Press the...

Page 78: ...rsor is at the left most digit the setting will be canceled Set so that the HIGH threshold is greater than the LOW threshold Press the button to enable setting of the HIGH threshold Set any value Press the button to move the digit press the button to change the numeric value and set the HIGH threshold Press the button to apply the setting Press the button to display the LOW threshold Press the but...

Page 79: ...ding Measured Values Under Special Conditions Bank Setting 99 Zero Reset 101 Scaling 105 Changing Digital Values for Specific Measured Values Analog Output 109 Output for Non measurement 111 Output Setting During Input of the Reset Signal at an Error Timer 114 Setting the Differential Function 116 External Input for Bank Timing Input Reset Input 118 Setting the Detection Surface Selection 120 Decr...

Page 80: ... of CH2 and later If the tuning result is NG for either Amplifier Unit the smart tuning setup results are not applied to any amplifier units 1 Set to the MENU mode 2 Response time setting Button Operation Display Description of Operation Explanation of Selection Menu Hold down the button for three seconds to switch to the MENU mode Button Operation Display Description of Operation Explanation of S...

Page 81: ...Single smart tuning Select the desired value Press the button to select the response time Select the response time to match the size and moving speed of the sensing object to 60 µs 120 µs 240 µs 500 µs 1 ms 2 ms 4 ms 8 ms 12 ms 20 ms 36 ms 66 ms 128 ms 250 ms 500 ms Press the button to apply the setting After the response time is changed the smart tuning results are cleared so be sure to re execut...

Page 82: ...d If flashes on the sub display for three seconds it indicates that tuning was not possible Change the response time setting to a larger value and try again Swap the workpiece with reference workpiece 2 and set it in place Press the button for three seconds When is displayed release your finger from the button to start execution of smart tuning When there are three or more reference workpieces swa...

Page 83: ...ece set in place When is displayed release your finger from the button to start execution of smart tuning Because the execution of smart tuning continues move the workpiece and are displayed for one to five seconds after the button is pressed and then is displayed At the end of the desired tuning period press the button again for 5 to end tuning The optimum setting conditions will be set If flashe...

Page 84: ... up initial sub display 1 Set to the MENU mode 2 Sub display memory setting Button Operation Display Description of Operation Explanation of Selection Menu Hold down the button for three seconds to switch to the MENU mode Button Operation Display Description of Operation Explanation of Selection Menu Press the button to display Select the desired value Press the button to select the sub display me...

Page 85: ...GS SPECIFI CATIONS Height Double Sheet Detection Positioning Eccentricity andSurface Deflection Steps and Warpage Thickness 3 Return to RUN mode Press the button to apply the setting Button Operation Display Description of Operation Explanation of Selection Menu Hold down the button for three seconds to switch to the RUN mode Button Operation Display Description of Operation Explanation of Selecti...

Page 86: ...es maximum values are as follows Response time if mutual interference prevention is set to ON Function Number of Connectable Amplifier Units See Calculation Up to two units Up to five units can be connected However calculations are done between pairs of two A B calculation Page 47 Thickness calculation Page 57 Mutual interference prevention Up to five units Page 88 Mutual Interference Prevention T...

Page 87: ...o CH5 These cannot be used The setting menu is not displayed on the digital display The setting of CH1 is also applied to Amplifier Units of CH2 and later Two sensor operation setting Thickness setting CH2 to CH5 CH1 This cannot be used The setting menu is not displayed on the digital display Bank switching setting CH1 CH2 to CH5 These cannot be used The setting menu is not displayed on the digita...

Page 88: ...onnected by using Calculating Units ZX2 CAL Procedure for setting up mutual interference prevention 1 Set to the MENU mode Button Operation Display Description of Operation Explanation of Selection Menu Hold down the button of the CH1 Amplifier Unit for three seconds to switch to the MENU mode Press the button to display This step is not required if detail menu display is already set to ON in the ...

Page 89: ...esponse times maximum values are as follows Button Operation Display Description of Operation Explanation of Selection Menu Press the button to display Press the button to display Press the button to apply the setting Button Operation Display Description of Operation Explanation of Selection Menu Hold down the button for three seconds to switch to the RUN mode Menu Displayable and Specifiable CH N...

Page 90: ...ASIC SETUP TROUBLE SHOOTING Height Double Sheet Detection Positioning Eccentricity and Surface Deflection Steps and Warpage Thickness Response time if mutual interference prevention is set to ON CH1 Response Time Setting Response Time per Unit 60 µs 3 ms 120 µs 3 ms 240 µs 3 ms 500 µs 4 ms 1 ms 8 ms 2 ms 16 ms 4 ms 32 ms 8 ms 64 ms 12 ms 72 ms 20 ms 80 ms 36 ms 100 ms 66 ms 160 ms 128 ms 280 ms 25...

Page 91: ...values Procedure for setting up the hysteresis width 1 Set to the MENU mode Button Operation Display Description of Operation Explanation of Selection Menu Hold down the button for three seconds to switch to the MENU mode Press the button to display This step is not required if detail menu display is already set to ON in the MENU mode Press the button to set the display to to set display of the de...

Page 92: ...eration Display Description of Operation Explanation of Selection Menu Press the button to display Press the button to enable setting of the hysteresis width Set any value Press the button to move the digit press the button to change the numeric value and set the hysteresis width If the button is pressed when the cursor is at the right most digit or the button is pressed when the cursor is at the ...

Page 93: ...Procedure for setting up hold 1 Set to the MENU mode Button Operation Display Description of Operation Explanation of Selection Menu Hold down the button for three seconds to switch to the MENU mode Press the button to display This step is not required if detail menu display is already set to ON in the MENU mode Press the button to set the display to to set display of the detail menu Press the but...

Page 94: ...the desired value Press the button to select the hold conditions Hold OFF The average measured value during the sampling period is held The difference between the minimum and maximum values during the sampling period is held The measured value at the start of the sampling period is held The minimum value during the sampling period is held The maximum value during the sampling period is held For de...

Page 95: ...detect vibration The output changes at the end of the sampling period and is held until the end of the next sampling period The measured value at the start of the sampling period is held The output changes at the end of the sampling period and is held until the end of the next sampling period The minimum value during the sampling period is held The output changes at the end of the sampling period ...

Page 96: ...to display Select the desired value Press the button to select the self trigger Enter the trigger by using the timing input or by pressing the button in the RUN mode The period that the timing signal is ON is the sampling period The sampling period is the period that the measured value is lower than the specified self trigger level The sampling period is the period that the measured value is great...

Page 97: ...le without a sync input The sampling period is the period that the measured value is greater than the specified self trigger level Hold measurement is possible without a sync input Button Operation Display Description of Operation Explanation of Selection Menu Press the button to display Press the button to enable setting of the self trigger level Set any value Press the button to move the digit p...

Page 98: ...input wire Press the button to apply the setting Button Operation Display Description of Operation Explanation of Selection Menu Hold down the button for three seconds to switch to the RUN mode Button Operation Display Description of Operation Explanation of Selection Menu Hold down for 3 seconds Out Important Analog output Analog output Maximum value Maximum value ON ON ON Sampling period Samplin...

Page 99: ...ation Explanation of Selection Menu Hold down the button for three seconds to switch to the MENU mode Press the button to display This step is not required if detail menu display is already set to ON in the MENU mode Press the button to set the display to to set display of the detail menu Press the button to apply the setting Bank switching 2 Various settings 3 Set to the MENU mode 1 Return to RUN...

Page 100: ...results are not applied to other banks 4 Return to RUN mode The following explains how to switch banks and perform measurement Either switch banks by following the steps 1 2 4 described above or input the required signal from an external device to switch the bank Button Operation Display Description of Operation Explanation of Selection Menu Press the button to display Select the desired value Pre...

Page 101: ...eference value The measured value can be set to 0 or any desired numeric value at any timing in the RUN mode Examples To eliminate reference deviation To measure steps in a sensing object by a single sensor Executing a zero reset at each measurement To display the height of a workpiece To display the actual measuring distance value 1 5 0 3 5 2 HIGH threshold 0 5 2 LOW threshold Sensing object Sens...

Page 102: ...lay is already set to ON in the MENU mode Press the button to set the display to to set display of the detail menu Press the button to apply the setting Button Operation Display Description of Operation Explanation of Selection Menu Press the button to display Select the desired value Press the button to select the zero reset memory setting Saves the current measured result Does not save the curre...

Page 103: ... to apply the setting Button Operation Display Description of Operation Explanation of Selection Menu Press the button to display Press the button to enable setting of values at a reset Set any value Press the button to move the digit press the button to change the numeric value and set the offset level If the button is pressed when the cursor is at the right most digit or the button is pressed wh...

Page 104: ...ecomes 0 the HIGH threshold stays at 5 if it is 5 before zero reset is executed After a zero reset analog values are output in a range that corresponds to the zero reset display value initial value 0 mm which accords with the zero reset distance point When the zero reset display is 0 mm and scaling is set to OFF the analog output value will be 3 V if the range is 1 to 5 V 0 V if the range is 5 to ...

Page 105: ...ocedure for setting up scaling 1 Set to the MENU mode 2 Scaling Button Operation Display Description of Operation Explanation of Selection Menu Hold down the button for three seconds to switch to the MENU mode Press the button to display This step is not required if detail menu display is already set to ON in the MENU mode Press the button to set the display to to set display of the detail menu Pr...

Page 106: ... Press the button to enable setting of S1 Before Numeric value before change Set any value Press the button to move the digit press the button to change the numeric value and set the measured value before S1 is changed Press the button to apply the numeric value of S1 Before Press the button to display Press the button to enable setting of S1 After Numeric value after change Set any value Press th...

Page 107: ...he digit press the button to change the numeric value and set the measured value before S2 is changed Press the button to apply the numeric value of S2 Before Press the button to display Press the button to enable setting of S2 After Numeric value after change Set any value Press the button to move the digit press the button to change the numeric value and set the measured value after S2 is change...

Page 108: ...r the larger of these values Example To set the analog output in the range of 5 V to 5 V and display a value from 45 mm to 55 mm when using the ZX2 LD50 L at a distance of 45 mm to 55 mm from the sensor 1 Select as the analog output setting 2 Specify the AFT value and then assign the display value based on the measured value Assign the analog output range based on the display value range S1 BEF 5 ...

Page 109: ...ecified Monitor focus Procedure for setting up analog output 1 Set to the MENU mode 2 Analog output setting Button Operation Display Description of Operation Explanation of Selection Menu Hold down the button for three seconds to switch to the MENU mode Button Operation Display Description of Operation Explanation of Selection Menu Press the button to display Select the desired value Press the but...

Page 110: ...tput minimum value is output for the smaller of the post scaling display values S1 AFT S2 AFT and the analog output maximum value is output for the larger of these values To only specify the analog output range without changing display values Example To set the analog output in the range of 5 V to 5 V when using the ZX2 LD50 L at a distance of 45 mm to 55 mm from the sensor 1 Select as the analog ...

Page 111: ...measurement value immediately before the non measurement state is entered is held and output CLAMP All OFF The specified CLAMP value is output The following options are available For voltage output 5 00 to 5 00 V in 1 V steps or the maximum approximately 5 5 V For current output 4 00 to 20 00 mA in 1 mA steps or the maximum approximately 22 mA Button Operation Display Description of Operation Expl...

Page 112: ... to select output for non measurement The measured value status before measurement is stopped is held and output Judgment output All OFF Analog output The preset clamp value is output Press the button to apply the setting Button Operation Display Description of Operation Explanation of Selection Menu Press the button to display The clamp value is output from when the power is turned on until the m...

Page 113: ...RATION MAIN APPLICATIONS SETTING METHODS DETAILED SETTINGS SPECIFI CATIONS Height Double Sheet Detection Positioning Eccentricity andSurface Deflection Steps and Warpage Thickness 4 Return to RUN mode Button Operation Display Description of Operation Explanation of Selection Menu Hold down the button for three seconds to switch to the RUN mode Hold down for 3 seconds Out ...

Page 114: ...u Hold down the button for three seconds to switch to the MENU mode Press the button to display This step is not required if detail menu display is already set to ON in the MENU mode Press the button to set the display to to set display of the detail menu Press the button to apply the setting Button Operation Display Description of Operation Explanation of Selection Menu Select the desired value P...

Page 115: ...pply the setting Selection menu Details ON delay timer After the measurement result has been finalized the timer delays turning ON of the PASS output for the time set to the timer OFF delay timer After the measurement result has been finalized the timer delays turning OFF of the PASS output for the time set to the timer Button Operation Display Description of Operation Explanation of Selection Men...

Page 116: ...ess varies depending on the response time setting Procedure for setting up differential function 1 Set to the MENU mode Button Operation Display Description of Operation Explanation of Selection Menu Hold down the button for three seconds to switch to the MENU mode Setting example Making it easier to detect only sudden changes Counting gradual changes for which a threshold value cannot be easily s...

Page 117: ...tail menu display is already set to ON in the MENU mode Press the button to set the display to to set display of the detail menu Press the button to apply the setting Button Operation Display Description of Operation Explanation of Selection Menu Press the button to display Press the button to set the display to Press the button to apply the setting Button Operation Display Description of Operatio...

Page 118: ...rom an external device to execute these operations Procedure for setting up external input 1 Set to the MENU mode 2 External input terminal setting Button Operation Display Description of Operation Explanation of Selection Menu Hold down the button for three seconds to switch to the MENU mode Press the button to display This step is not required if detail menu display is already set to ON in the M...

Page 119: ...cified bank When connecting two or more Amplifier Units use the CH1 Amplifier Unit for bank switching The banks of the Amplifier Units of CH2 and later are switched together with CH1 Table 1 External Input Wiring Table 2 Bank Signal Switching Wiring Note Bank signal switching is enabled only in the RUN mode Select the desired value Press the button to select the external input terminal timing inpu...

Page 120: ...o the MENU mode Button Operation Display Description of Operation Explanation of Selection Menu Hold down the button for three seconds to switch to the MENU mode Press the button to display This step is not required if detail menu display is already set to ON in the MENU mode Press the button to set the display to to set display of the detail menu Press the button to apply the setting Sensor Head ...

Page 121: ...etection surface selection setting 3 Return to RUN mode Button Operation Display Description of Operation Explanation of Selection Menu Press the button to display Select the desired value Press the button to display During normal measurement When an incorrect measurement occurs due to diffused reflection or multireflection Press the button to apply the setting Button Operation Display Description...

Page 122: ... released This function is useful for preventing inadvertent changes to settings Although button operations are disabled external input is still possible Key Lock Function Canceling the Key Lock Button Operation Display Description of Operation Explanation of Selection Menu Hold both the buttons down for three seconds in the RUN mode Button Operation Display Description of Operation Explanation of...

Page 123: ...side HIGH threshold Measurement range maximum value LOW threshold Measurement range minimum value Response time 500 ms Analog output setting 5 to 5 V Detail menu display selection OFF Bank switching settings 0 Mutual interference prevention OFF Hysteresis width 0 000 Two Sensor operation setting OFF Thickness setting 0 000 Measured value display scaling OFF Differential function OFF Hold setting O...

Page 124: ...nnot be used to do this Note that CH2 and later channels are initialized together with CH1 1 Set to the MENU mode 2 Setting data initialization Button Operation Display Description of Operation Explanation of Selection Menu Hold down the button for three seconds to switch to the MENU mode Button Operation Display Description of Operation Explanation of Selection Menu Press the button to display Pr...

Page 125: ...RATION MAIN APPLICATIONS SETTING METHODS DETAILED SETTINGS SPECIFI CATIONS Height Double Sheet Detection Positioning Eccentricity andSurface Deflection Steps and Warpage Thickness 3 Return to RUN mode Button Operation Display Description of Operation Explanation of Selection Menu Hold down the button for three seconds to switch to the RUN mode Hold down for 3 seconds Out ...

Page 126: ...NS SETTING METHODS SPECIFI CATIONS INDEX SETTING TRANSITION CHARTS DETAILED SETTINGS FLOW OF OPERATION CONTENTS PREPARATION FOR MEASUREMENT BASIC SETUP TROUBLE SHOOTING Height Double Sheet Detection Positioning Eccentricity and Surface Deflection Steps and Warpage Thickness MEMO ...

Page 127: ...6 TROUBLESHOOTING TROUBLESHOOTING Troubleshooting 128 Error Messages 130 Q A 133 ...

Page 128: ...d Is the LD OFF input short circuited p 30 Bank switching by signals from the external input terminal is not functioning Is the external input terminal set to Is the cable connected correctly p 118 p 30 The state returns to in the RUN mode even if after a bank is switched by button operation Is the external input terminal set to p 118 Display The main display stays at Has a timing input been made ...

Page 129: ...e distance between the Sensor Head and the workpiece within the measurement range p 139 is displayed on the main display Is the distance between the Sensor Head and the workpiece within the measurement range p 139 Output Judgements are not output to external devices Are all cables connected correctly Is the output signal line disconnected Is the reset input short circuited Is the HIGH threshold se...

Page 130: ...ere is only one Amplifier Unit even though two Sensor operation is set to ON If two or more Amplifier Units have been installed turn OFF the power supply and check that the Amplifier Units and Calculating Units are connected correctly If only one Amplifier Unit is being used connect another Amplifier Unit temporarily and turn OFF mutual interference prevention and two Sensor operation or initializ...

Page 131: ... then turn ON the power supply again If the above countermeasure does not solve the problem the Amplifier Unit is malfunctioning Replace the Amplifier Unit Error memory Amplifier Unit setting memory error Initialize the settings by holding down the SET key for at least three seconds If the above countermeasure does not solve the problem the Amplifier Unit is malfunctioning Replace the Amplifier Un...

Page 132: ...le Sheet Detection Positioning Eccentricity and Surface Deflection Steps and Warpage Thickness LD down The laser of the Sensor Head has deteriorated Replace the Sensor Head Measured values are not output because the reset signal is being input calculations are in progress timing is before the hold sampling time etc The error output signal is not output Normally measured values are displayed once t...

Page 133: ...n cables between the Sensor Head and Amplifier Unit Regardless of the length only one extension cable can be added It is not possible to add multiple extension cables About how much signal input and open time is required for each input operation These times can be checked using the timing charts in this manual on page 144 Can calculations be performed when Sensor Heads that have different measurem...

Page 134: ...ETHODS SPECIFI CATIONS INDEX SETTING TRANSITION CHARTS DETAILED SETTINGS FLOW OF OPERATION CONTENTS PREPARATION FOR MEASUREMENT BASIC SETUP TROUBLE SHOOTING Height Double Sheet Detection Positioning Eccentricity and Surface Deflection Steps and Warpage Thickness MEMO ...

Page 135: ...7 SPECIFICATIONS SPECIFICATIONS Specifications and Dimensions 136 Timing Charts 144 Engineering Data Reference Value 147 ...

Page 136: ...rface Deflection Steps and Warpage Thickness Specifications and Dimensions Amplifier Units ZX2 LDA11 LDA41 15 4 16 9 72 6 2 4 2 38 4 cover open 56 16 6 6 1 20 7 36 8 9 6 34 2 47 6 10 9 18 11 7 30 50 mm cover open 84 6 Vinyl insulated round cable 5 2 dia 11 conductors Conductor cross section 0 09 mm2 Insulator diameter 0 7 mm Standard length 2 m Minimum bending radius 30 mm Min length when connecte...

Page 137: ...V or less OFF Open leakage current 0 1 mA max ON Supply voltage short circuited or supply voltage within 1 2 V OFF Open leakage current 0 1 mA max Functions Smart tuning scaling sample hold peak hold bottom hold peak to peak hold self peak hold self bottom hold average hold zero reset On delay timer OFF delay timer keep clamp switch A B calculations 3 thickness calculation 3 mutual interference pr...

Page 138: ...erence surface Range indicator Range indicator Laser warning indicator Reference surface A L 7 35 5 47 5 39 5 4 4 Two 3 2 dia mounting holes 27 5 28 43 Emitter axis Receiver axis 9 7 Emitter axis 22 6 29 8 12 6 dia 9 7 35 3 16 7 10 5 Emitter center 6 20 9 4 8 4 8 For ZX2 LD50 L L 50 A 21 For ZX2 LD100 L L 100 A 11 5 Vinyl insulated round cable 4 7 dia 4 conductors Conductor cross section 0 086 mm2...

Page 139: ...rd reference object secured with an aluminum jig 5 Categorized as Class 2 by IEC60825 1 criteria in accordance with the stipulations of the FDA standard Laser Notice No 50 and registered with CDRH Center for Devices and Radiological Health accession number 1020665 Model Item ZX2 LD50L ZX2 LD50 ZX2 LD100L ZX2 LD100 Optical system Diffuse reflective Light source wave length Visible light semiconduct...

Page 140: ...istic The temperature characteristic is measured at the measurement center distance with the Sensor and reference object OMRON s standard reference object secured with an aluminum jig 5 Categorized as Class 1 by IEC60825 1 criteria in accordance with the stipulations of the FDA standard Laser Notice No 50 and registered with CDRH Center for Devices and Radiological Health accession number 1020665 ...

Page 141: ...ATION MAIN APPLICATIONS SETTING METHODS DETAILED SETTINGS SPECIFI CATIONS Height Double Sheet Detection Positioning Eccentricity andSurface Deflection Steps and Warpage Thickness Mounting Bracket 1 14 14 3 2 2 3 2 3 3 2 3 2 5 5 2 5 2 12 12 8 8 8 8 16 8 1 1 1 1 16 8 16 8 9 6 9 6 1 14 14 3 2 2 3 2 3 3 2 3 2 5 5 2 5 2 12 12 8 8 8 8 2 R3 16 8 1 1 1 1 16 8 16 8 9 6 26 4 26 4 2 R3 ...

Page 142: ...electric strength connector No flashover and no breakdown at AC 300 V for 1 minute Insulation resistance connector 1000 MΩ min at 100 VDC Weight packed state Approx 70 g Approx 450 g Approx 600 g Approx 1050 g Materials Connector PPS and PBT Cable PVC Minimum bend radius 30 mm Accessories Ferrite core x 2 made by TDK Corp ZCAT1730 0730A 12 6 dia 12 dia L Cable lengths ZX2 XC1R 1 m ZX2 XC4R 4 m ZX2...

Page 143: ...sor Amplifier Unit Ambient temperature Operating 0 to 50 C Storage 15 to 70 C with no icing or condensation Ambient humidity Operating and storage 35 to 85 with no condensation Connection method Connector Dielectric strength 1 000 VAC 50 60 Hz for 1 minute Vibration resistance destruction 10 to 150 Hz 0 7 mm double amplitude 80 minutes each in X Y and Z directions Shock resistance destruction 300 ...

Page 144: ...e with the output during non measurement setting When the hold function is used If a reset signal is input the state in effect before the hold function was set will be restored For details on the hold function see page 93 and for details on the output during non measurement see page 111 1 Laser emission ON OFF If laser OFF input is ON for 4 ms or more the signal is received and laser emission is t...

Page 145: ... ms or more the bank is determined the bank is switched within 20 ms and then measurement is resumed Acquire the measurement results after the preset response time elapses If a CH1 bank input signal is input for 4 ms or more the bank is determined the bank is switched within 50 ms if mutual interference prevention is set to OFF and within 420 ms if mutual interference prevention is set to ON and t...

Page 146: ... cancellation Turn OFF after zero reset input turns ON for 3 s or more The zero reset is canceled and measurement is resumed within 5 ms Acquire the measurement results after the preset response time elapses 1 Zero reset execution Turn OFF after 4 ms to 1 s zero reset input turns ON The zero reset is executed and measurement is resumed within 400 ms Acquire the measurement results after the preset...

Page 147: ...0 20 30 40 50 10 20 30 40 50 1 0 0 8 0 6 0 4 0 2 0 0 2 0 4 0 6 0 8 1 0 0 10 20 30 40 50 10 20 30 40 50 Inclination Inclination Inclination Inclination 1 0 0 8 0 6 0 4 0 2 0 0 2 0 4 0 6 0 8 1 0 0 10 20 30 40 50 10 20 30 40 50 1 0 0 8 0 6 0 4 0 2 0 0 2 0 4 0 6 0 8 1 0 0 10 20 30 40 50 10 20 30 40 50 Inclination Inclination Inclination Inclination Inclination Inclination Inclination Inclination White...

Page 148: ...to silicon wafer Front to back inclination with respect to flat mirror 10 5 3 0 2 5 2 0 1 5 1 0 0 5 0 1 0 0 5 1 5 2 0 2 5 3 0 3 5 1 1 3 2 4 0 2 4 5 3 0 2 5 2 0 1 5 1 0 0 5 0 1 0 0 5 1 5 2 0 2 5 3 0 3 5 1 1 3 2 4 0 2 4 5 10 5 3 0 2 5 2 0 1 5 1 0 0 5 0 1 0 0 5 1 5 2 0 2 5 3 0 3 5 1 1 3 2 4 0 2 4 5 3 0 2 5 2 0 1 5 1 0 0 5 0 1 0 0 5 1 5 2 0 2 5 3 0 3 5 1 1 3 2 4 0 2 4 5 10 5 Error F S Error F S Error ...

Page 149: ...mirror finish Black rubber Error F S White ceramic SUS304 mirror finish Black rubber Error F S Error F S 0 Inclination 0 Inclination 0 Inclination 0 Inclination 50 Inclination 50 Inclination 50 Inclination 50 Inclination 50 Inclination 50 Inclination 50 Inclination 50 Inclination Note X axis displacement Measurement distance displayed on the Amplifier Unit For the measurement distance displayed on...

Page 150: ...mm Measurement center distance NEAR side FAR side Error F S Inclination L 10 mm 0 mm 4 mm 10 mm X Approx 600 µm Approx 160 µm Approx 40 µm Approx 220 µm Y Approx 350 µm Approx 90 µm Approx 60 µm Approx 130 µm L 35 mm 0 mm 20 mm 35 mm X Approx 1 1 mm Approx 400 µm Approx 70 µm Approx 250 µm Y Approx 550 µm Approx 190 µm Approx 110 µm Approx 150 µm L 5 mm 0 mm 4 2 mm 5 mm X Approx 350 µm Approx 160 ...

Page 151: ... resolution exceeded the rated value when sensors were moved towards each other in all the X Y and Z directions while mutual interference prevention was turned off was measured Workpiece white ceramic positioned facing the sensor not on an angle Horizontal direction Vertical direction Results For all models the distance that causes malfunction is 0 mm in all the X Y and Z directions Note The above...

Page 152: ...TIONS SETTING METHODS SPECIFI CATIONS INDEX SETTING TRANSITION CHARTS DETAILED SETTINGS FLOW OF OPERATION CONTENTS PREPARATION FOR MEASUREMENT BASIC SETUP TROUBLE SHOOTING Height Double Sheet Detection Positioning Eccentricity and Surface Deflection Steps and Warpage Thickness MEMO ...

Page 153: ... Output 109 Angle Characteristic 147 analog output mark 109 hold measured value average 44 54 62 76 94 B bank switching 100 119 Bank Setting 99 Bank Switching 100 119 Basic Configuration 18 BASIC SETUP 40 Beam Size 139 140 150 hold minimum value 44 54 62 76 94 C 2 sensor operation 50 60 Calculating Unit Connecting 26 Part Names and Functions 22 Specifications and Dimensions 143 Canceling the Key L...

Page 154: ...is width 91 I I O Circuit Diagrams NPN Amplifier Unit 33 PNP Amplifier Unit 34 initialization 124 Initialization 123 Installing Amplifier Unit 25 Sensor Head 23 K output for non measurement keep 112 Key Lock Function 122 key lock enabled 122 L 132 LD OFF input 31 Linearity Characteristic for Different Materials 149 sub display memory LOW threshold mark 84 M Main Display 19 20 clamp value MAX 112 d...

Page 155: ...Dimensions 138 Sensor Head extension cable 142 Sensor Heads Installing 23 Setting Transition Charts 158 Simplest Setting 40 Single Smart Tuning 40 43 49 53 59 68 73 81 Smart Tuning 40 43 49 53 59 68 73 80 83 82 40 43 49 53 59 68 73 81 Specifications and Dimensions Amplifier Unit 136 Calculating Unit 143 Sensor Head 138 response time 43 48 53 58 67 73 80 84 Steps and Warpage 47 sub display memory 8...

Page 156: ...METHODS SPECIFI CATIONS INDEX SETTING TRANSITION CHARTS DETAILED SETTINGS FLOW OF OPERATION CONTENTS PREPARATION FOR MEASUREMENT BASIC SETUP TROUBLE SHOOTING Height Double Sheet Detection Positioning Eccentricity and Surface Deflection Steps and Warpage Thickness MEMO ...

Page 157: ...ons agreement Page 10 Changed information on FDA standards Page 137 Changed specification of power consumption Page 138 Changed L and A values for ZX2 LD100 L Page 139 Changed information on FDA standards Page 140 Changed information on FDA standards and changed specification of accessories Page 141 Revised dimensions of E39 L178 L179 Mounting Brackets Page 147 Changed Typical to Reference Value 0...

Page 158: ...FI CATIONS INDEX SETTING TRANSITION CHARTS DETAILED SETTINGS FLOW OF OPERATION CONTENTS PREPARATION FOR MEASUREMENT BASIC SETUP TROUBLE SHOOTING Height Double Sheet Detection Positioning Eccentricity and Surface Deflection Steps and Warpage Thickness SETTING TRANSITION CHARTS ...

Page 159: ...R MEASUREMENT TROUBLE SHOOTING INDEX CONTENTS SETTING TRANSITION CHARTS FLOW OF OPERATION MAIN APPLICATIONS SETTING METHODS DETAILED SETTINGS SPECIFI CATIONS Height Double Sheet Detection Positioning Eccentricity andSurface Deflection Steps and Warpage Thickness ...

Page 160: ...oto JAPAN OMRON ASIA PACIFIC PTE LTD No 438A Alexandra Road 05 05 08 Lobby 2 Alexandra Technopark Singapore 119967 Tel 65 6835 3011 Fax 65 6835 2711 OMRON CHINA CO LTD Room 2211 Bank of China Tower 200 Yin Cheng Zhong Road PuDong New Area Shanghai 200120 China Tel 86 21 5037 2222 Fax 86 21 5037 2200 Regional Headquarters OMRON EUROPE B V Sensor Business Unit Carl Benz Str 4 D 71154 Nufringen Germa...

Reviews: